Looking for a fun and unique craft activity for kids? Coffee filter crafts are a cost-effective, simple way to engage young learners. With coffee filters, markers and some creativity, children of all ages, from toddlers to kindergarteners, can easily create fun projects that bring out their personal flair. Decorate the coffee filters with doodles and designs, or cut them into interesting shapes like animals or seasonal motifs. From garlands and suncatchers to flowers and butterflies – whatever the imagination can dream up! So why not gather the supplies and imbue your child’s day with art + science using these easy coffee filter crafts and activities?
Discover 25 unique and easy coffee filter crafts and art projects that the whole family can enjoy. From abstract designs to colorful creations, craft with coffee filters offers an exciting variety of activities for both children and adults alike.
With simple supplies like markers, scissors, glue, or even paper towels, you can create beautiful artwork out of humble coffee filters in no time! Kids will love exploring their creative side as they make stained glass window decorations and one-of-a-kind flowers for special occasions or use them as artful backgrounds for mixed media collages. Let your imagination run wild as you discover fun new ways to turn ordinary coffee filters into amazing art and crafts.
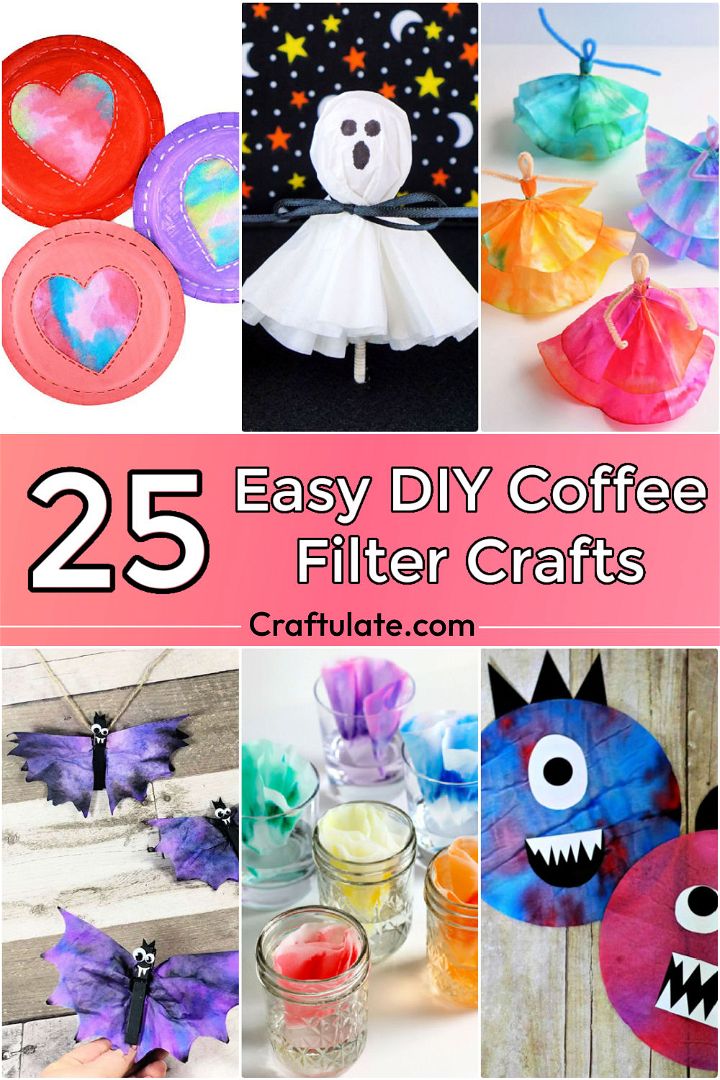
Easy Coffee Filter Crafts and Art Projects for Kids
From toddlers and preschoolers to kindergarten and elementary students, these coffee filter crafts and art projects can be an easy, fun, and inexpensive way to spend time with children! These coffee filter crafts are a great way for parents and teachers also to engage children in hands-on learning. With just a few supplies, such as markers, glue and glitter, you can create beautiful pieces of art from something that would have otherwise gone in the trash.
These coffee filter crafts come with step-by-step instructions that will help you to upcycle used coffee filters easily. Whether your goal is to keep the kids entertained or teach them about upcycling, there will definitely be something to suit their needs from the group of coffee filter crafts available below!
1. Coffee Filter Dragonfly Craft
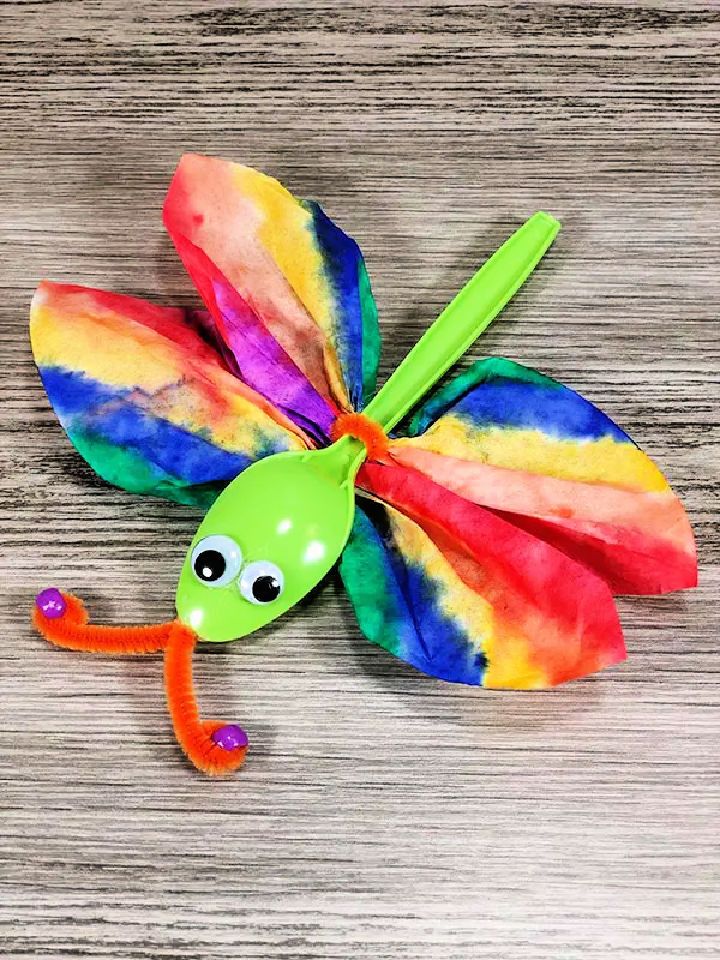
This DIY coffee filter dragonfly craft is an amazing summer craft for kids. A few basic craft supplies are all you need to get started. You will need round white coffee filters, washable markers, googly eyes, plastic spoons, chenille stems in assorted colors, pony beads, water spray bottles, low temp glue guns and glue sticks, scissors, gallon zip-top bags or cookie sheets or wax paper.
Follow the step-by-step instructions below to make your own coffee filter dragonflies.
- Begin by laying out a coffee filter on a flat surface. Use washable markers to draw a design on the coffee filter.
- Once you are happy with your design, use a water spray bottle to mist the coffee filter lightly. Be sure not to saturate the filter.
- Allow the coffee filter to dry completely. This will help set the design and prevent the colors from running when adding water later.
- Once the filter is dry, fold it in half and then in half again to form a triangle shape.
- Use scissors to cut fringe along one side of the triangle shape. Be sure not to cut to the point of the triangle.
- Now it’s time to add the dragonfly’s body! Cut a chenille stem in half and insert it into the point of the triangle shape. This will form the dragonfly’s body.
- To create the wings, take two pony beads and thread them onto each side of the body. This will keep the wings in place and add some fun color!
- Finally, add googly eyes and enjoy your finished DIY dragonfly craft!
2. How to Make Coffee Filter Dancers
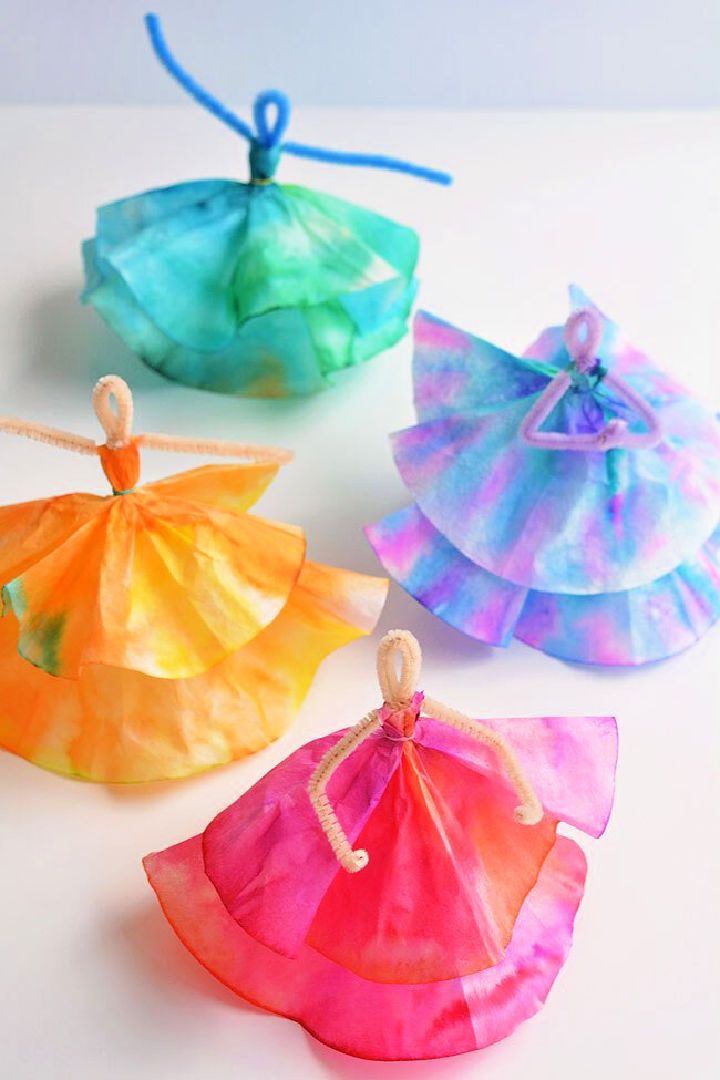
These DIY coffee filter dancers are a simple and fun way to add some color and life to your home. All you need are a few supplies from the dollar store and some basic craft skills. The result is a beautiful dancer that will bring a smile to your face. You’ll need coffee filters, washable markers, two pipe cleaners, tiny elastic, and scissors to get started. Once you have all of your supplies, follow the step-by-step instructions below. In no time at all, you’ll have your very own coffee filter dancer. onelittleproject
3. DIY Sea Animal Coffee Filter Suncatcher
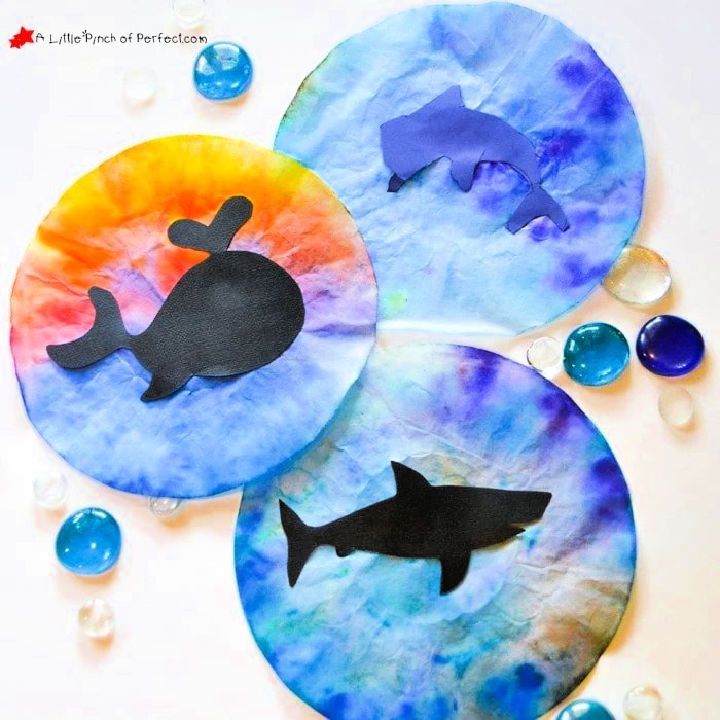
This DIY sea animal coffee filter suncatcher is a beautiful ocean-themed kids’ craft. Kids will love the cute whale, dolphin, fish, and shark. The suncatcher is easy to make with the free template and coffee filters. Just follow the step-by-step instructions. Your kids will have a blast doing this DIY project. alittlepinch
4. Rainbow Marker Coffee Filter Experiment
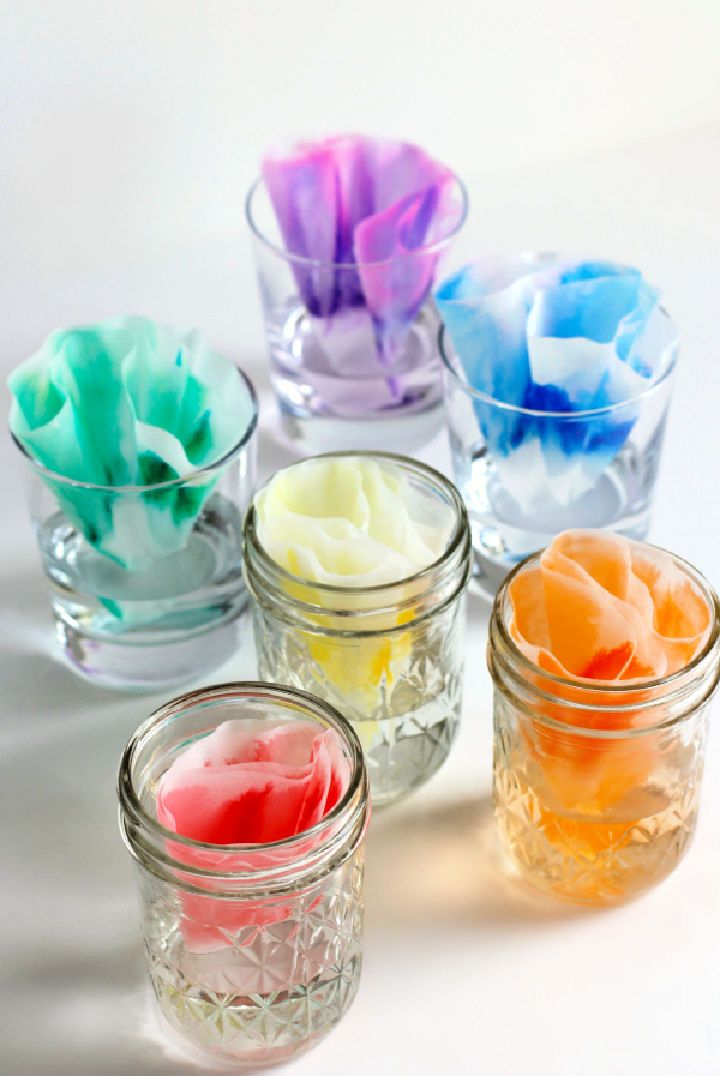
This DIY coffee filter experiment is simple and fun to do. All you need are white coffee filters, rainbow-colored markers, a small glass jar or drinking cup, and water. The newspaper is optional, but it will help to protect your work surface from any potential stains.
First, fold the coffee filter in half and then in half again. Next, use the markers to draw a design on the filter. Be sure to use a different color for each quadrant. Once you’re happy with your design, carefully pour water into the jar or cup and place the filter inside.
Allow the filter to soak before removing it from the water. The colors will begin to blend and create amazing tie-dye rainbow colors. This rainbow marker coffee filter experiment is easy, magical, and fun! makeandtakes
5. Easy DIY Coffee Filter Roses
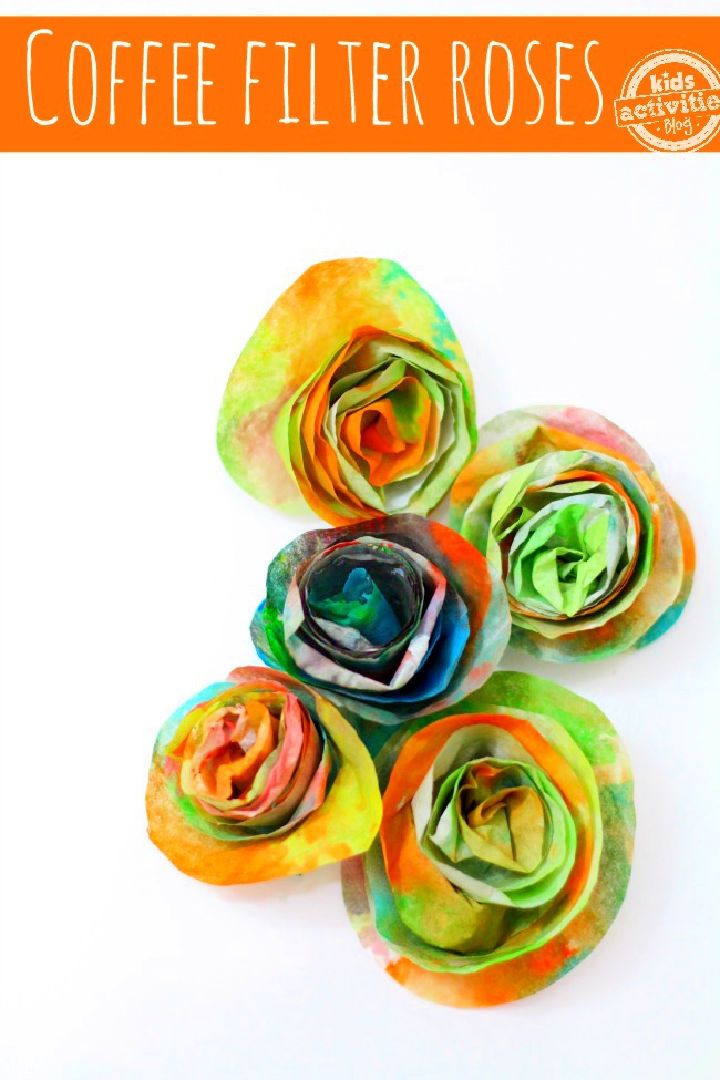
These handmade roses are an easy, pretty craft that only requires 4 items! They are excellent for kids of all ages and make stunning flower decor.
Here are the step-by-step instructions:
- First, you will need coffee filters, watercolors, scissors, and glue or tape.
- Begin by coloring the coffee filters with watercolors. You can use any colors you like!
- Once the filters are dried, it’s time to cut them into rose shapes. To do this, fold the filter in half and then snip it into a spiral shape. Be sure to leave a small piece uncut in the center so that your rose will have a base to attach to.
- Once all of your roses are cut out, it’s time to assemble them! Take the base of one rose and glue or tape it to the center of another. Continue attaching roses until you have created a full bouquet (if you want to), or attach them to the pipe cleaner, stir sticks or anything.
These coffee filter roses are a beautiful and easy craft anyone can enjoy! Give it a try today! kidsactivities
6. Simple Coffee Filter Emoji Crafts
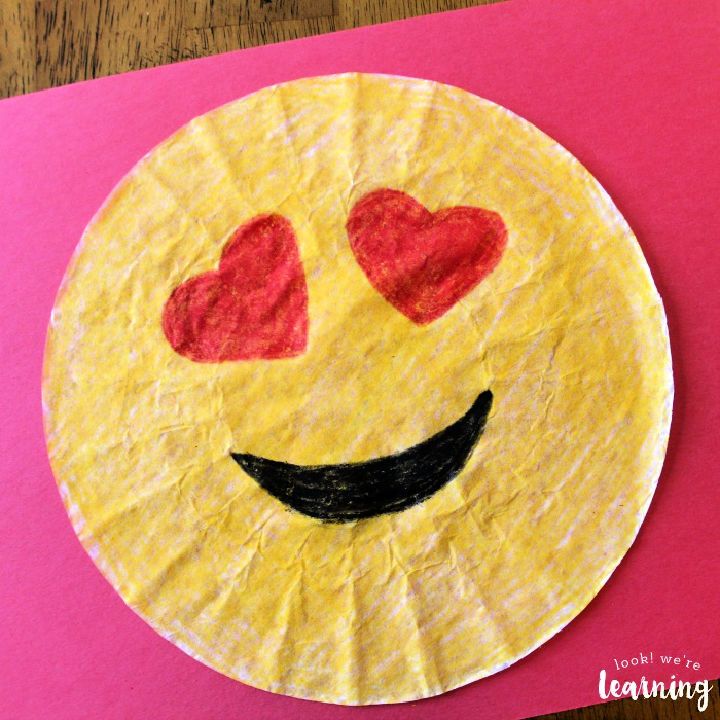
This DIY coffee filter emoji is a cool and simple craft that is a great way to express feelings. The materials you will need for this craft are three white baskets of coffee filters, crayons, colored pencils, construction paper, and a glue stick.
The first step is to draw a face on one of the coffee filters with the crayons. Then, you will use colored pencils to add details to the face. Next, you will cut out two small circles from the construction paper and glue them onto the coffee filter for the eyes.
Finally, you will cut out a small mouth from the construction paper and glue it onto the coffee filter. This DIY emoji craft is fun and easy to make! learning
7. How to Make Classic Coffee Filter Butterflies
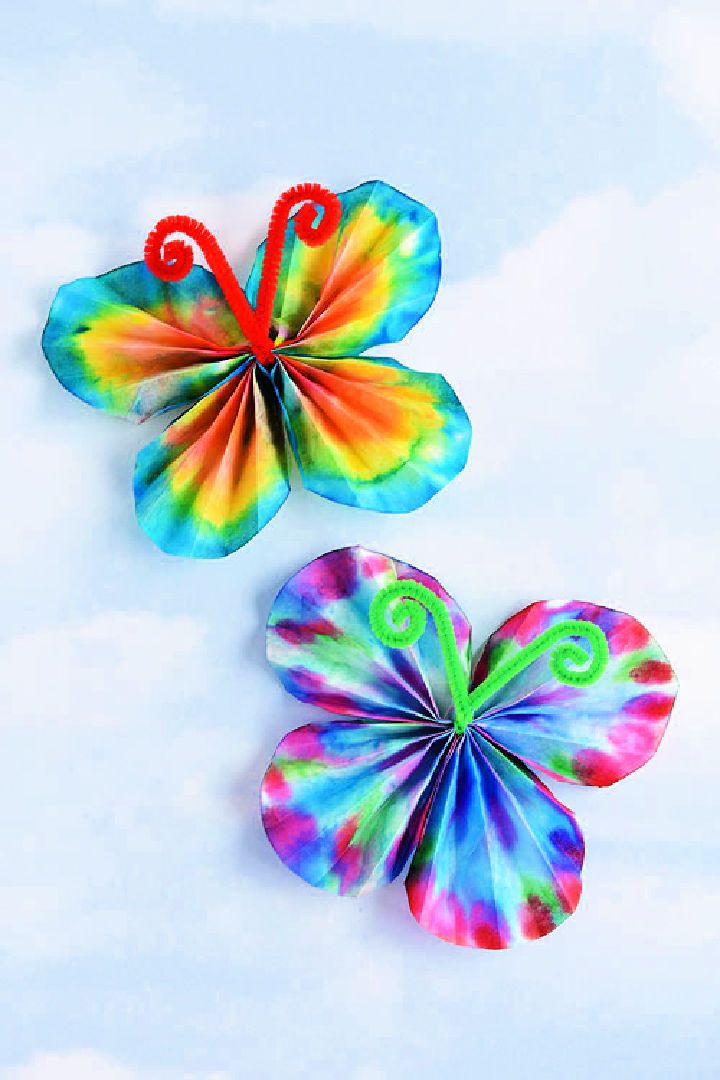
These DIY butterflies from the coffee filter are an easy, good-looking craft to brighten up any room. It is also a great project for kids, as they can be involved in every process. Best of all, it only requires a few supplies that you likely already have on hand.
Here’s how to make them:
Start by folding each coffee filter in half, then in half again. Then, use washable markers to draw designs on the folded filters. When finished, carefully open the filters and hold them over a bowl or sink. Use an eye dropper or small measuring spoon to add water to each filter’s center slowly. As the water saturates the filter, the colors will begin to bleed out and create a beautiful butterfly wing design.
Finally, adhere each wing to a pipe cleaner using glue or tape, and your DIY butterflies are complete! Hang them up as individual decorations or group them to create a stunning butterfly display. onelittleproject
8. DIY Clothespin Bee for Kids
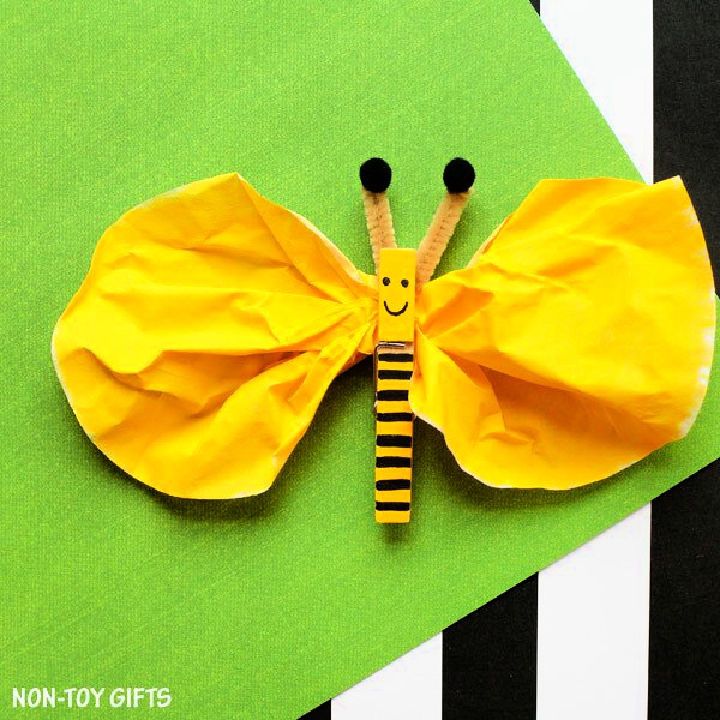
From wooden clothespins and coffee filters to pom poms and pipe cleaners, this DIY clothespin bee craft is easy to make and fun for kids to play with. Simply upcycle some clothespins with a coat of yellow paint, then use black markers for the stripes, eyes and face. Cut a coffee filter in half and glue it to the back of the bee for wings.
Finally, add some black pompoms and a pipe cleaner for the antennae. This thrifty project is easy and quick, but your kids will love making and playing with their own clothespin bee. nontoygifts
9. Coffee Filter Watercolor Fish Arts and Crafts
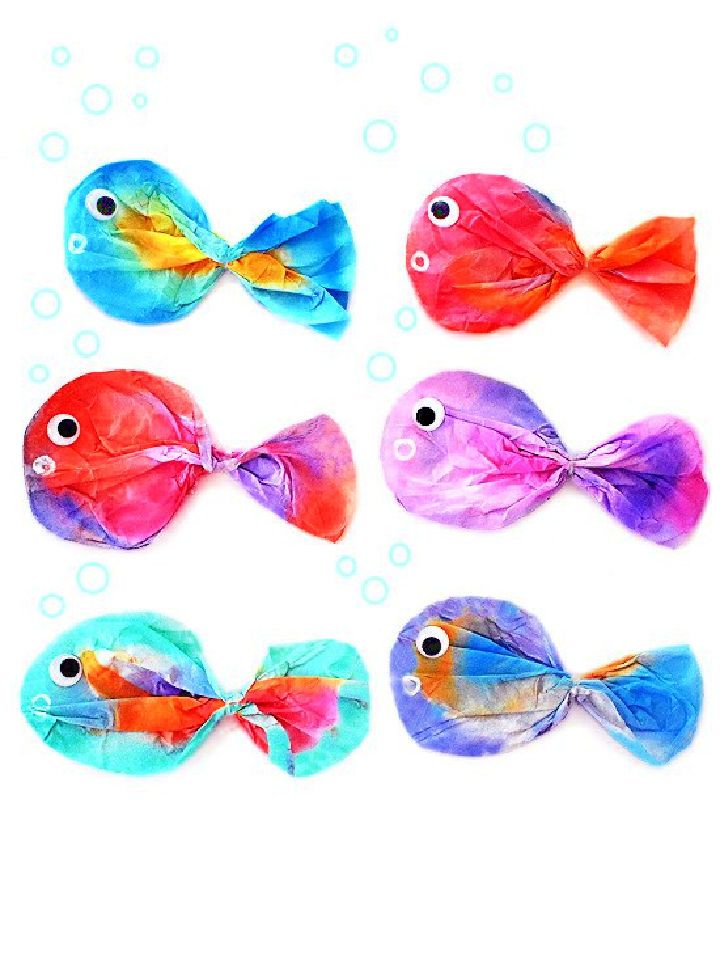
DIY coffee filter watercolor fish craft is a fun and easy way to bring color and life into your home. This cheerful and attractive under-the-sea creature is sure to brighten up any room, and it’s also a great way to recycle coffee filters.
Best of all, these DIY fish are very easy to make. All you need are some coffee filters, watercolors, clear elastic bands, a white pen or marker, googly eyes, and glue.
Follow the step-by-step instructions below to create your own watercolor fish:
- Begin by painting your coffee filters with watercolors. You can use any colors you like, but try to use at least three different colors for a more vibrant effect. Allow the filters to dry completely before proceeding to the next step.
- Once the filters are dried, fold each one in half and then in half again. Use a white pen or marker to draw two small fins on the top side of each filter. Then, cut out the fins with scissors.
- To assemble the fish, take two coffee filters and slip an elastic band around their centers. Repeat this step until all of the filters are assembled into pairs.
- Glue googly eyes onto the front of each fish. If desired, add additional details, such as mouths or scales. Let the glue dry completely before displaying your handmade watercolor fish craft. Enjoy! kidthings
10. Crab Crafts Using Coffee Filters
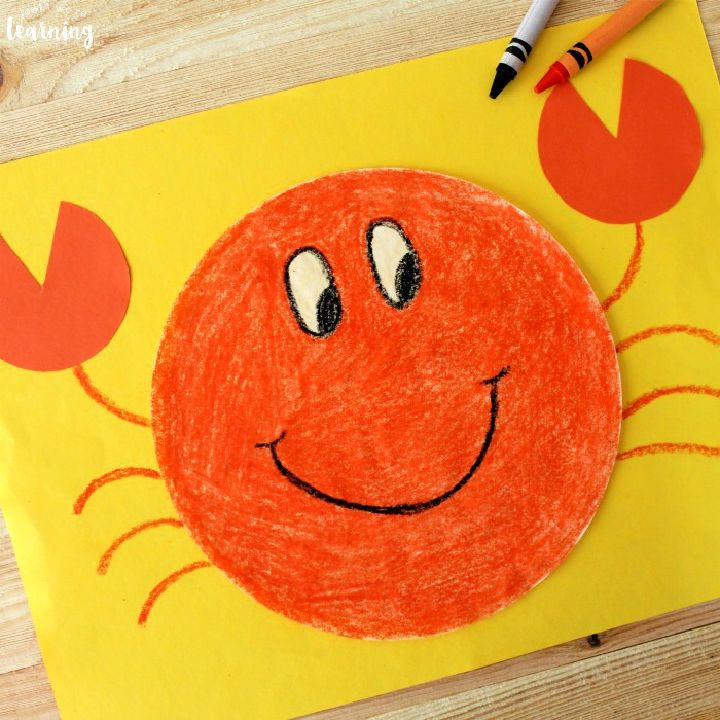
This DIY crab from the coffee filter is a fun and fairly easy way to make a cute crab. The following steps will show you how to make one. First, you need a white basket coffee filter and some construction paper. Then, glue sticks attach the coffee filter to the construction paper. Next, use crayons to draw the eyes and mouth of the crab.
Finally, use child-safe scissors to cut out the crab. This coffee filter crab craft is perfect for beachy or nautical-themed decor. It’s also great for kids’ rooms or playrooms. Plus, it’s a fun and easy project to do with your kids. learning
11. DIY Tie Dye Coffee Filter Monster
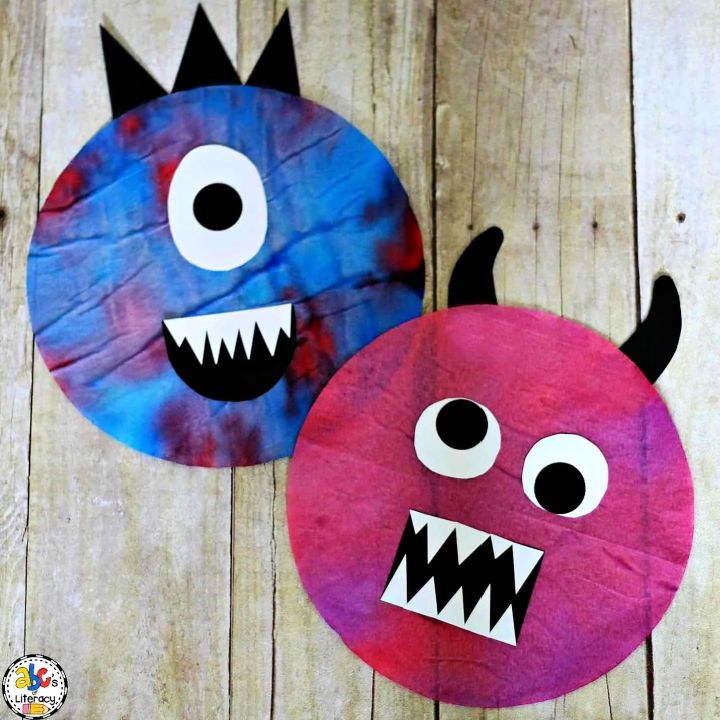
The DIY tie-dye coffee filter monster is an imaginative, bright halloween craft that will also be a fun activity for kids of all ages. This coffee filter monster is also a great classroom project or craft. Here is the step-by-step guide on how to make this tie-dye monster. To make this cute critter, you will need coffee filters, washable markers, a spray bottle with water, black card stock, white card stock, scissors and glue.
First, take the coffee filters and use the washable markers to color them. Then, spray the coffee filters with water until they are damp. Next, lay the coffee filters out on the black cardstock and trace a monster shape around them. Cut out the monster shape and then glue the coffee filters onto the monster shape.
Finally, cut out eyes and a mouth from the white cardstock and glue them onto the monster. Your handcrafted tie-dye coffee filter monster is now complete! abcsofliteracy
12. Watercolor Coffee Filter Heart Suncatchers
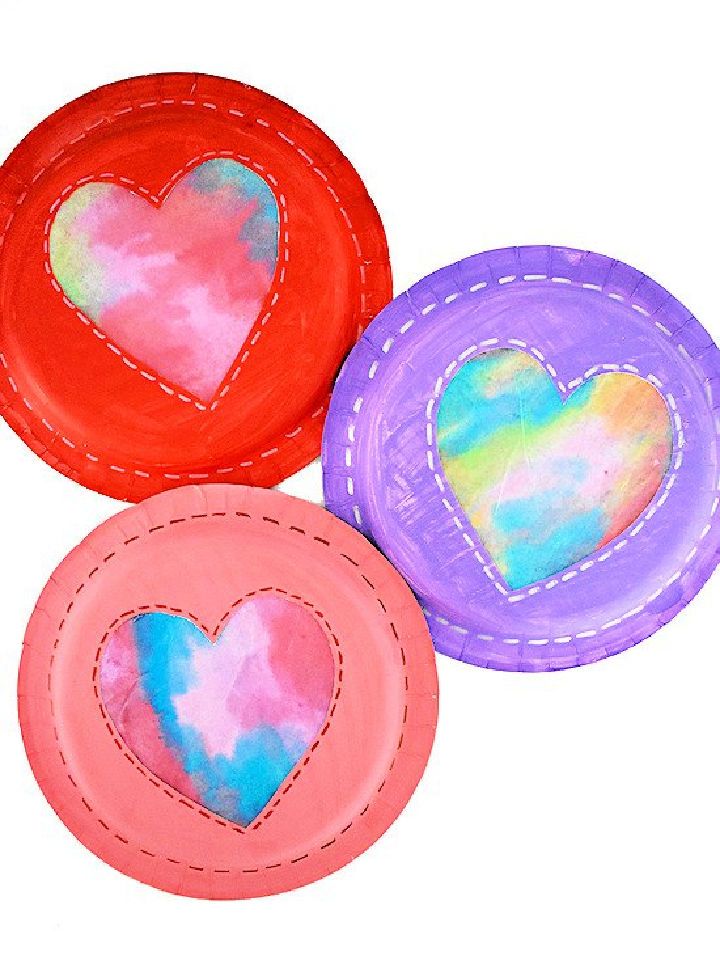
These DIY watercolor heart suncatchers are an innovative and stunning Valentine’s Day craft. They are easy to make with just a few supplies you probably already have at home. All you need is a paper plate, coffee filters, acrylic paint, watercolor paints, metallic markers, glue stick, and scissors.
Follow the easy steps below to make one:
- First, cut out a heart shape from the paper plate. You can either freehand this or use a template.
- Next, use acrylic paint to add some color to the coffee filters. You can paint them all one color or add multiple colors for a more festive look. Once the paint is dried, fold each coffee filter in half and then in half again.
- Now it’s time to start assembling your suncatcher! Take one coffee filter and glue it to the center of the paper plate heart. Repeat with the remaining coffee filters, working from the center outwards.
- Once the coffee filters are glued in place, add some final touches with the watercolor paints and metallic markers. Let your suncatcher dry completely before displaying it in a sunny spot! Once dried, hang it in your home to bring a pop of color or present it to someone special as an expression of love. kidthings
13. Coffee Filter Ghost Lollipops Activities
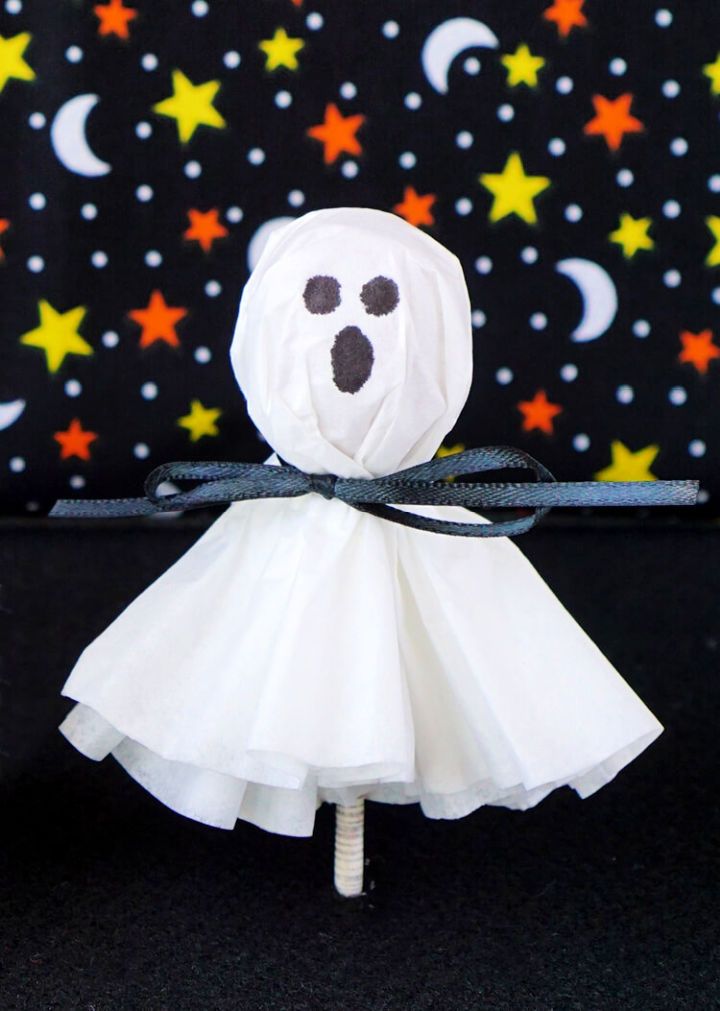
DIY coffee filter ghost lollipops are a fun and easy way to make your own halloween treats. All you need is a coffee filter, rounded lollipops, a small rubber band, some thin ribbon or baker’s twine, and a black sharpie marker.
Simply fold the coffee filter in half and tie it around the rubber band. Cut two small holes for the eyes and mouth, then tie the ribbon or twine around the neck. Finally, use the black sharpie marker to draw on the eyes and mouth.
These cute DIY ghost lollipops are perfect for kids of all ages and will be a hit at any halloween party. homemade
14. DIY Tie Dye Coffee Filter Turkey
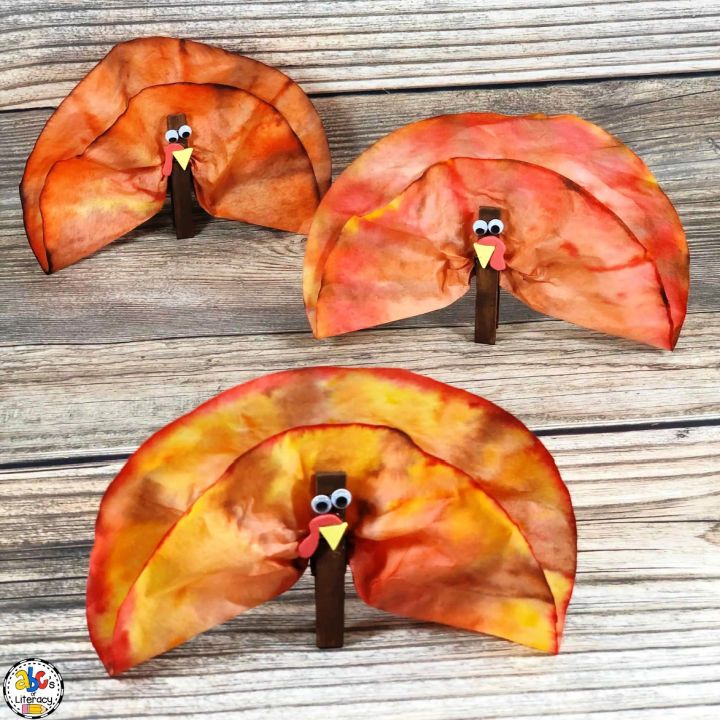
Who says tie-dye is just for shirts? With this DIY tie-dye turkey craft, you can bring some color to your Thanksgiving table. And the best part is, it’s easy to make! Just grab some coffee filters, washable markers, and wooden clothespins, a few handy craft supplies, and you’re all set.
To start, tie-dye the coffee filters using the markers. Once dried, glue the filters to the clothespins to create the turkey’s feathers. Then, cut out a beak and wattle from the craft foam and glue them onto the turkey’s head.
Finally, add googly eyes and paint on a brown mouth. Now your coffee filter turkey is ready to gobble up all the attention! abcsofliteracy
15. Coffee Filter Bats Halloween Craft for Kids
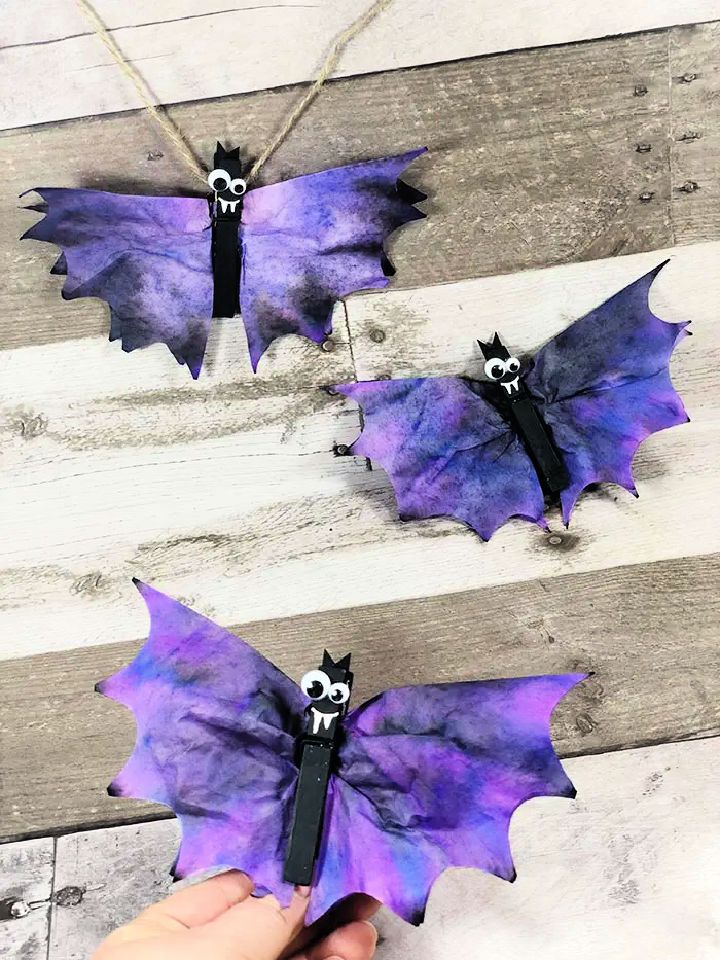
These DIY coffee filter bats’ are a great way for kids to learn more about bats. This simple craft requires only a few supplies and can be completed in 20 minutes. To make these colorful bats, you will need wooden clothespins, round white coffee filters, assorted googly eyes, washable markers, black acrylic craft paint, a paintbrush, black cardstock, scissors, liquid glue, a scrap of cardboard, a white gel pen, and a pencil.
Once you have gathered your supplies, follow the step-by-step instructions below. First, use the black marker to draw bat wings on the coffee filters. Next, paint the coffee filters and a clothespin and glue the coffee filters to the clothespin. Then, add googly eyes and embellishments with the markers. Once your bat is complete, hang it up on black cardstock for a spooky halloween display! darcyandbrian
16. Peacock Crafts With Coffee Filters
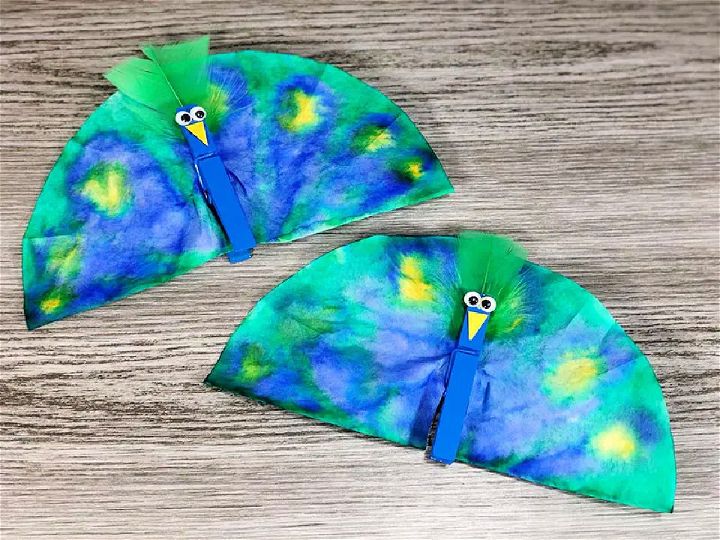
These DIY coffee filter peacocks are a pretty and colorful bird craft that’s fun to make with kids! You can make these beautiful peacocks in about 30 minutes with just a few basic craft supplies. All you need is some round white coffee filters, washable markers, clothespins, googly eyes, feathers, craft foam, glue and a few other supplies.
To make them, color the coffee filters with markers, glue on the eyes and clothespins for the beak and nose, and attach the feathers. That’s it! These DIY peacocks make a great decoration for your home or office. So get crafting today! darcyandbrian
17. DIY Watercolor Luminaries for Adults
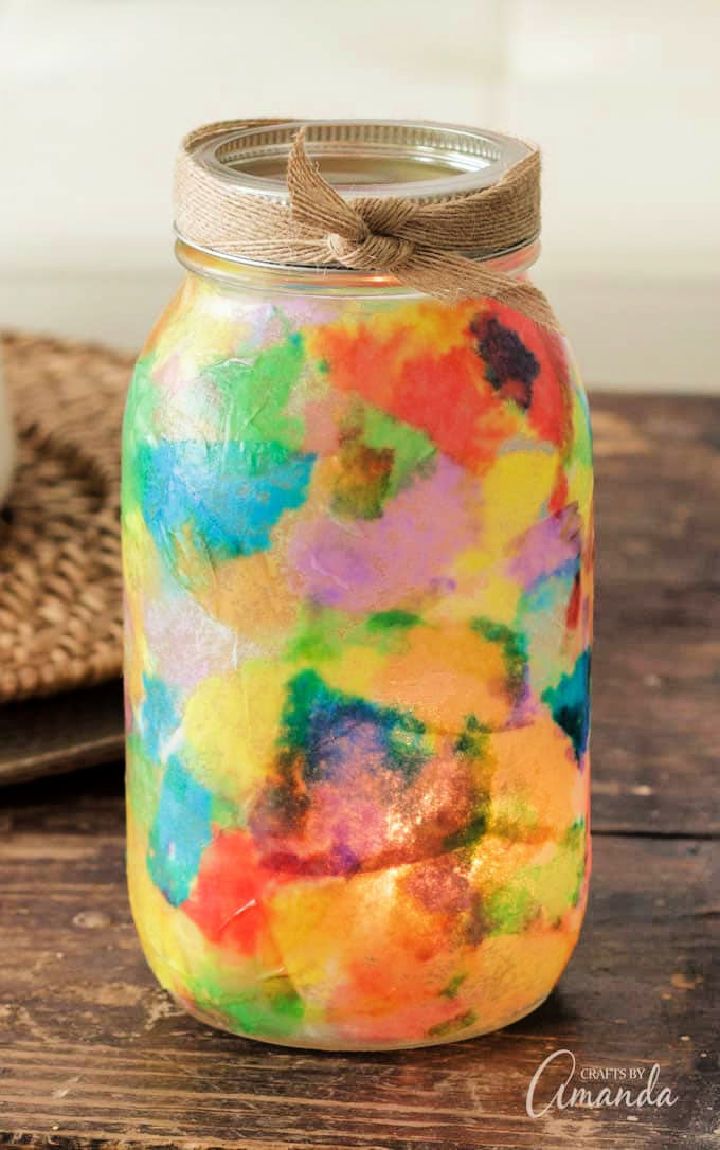
These DIY watercolor luminaries are a beautiful and simple way to add some light and color to your home decor. They are excellent for adults, elders, and even kids to make, and they also make great gifts! The best part is that they can be customized to match any decor style or color scheme.
Here’s how to make watercolor luminaries:
- Begin by painting the outside of your mason jar with watercolor paint. You can use one color or multiple colors – it’s up to you! Let the paint dry completely before moving on to the next step.
- Cut your coffee filters into thirds, and then fold each one accordion-style.
- Paint the inside of each filter with watercolor paint, using as many colors as you’d like. Be sure to paint both sides of the filter so the luminaries will be colorful when illuminated. Allow the filters to dry completely.
- Once the paint is dried, decoupage the coffee filters onto the outside of the mason jars using mod podge or another decoupage medium. Make sure that there are no gaps between the filters so that no light will leak.
- Use a large paintbrush or sponge applicator to apply another layer of decoupage medium over the top of the coffee filters. This will help protect them from wear and tear. Allow the jars to dry completely before proceeding.
- Once the jars are dried, add a ribbon or twine around the neck of each one for a finishing touch. Then, insert a battery-operated tea light into each jar, and enjoy your beautiful DIY luminaries! craftsbyamanda
18. Watercolored Coffee Filter Wreath
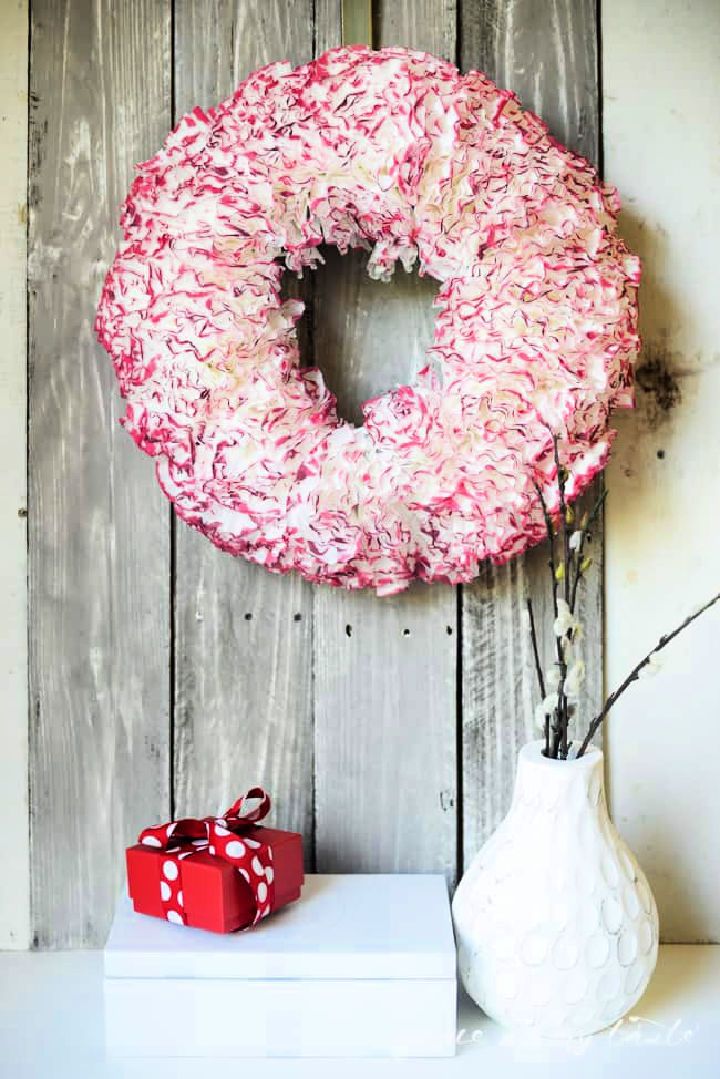
A DIY watercolored wreath is a stunning wreath. It’s a beautiful valentine’s wreath. You can make it from a wreath base- foam, sew pins, coffee filters, watercolor and paintbrush. The easy step-by-step instructions are given in the tutorial. This coffee filter wreath can be a truly personalized gift for someone special.
The best thing about this DIY project is that you can change the colors to match any decor. This lovely wreath will be a great addition to your front door or a wall hanging in your home. mytaste
19. Coffee Filter Planet Earth Day Craft for Kids
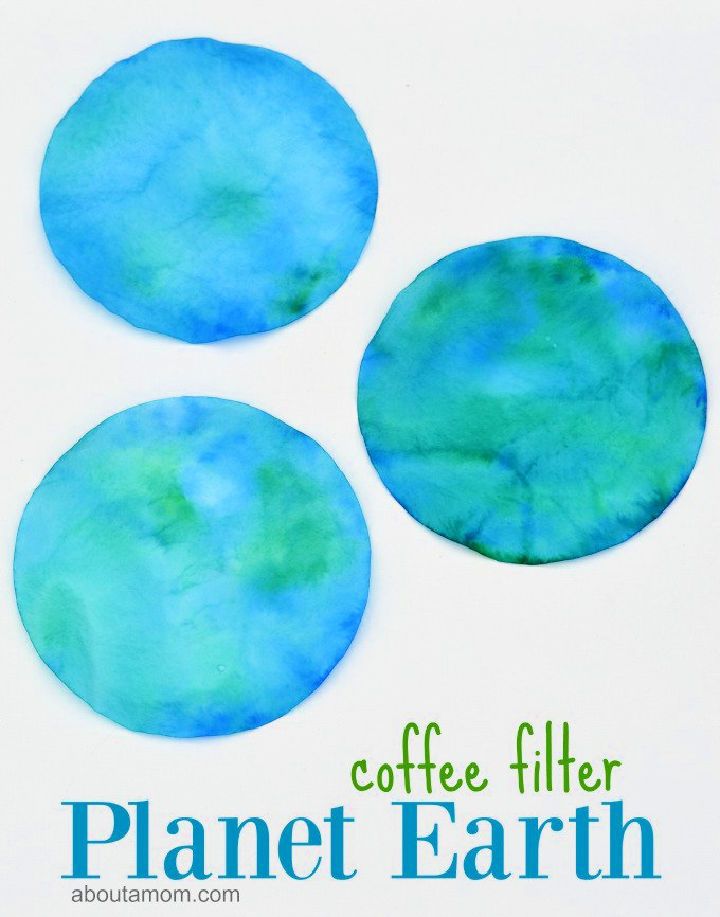
This DIY coffee filter earth craft is a fantastic way to teach kids about earth day and the importance of caring for our planet. This craft is super easy and affordable, and it’s a great way to get kids involved in celebrating earth day. To make this craft, you’ll need coffee filters, a blue marker, a green marker, and a spray bottle.
First, use the blue marker to draw land masses on the coffee filters. Then, use the green marker to add trees, grass, and other vegetation. Once you’re finished drawing, carefully spray the coffee filters with water. The water will cause the colors to run, creating an effect that resembles planet earth. Allow the filters to dry completely before displaying them. This DIY craft is a fun and easy way to celebrate earth day with kids! aboutamom
20. Ballerina Silhouette Art Projects
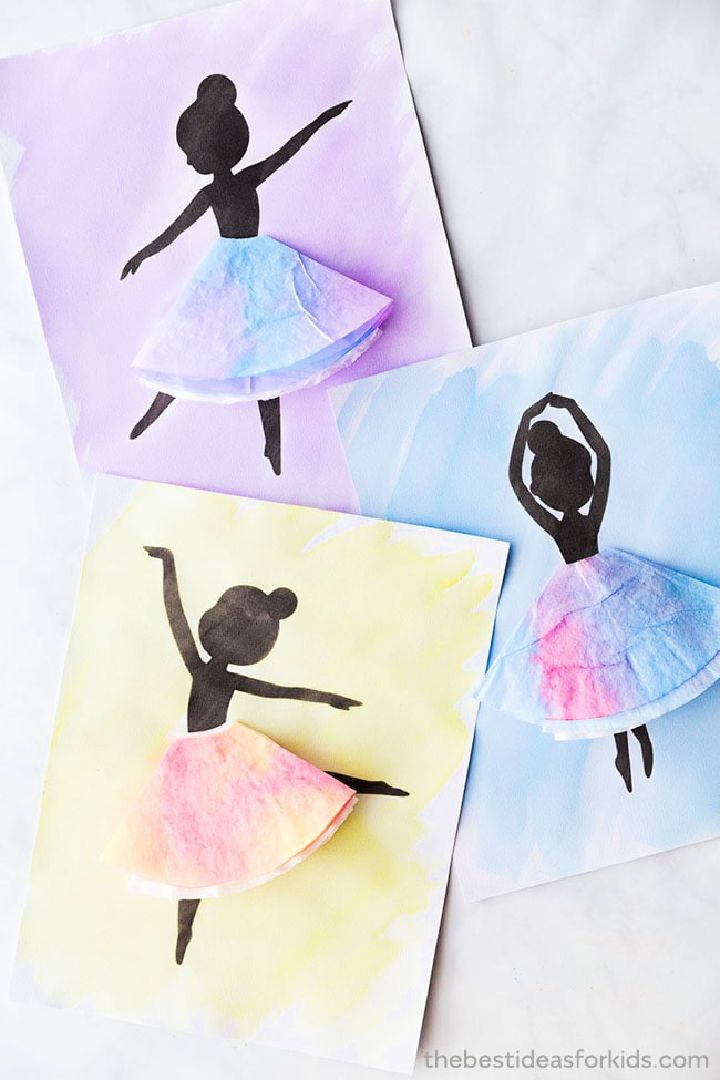
This DIY ballerina silhouette is a beautiful decor for a kid’s room or nursery. It is easy and fun to make. You can use white cardstock, watercolor paper, coffee filters, and free printable ballerina silhouettes. With this project, you can customize it to any color you desire.
Follow the step-by-step instructions below to DIY your own ballerina silhouette.
- Prepare your materials. You will need liquid watercolors, white cardstock or watercolor paper, coffee filters, and free printable ballerina silhouettes.
- Begin by coloring the coffee filters with liquid watercolors. Use as many colors as you like! Let the filters dry completely.
- Cut out the ballerina silhouette shapes from white cardstock or watercolor paper.
- Once the coffee filters are dry, glue them onto the ballerina silhouette shapes.
- Hang up your finished ballerina decorations in your child’s room or nursery!
Full tutorial here: thebestideas
21. DIY Dip Dyed Pumpkin Garland
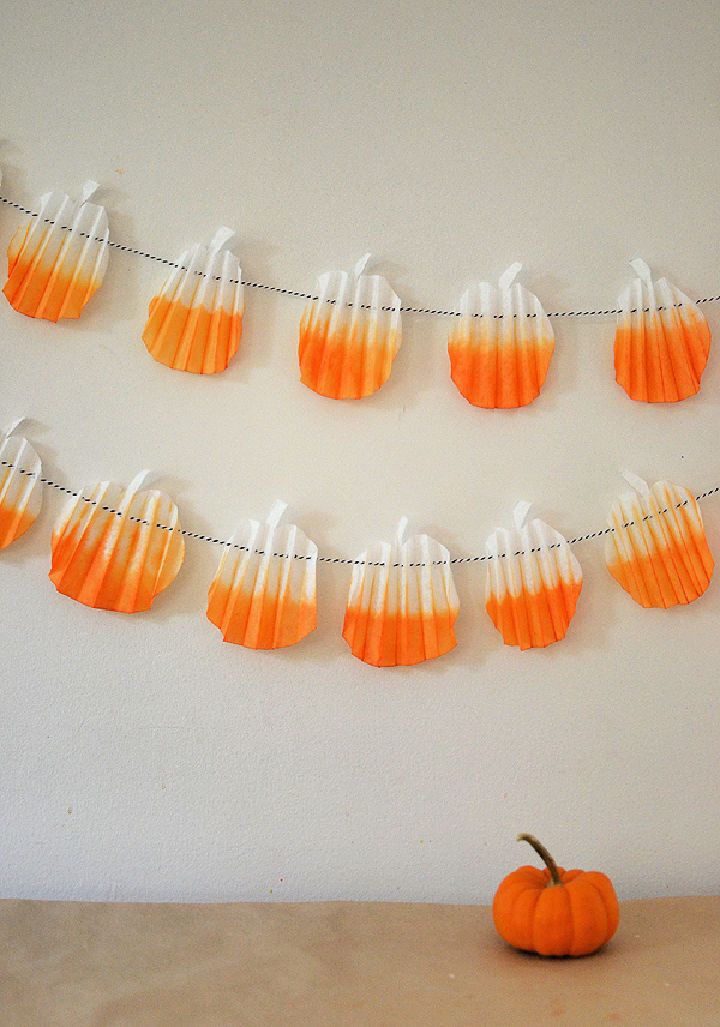
DIY dip-dyed pumpkin garland is an easy and beautiful way to decorate for halloween. You can make pumpkin garlands in any color you like, but orange is perfect for halloween. You will need coffee filters, a pumpkin template, a pencil and scissors, orange liquid watercolor or food coloring, a small bowl, an extra glass of water, a paper towel, a hole punch, and black and white baker’s twine. Once all the material is collected, follow the step-by-step instructions below to make your own dip-dyed pumpkin garland in no time. artbarblog
22. Homemade Coffee Filter Sunflowers
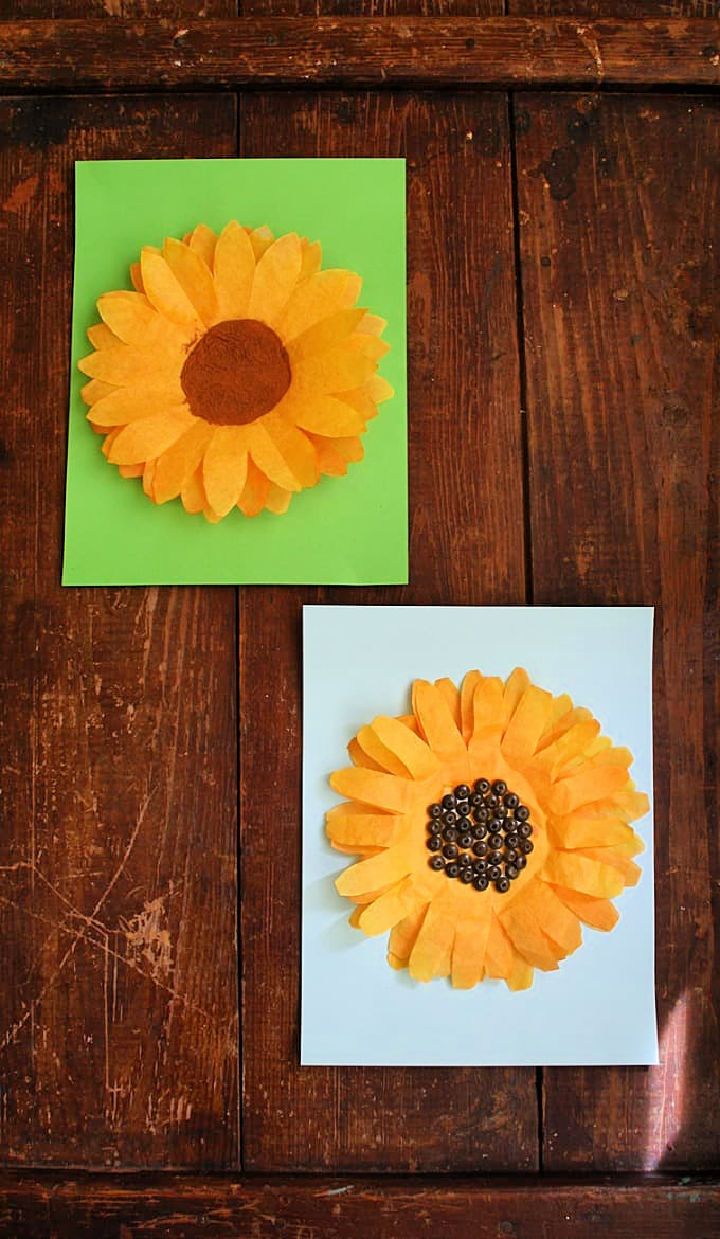
These DIY coffee filter sunflowers are a lovely sunflower craft that is fun to make. They will also be a pretty decor for the classroom or school hallway. To make these sunflowers, you will need three white coffee filters, a paper plate, red and yellow food coloring, water, one sheet of light blue card stock or construction paper, and a handful of brown beads.
You will also need a paintbrush, cooling rack, scissors, and white craft glue. Follow the step-by-step instructions below to make your own coffee filter sunflowers.
First, cut the coffee filters into thirds. Next, crumple each filter into a ball and glue them onto the paper plate. Allow the glue to dry completely. Once the glue is dried, paint the coffee filters with a mixture of red and yellow food coloring diluted with water. Then, place the coffee filter sunflowers on a cooling rack to dry.
Once they are dried, cut out petals from the light blue construction paper and glue them around the edge of the paper plate. Finally, add brown beads to the center of the coffee filter sunflowers to finish them off. These beautiful sunflowers are sure to brighten up any space! craftsbyamanda
23. Coffee Filter Flower Crafts
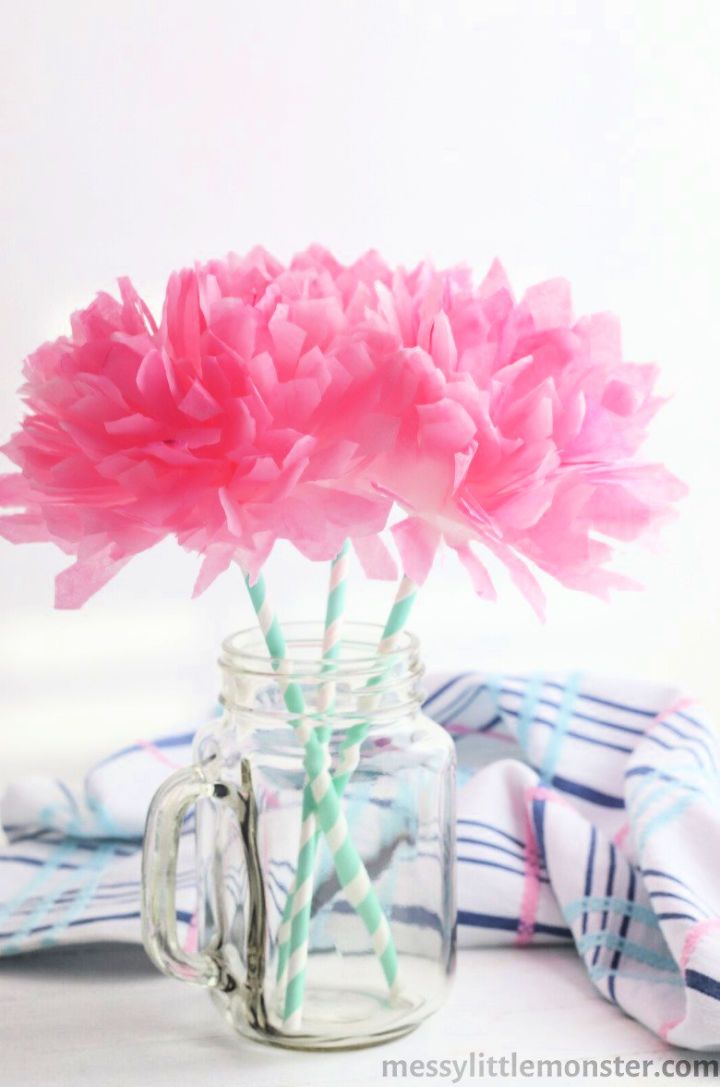
This handmade flower craft is a super cost-effective project that is also easy to make. This is an enjoyable project for all the family and will also help enhance your kids’ motor skills. This spring craft is a wonderful way to show your creative side while making something beautiful.
You need round coffee filters, water-based markers, paintbrushes, scissors, glue, and paper straws. The step-by-step instructions are as follows:
- Choose your colors and draw abstract flowers on the coffee filter with the markers. Make sure to use bright colors!
- Once you’re satisfied with your design, carefully brush water over the entire surface of the coffee filter.
- Allow the coffee filter to dry completely.
- Once it’s dried, carefully cut out your flowers.
- Apply glue to the back of each flower and attach a paper straw.
That’s it! Your coffee filter flowers are ready to be displayed proudly in a vase or given away as gifts. Enjoy! littlemonster
24. DIY Coffee Filter Rose Tutorial
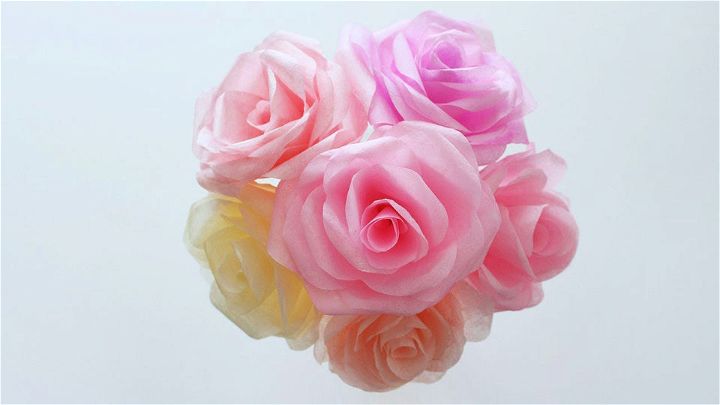
DIY coffee filter roses are an excellent way to show someone you care. They’re simple to make and the perfect way to express your love and admiration for your loved ones. Plus, it is a fun craft that is also super easy to do and makes a beautiful home decor piece.
You’ll need colored paper to cut petal templates, coffee filters, scissors, watercolors, a small paintbrush, water, a jar, floral wire, floral tape, and school glue. Once you have all of your supplies gathered, follow these instructions:
- Paint your coffee filters with watercolors.
- Cut out petal templates from colored paper.
- Trace the petal templates onto the coffee filters.
- Cut out the petals.
- Cut out a floral wire to the desired length.
- Glue the petals onto the floral wire carefully.
- Finally, wrap the bottom of the petals with floral wire.
- Tie all the roses together using a pretty ribbon. That’s it!
These pretty coffee filter roses are a beautiful way to show someone you care, and they’re sure to appreciate your gesture.
25. How to Make a Coffee Filter Butterfly
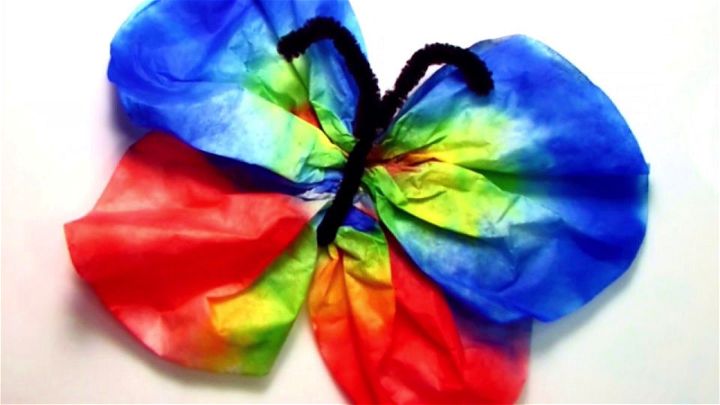
This homemade butterfly is a great activity for kids that they can make by upcycling coffee filters. It’s easy to make and requires only a few supplies you probably already have at home. All you need is a coffee filter, markers, pipe cleaners, water and a brush.
First, fold the coffee filter in half and then in half again. Then, use the markers to draw a design on the filter. Next, fold the coffee filter in half and cut along the folded edge. Now, open up the coffee filter, and you should have a beautiful and bright butterfly.
Finally, use pipe cleaners to make antennae for the butterfly. That’s it! Your coffee filter butterfly is now complete. Happy crafting!
Related Crafts for Kids:
Discover fun and creative crafts for kids of all ages! From paper mache projects to hand-made jewelry, find projects that keep kids entertained while sparking creativity.
- 4th of July Crafts: Celebrate the fourth of july with easy and fun kid-friendly crafts! From paper flags to painted rocks, find awesome 4th of july craft ideas for kids here.
- Mason Jar Crafts: Discover mesmerizing mason jar crafts and decor ideas to enhance your home. From wall décor to candles, find the perfect project for any skill level.
- DIY Fall Crafts: Create stunning fall décor and crafts in the comfort of your home with these easy DIY ideas. Get inspired to bring a touch of autumn into every room!
- Winter Crafts: Bring some fun and creativity to the colder months with these easy winter craft ideas for kids. From snowman art projects to Christmas decorations, these art and craft activities will keep your kids engaged!
- Pool Noodle Crafts: Create fun and unique items for your home out of pool noodles! Learn cool DIY pool noodle crafts and make creative things with this versatile material.
- Easy Seashell Crafts: Make beautiful seashell decorations and crafts with these easy DIY ideas. From stunning mantel displays to fun beach-theme projects, you’ll find something to inspire your creativity.
- Wine Cork Crafts: Transform your old wine corks into unique and creative crafts with this list of superb DIY wine cork crafts. From home decor to wall art, find the perfect craft project here!
- Crafts to Do When Bored: Discover creative DIY crafts to do when bored at home! Get inspired with these easy-to-make projects that require minimal materials and create something special.
- Crafts for Toddlers: Find fun and easy craft ideas for your toddler! Easy step by step instructions to help them explore their creative side. Perfect for keeping little ones entertained at home.
- Pipe Cleaner Crafts: Make crafting fun with easy and creative pipe cleaner crafts! Help your kids unleash their inner artist with these amazing DIY projects for kids. Ideal for any age!
- Handprint Crafts: Create unique and fun handprint crafts with your little ones! From cards to decorations, explore dozens of creative ideas for handprint crafts that are easy and enjoyable.
- Egg Carton Crafts: Get creative with your kids and have fun making beautiful egg carton crafts! From animals to flowers, explore our collection of art projects for children of all ages.
- Popsicle Stick Crafts: Learn how to craft fun popsicle stick projects with your kids! From birdhouses to pencil holders and more, these creative popsicle stick crafts will keep them busy.
Conclusion:
Coffee filter crafts and art projects are a great way to show your creativity while recycling materials you have at home. With just plain white coffee filters, markers, paints and other supplies, you can create beautiful decorations for any occasion. From flowers and animals to abstract designs – the possibilities are endless!
Coffee filter crafts can also be adapted for different age groups; younger children may enjoy crafting with colorful markers or stickers, while older kids will love making more intricate creations. Whether it’s a special event or just an afternoon of fun, these 25 easy coffee filter crafts and art projects provide plenty of inspiration!

