Are you looking for easy wood crafts that will bring a smile to your face when you’re done? Find these 30 easy wood craft ideas, including step by step instructions, plans and a material list that are perfect for beginners. From DIY garden signs and wooden planters to clever coasters and wall decorations, these wood crafts range from beginner-level all the way up to more advanced. With each wooden craft, we provide helpful tips and tricks on making it and design inspiration so you can create an impressive piece of art out of wood.
Whether you’re looking to make quick wooden crafts or more creative arts and crafts with wood, our collection of easy wood craft ideas is for everyone, regardless of skill level. So if you’re ready to get creative with some wood crafting, browse through our 30 simple wood craft ideas below and find the perfect one for your next project!
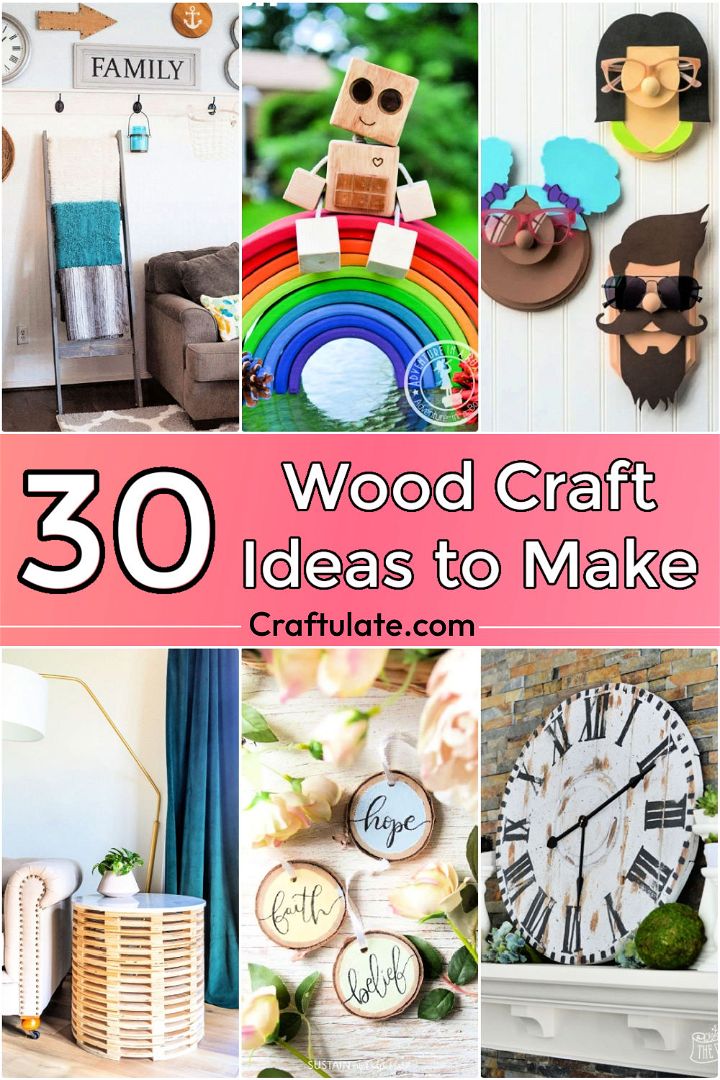
Simple Wood Craft Ideas to Make
This guide gives you easy wood craft ideas that are both creative and easy to make. From rustic decorations to DIY furniture, these wooden craft ideas will help spark your creativity so you can create unique home decor pieces or gifts from simple materials like wood. Use different colors of paint, stains, or even natural finishes to get the desired look for each project. Get ready for a crafting adventure as we explore all the wonderful easy wood crafts that come with making your own wooden creations!
1. Making Glasses Holder Display with Fun Faces

This really cute, modern and simple idea is perfect for kids’ rooms. DIY glasses holder display with fun faces is an easy project that can be completed in under 30 minutes. The hardest Part of this project is finding the supplies, which can all be found at your local hardware store.
This project is perfect for beginners and can be completed by anyone with a little DIY experience. The best Part about this project is that it can be easily customized to fit any home décor style. Change the colors of the foam and paint to match your existing décor. Hang your DIY sunglasses holder by the front door or in your kid’s room to keep track of their glasses. This is a fun and unique way to organize and display your sunglasses. Try this DIY project today! modpodgerock
2. Decorative IKEA Magazine Holder
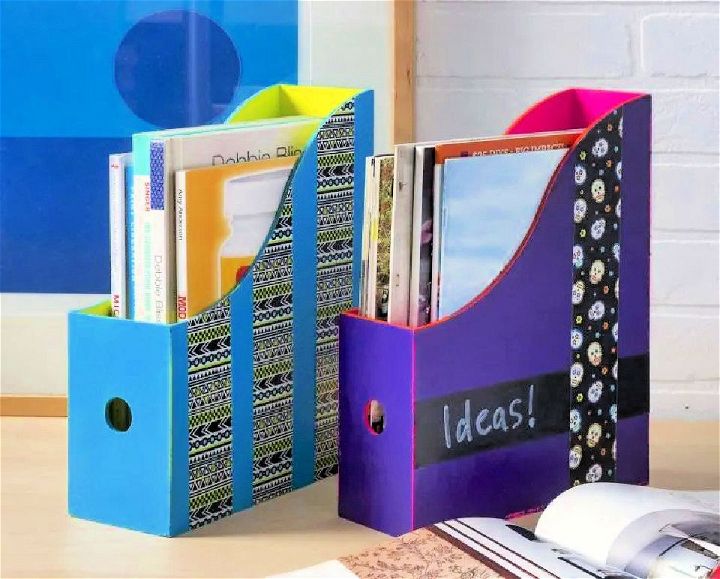
A DIY project can easily add personalization and style to your home décor. You can create unique pieces that reflect your personality by working with your hands and using simple supplies. One easy DIY project is to decorate an IKEA magazine holder.
With a little crafting experience, you can transform a mundane object into a work of art. And because the magazine holder is so inexpensive, you can experiment with different techniques and designs until you find the perfect look for your home. This project is relatively quick and easy so you can enjoy your new décor in no time. modpodgerock
3. Simple DIY Blanket Ladder
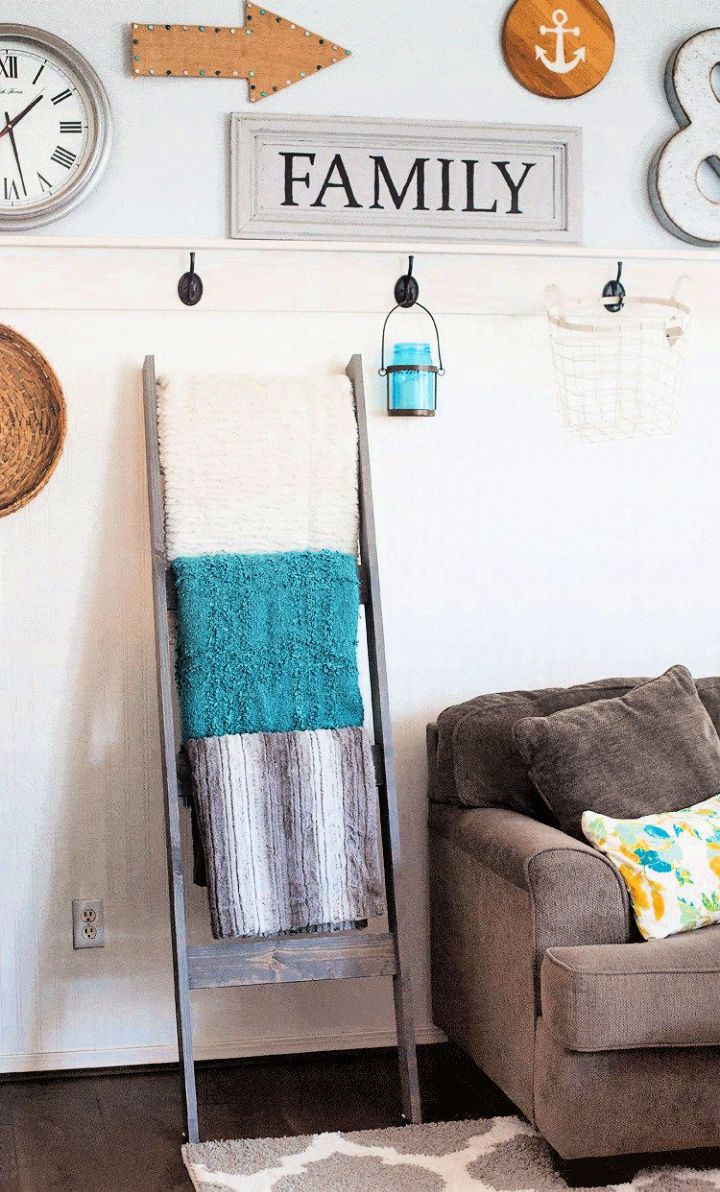
Making a blanket ladder is a great way to add a cozy touch to your home without spending much money. You can easily do this project in just a few hours, and it Will only cost you around $10. This makes it a great option for anyone looking for a quick and easy DIY project.
All you need for this project are three 1″ x 3″ x 6′ pine boards, a miter saw, a nailer, and your favorite weathered gray stain. Once you have all your supplies, cut the boards to size, stain them, and assemble them using the nailer. That’s it! You’ll have a beautiful blanket ladder that Will add warmth and character to any room in your home. domestically
4. Giant DIY Wood Clock to Sell
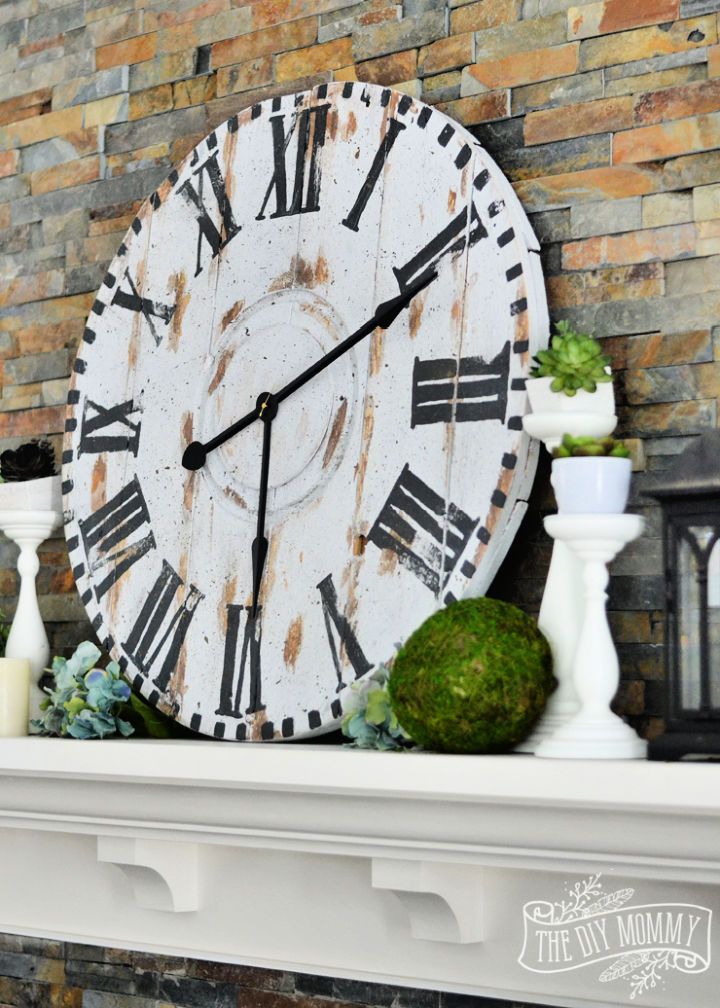
DIY projects are a way to add personal touches to your home décor. This DIY giant reclaimed wood clock is a gorgeous addition to any room. It’s easy to make and requires only a few materials you can find at your local hardware store.
The result is a beautiful, vintage-look clock that adds character to your home. So if you’re looking for a unique DIY project. Follow the instruction to learn how to make your DIY giant reclaimed wood clock. diymommy
5. Wooden Wall Art Craft to Make
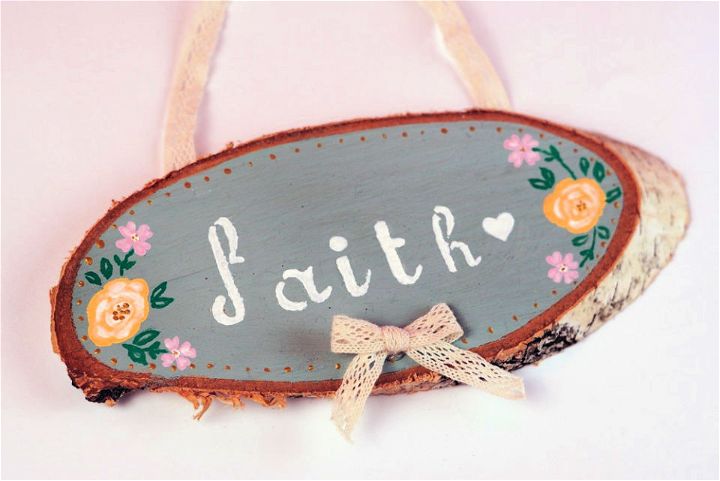
DIY wooden slice wall art is a perfect creative project to beautify your walls. It is fun to make and only requires a bit of art to spice it up. You can glam up your space on a budget with this DIY project.
Wooden slice wall art is a perfect way to infuse the beauty of nature into your room. To do this DIY project, you Will need a wooden slice, lace ribbon, glue gun, paintbrush, gold paint, two shades of green paint, light Rose paint, peach color paint, white acrylic paint, and an alphabet stencil. diys
6. How to Make Table Risers Out of Scrap Wood

DIY table risers out of scrap wood are the perfect way to bring some height to a coffee table. It’s a quick and easy project that you can do in the afternoon, and it’s a great way to reuse some old wood that you might have lying around. Plus, it’s a feel-good DIY project that will add personality to your home.
To make your DIY table risers:
- Start by sanding down the wood. You’ll want to use a 220-grit sandpaper or sanding pad to smooth rough edges.
- Cut the wood into pieces that are about 36 inches long.
- Glue the pieces together at the corners using wood glue.
- Once the glue has dried, stain the wood with a pickling white, no, pain gel stain.
- Apply a clear wax to protect the finish and give it a bit of shine.
- Use a wax brush to buff it until you’re happy with the result.
And that’s it! You’ve now got your DIY table risers that will add some character to your space. dododsondesign
7. Easy Wooden Tag Craft Ideas
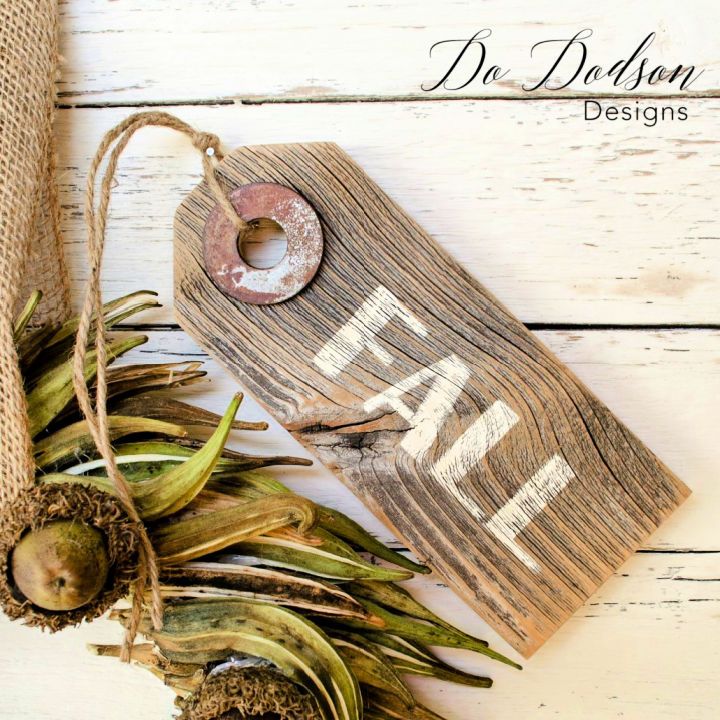
A DIY wooden tag is a personalization project that is unique and fun. It can be used to tag a gift or add cuteness to anything. The project requires a few supplies that are easy to find, and the result is too pretty. With washers and a weathered board, you can add a bit of cuteness to anything. This wooden tag is a great project for anyone who wants to add a personal touch to their gifts or home décor. dododsondesign
8. Cool Stacked Side Table Woodworking Project
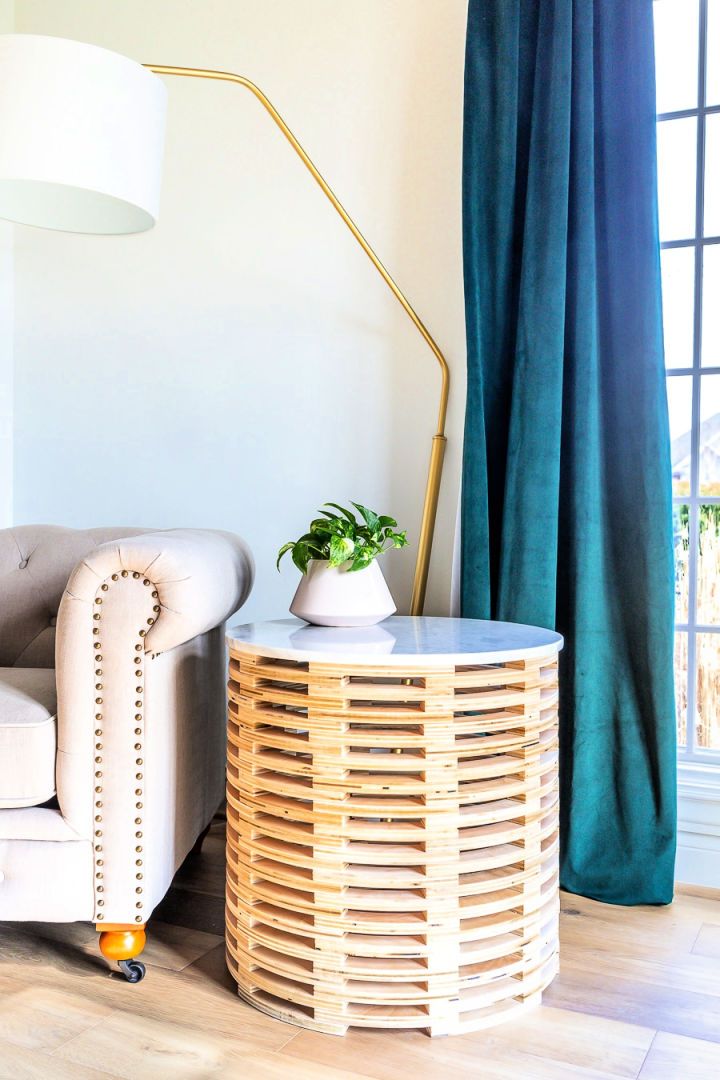
DIY’ers rejoice! This easy-to-follow tutorial will show you how to build your stacked side table. Perfect for small spaces, this simple design can be completed in just a few hours. And best of all, it’s worth the time and effort – you’ll love the finished product!
To get started, you’ll need a few materials. Most importantly, you’ll need an inventable x-carve 3D carving machine and easel design software. You’ll also need a ⅛” straight bit, a cordless brad nailer or hammer, and a 4 x 8 ft. Sheet of ¾-inch plywood.
Additionally, you’ll need a circular saw with a plywood blade and wood glue.
Once you have all your materials gathered, follow the instructions in the tutorial below. Before you know it, you’ll have your very own DIY stacked side table! jenwoodhouse
9. DIY Address Planter Door Decor

DIY address planter door decor is the perfect way to add unique decor to my door. This festive christmas DIY project is fun and easy to do. It’s also a great way to add some personality to your door. All you need are a few materials, including a planter box, faux flowers, succulents, adhesive house numbers and twine.
Assemble the planter box according to the instructions, then add the succulents, faux flowers and house numbers. Finish off by adding some twine for extra detail. That’s it! You now have a beautiful address planter door decor that adds holiday cheer to your home. cofranhome
10. Handmade Wooden Calendar
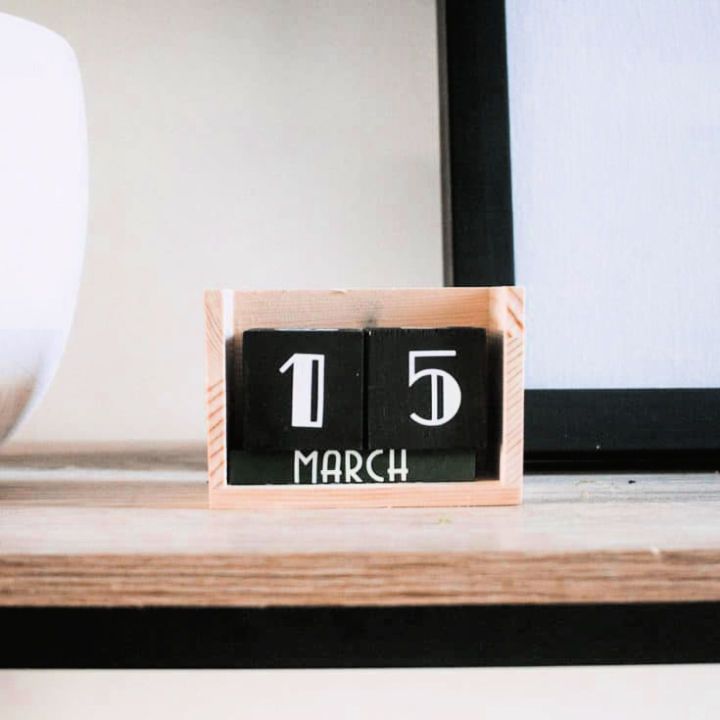
This DIY block calendar is a fun group project that is incredibly useful. It is a quick craft that makes a great teacher appreciation gift for your favorite desk worker. The calendar is fun and simple to make with just a few materials. You Will need a wood block calendar, permanent white vinyl, transfer tape, and acrylic paint:
- Paint the block calendar with acrylic paint.
- Use the tape to apply the vinyl design to the calendar.
- Enjoy your new block calendar!
They’ll learn valuable skills in creating their cards, like planning, designing, and executing. And best of all, they’ll have a blast doing it! So what are you waiting for? Get started on your summer cards today! practicalpretty
11. Geometric Candle Holder for Beginners
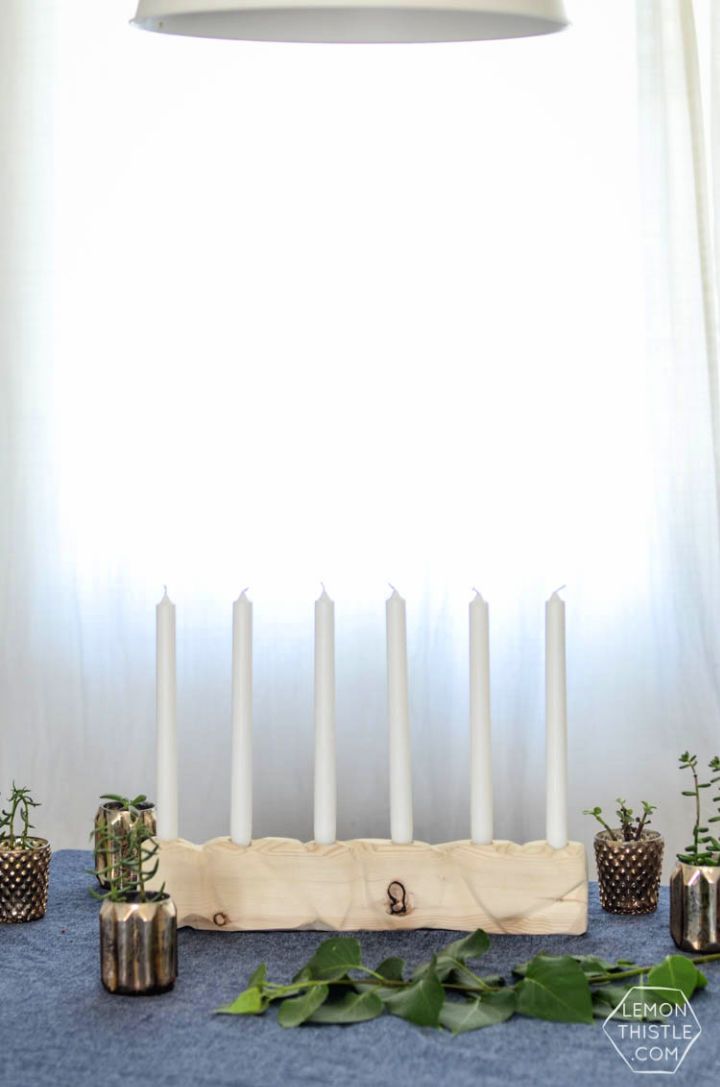
A DIY geometric wooden candle holder is a great project to create a gift for a designated person. The project is simple, yet the results are awesome. This guide Will show you how to create your own DIY geometric wooden candle holder.
You will need 2×4 (Or scrap of- I used less than 2 feet), a saw to cut wood to length (we used a miter saw), a belt sander with 80 grit sandpaper (safety goggles!), wood clamps (I only needed 1), sanding block with 100 grit sandpaper, drill with ¾″ bit, minwax finishing paste, rag to apply, and gloves, finishing nails, hammer, and pliers with wire cutter, taper candles. lemonthistle
12. DIY Twirling Twig Mobile With Wood
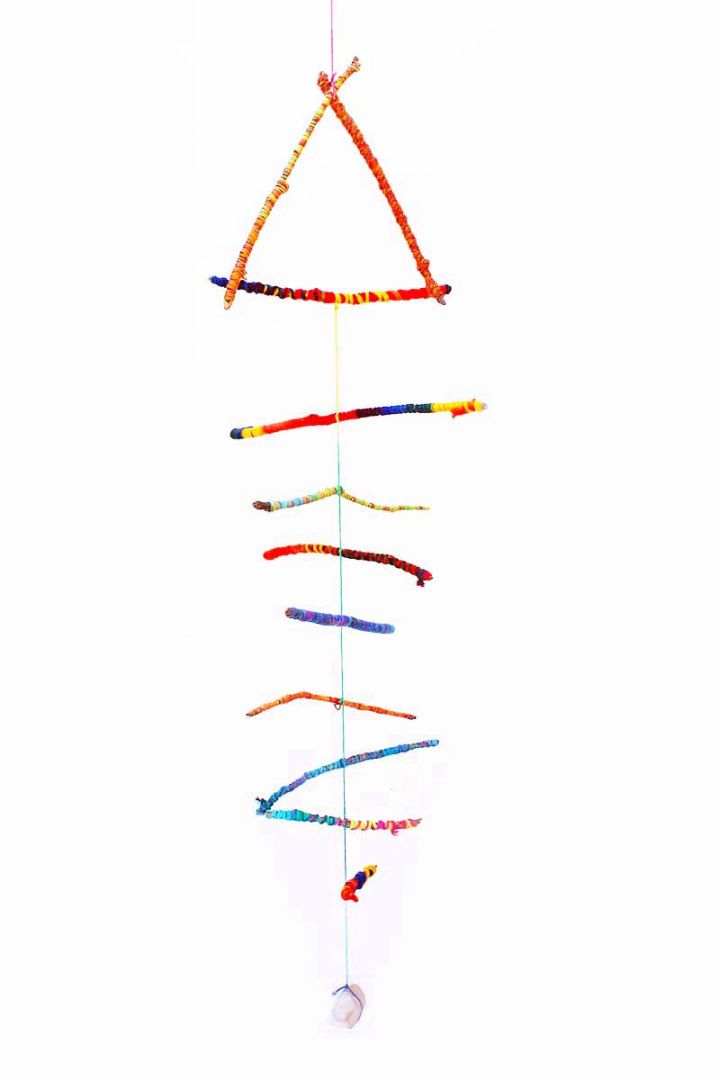
Twirling twig mobile is an engineering for kids project that is both fun and creative. It is also pretty to look at and has a touch of whimsy. The materials you will need for this project are yarn sticks, yarn or twine, scissors, and a small rock or pinecone. To begin, tie the yarn or twine around the middle of one of the yarn sticks.
Then, tie the other end of the yarn around the middle of a second yarn stick. Continue until all of the yarn sticks are tied together in pairs. Once all the yarn sticks are paired up, tie a piece of yarn around the top of each pair so they can hang from the mobile. Finally, tie a piece of string around the top of the mobile and hang it from a hook. The DIY twirling twig mobile is now complete and ready to be enjoyed! babbledabble
13. Unique DIY Robot Toy Out Of Wood
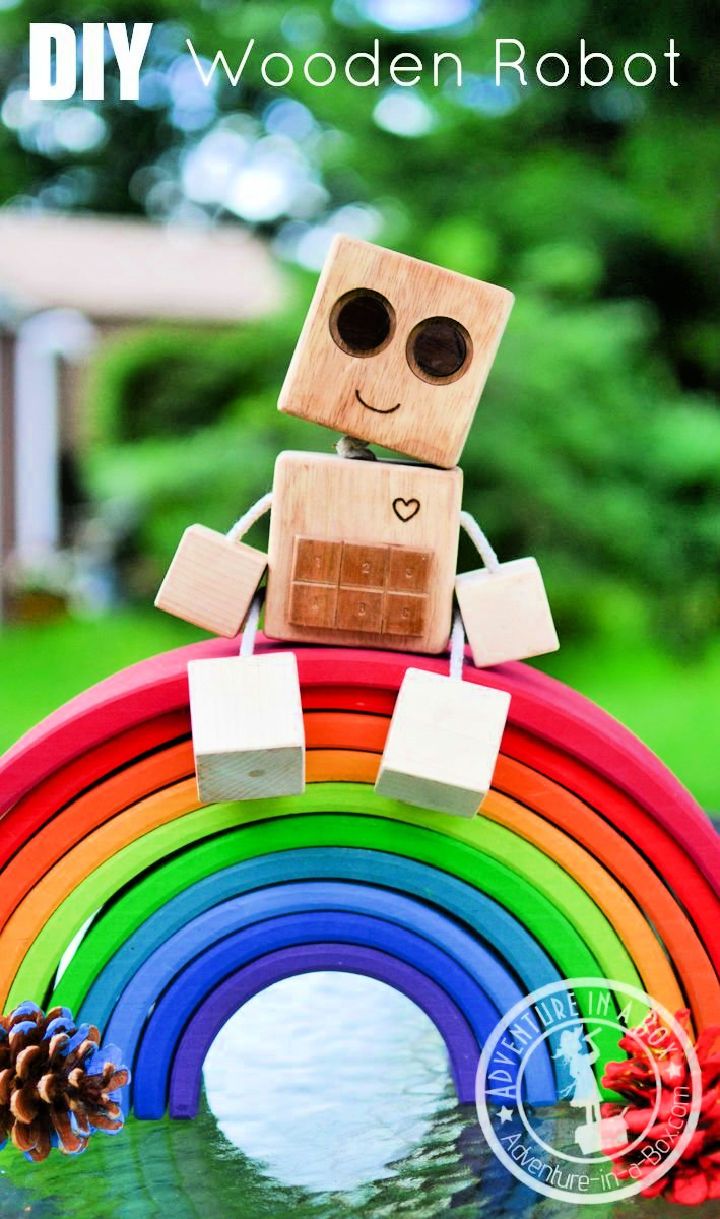
Looking for an easy and fun wood craft project? Look no further! Here you’ll find tons of great wood craft ideas that are simple to make and perfect for any skill level.
As anyone with a young child knows, toys can be a source of great joy and frustration. However, toys can also be expensive, and they often end up being broken or lost. This is why many parents choose to make their toys, such as the DIY wood robot toy.
Not only is this a simple project that can be completed in the afternoon, but it also has the charm of a homemade toy. Plus, it’s the perfect way to use up any spare wooden blocks or scraps of wood that you might have lying around. To make your DIY:
- Glue the blocks together using wood or polyurethane glue.
- Use a drill to create two small holes in the top of the head (for the eyes) and one larger hole in the back (for the mouth).
- Use a wood-burning pen to add features such as a nose, eyebrows, and whiskers.
- Tie a string length around the neck so your child can wear the robot like a necklace.
Your finished wood robot toy will surely bring smiles to you and your child. And who knows? Maybe you’ll even have a surprise guest climb onto your windowsill. adventureinbox
14. Wood Slice Wreath for Fall Decorations
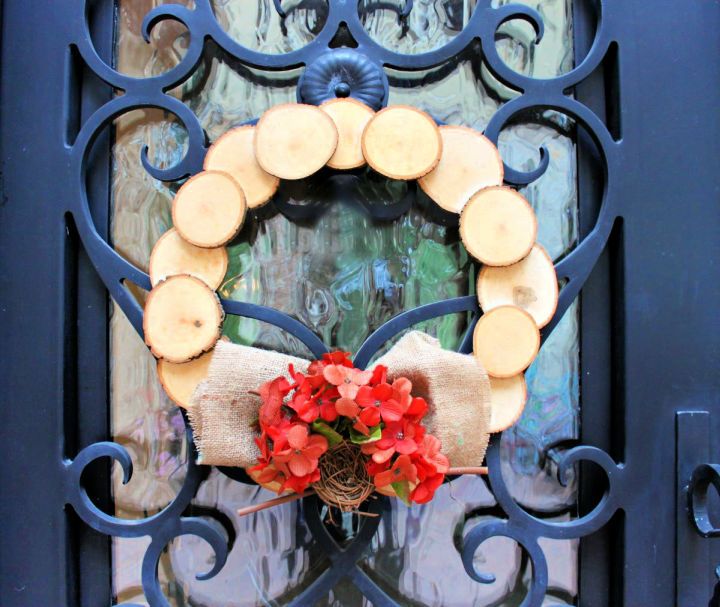
Adding a DIY wood slice wreath to your front door is a simple and fun way to show off your fall crafting skills. This rustic charm is perfect for your home and can be customized to match your style. The key to this project is finding the perfect round woodcuts with bark edges.
Once you have your wood, glue them together with wood glue. Then, use a gold shimmer mist to add a bit of shimmer and color. Finally, hot glue a burlap fabric bow, fabric flowers, and a decorative bird’s nest to complete the look. This wreath will impress your guests and give your home a warm and welcoming feel. homedit
15. Creative Small Wooden Craft Ideas
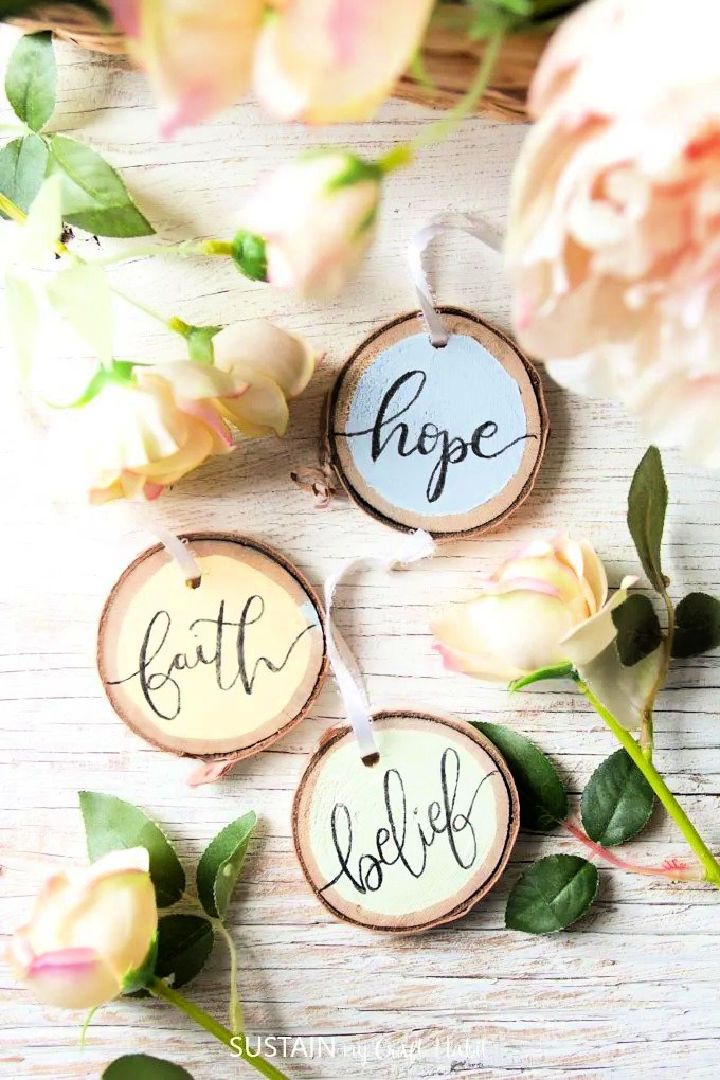
Looking for a simple and beautiful easter craft to make with the kids? Try this DIY easter ornament with hand lettered wood slice! All you need are 3 round wood slices, some paints, a brush pen or permanent marker, and a decorative ribbon. You can find all of these materials at your local craft store.
This project is perfect for kids of all ages. Paint the wood slices with your desired colors and let them dry. Then, use the black marker or brush pen to hand the letter any words with special meanings on the wood slices. Once the hand lettering is dry, thread the ribbon through the holes in the wood slices and tie in a bow. That’s it! You now have a sweet reminder of easter’s true meaning and beautiful nature-inspired decor for your home. Enjoy! sustaincraft
16. Homemade Wooden Candle Holder

Are you looking for a unique DIY wooden candle holder? This easy and affordable woodworking project is the perfect solution! You can create a beautiful and functional centerpiece for your home with just a few supplies and basic woodworking skills.
Start by cutting the 2x2s into nine pieces. Then, use drywall screws to attach the pieces into sets of three. Once the sets are screwed together, apply gorilla wood glue to affix them before moving on to the next step.
Then, it’s time to finish your DIY wooden candleholder! to protect the wood, Apply a coat of danish oil and give it a beautiful sheen. Allow the oil to dry before using your new candelabra. Enjoy! homedit
17. Wood Coaster Crafting Ideas
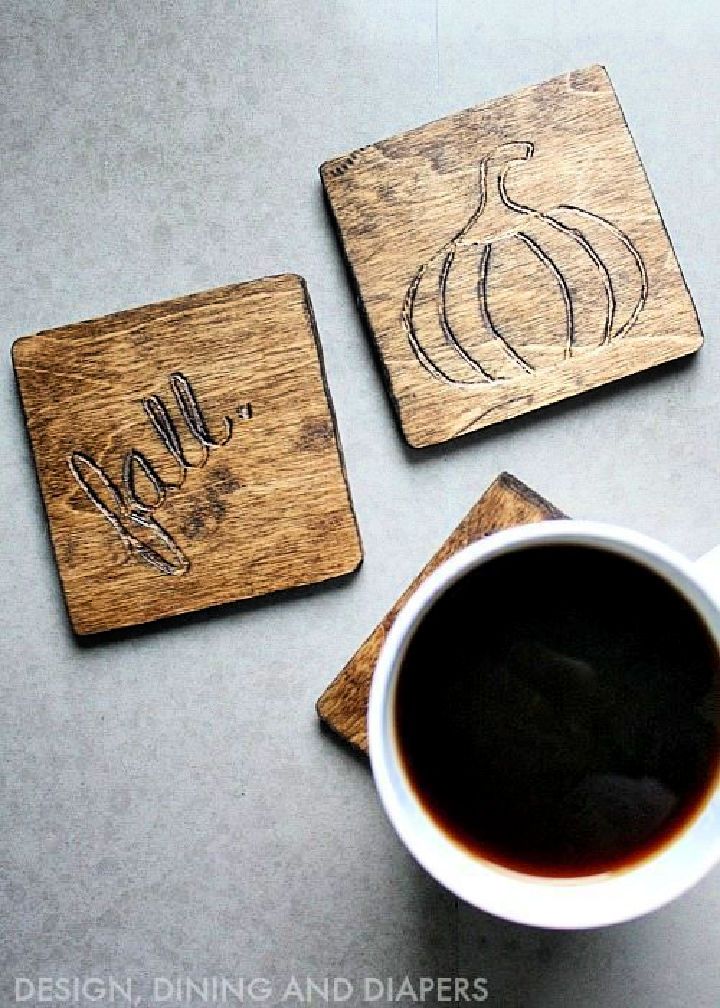
DIY wood coasters are easy, inexpensive, and easily altered to fit anyone’s style. You can make them a homemade gift for fall or a birthday present. You will need 4X4 pieces of craft wood, dark walnut stain, clear semi-gloss polyurethane, a paintbrush and stencils (optional). The first step is to cut the 4X12″ piece of wood into four equal pieces. Next, stain the wood using the dark walnut stain and let it dry completely. Once the stain is dry, you can apply the clear semi-gloss polyurethane to protect the coasters from spills. You can use stencils to add patterns or words to the coasters to add a personal touch. This DIY can add a personal touch to your home decor. tarynwhiteaker
18. Painted Wood Slice Pumpkins
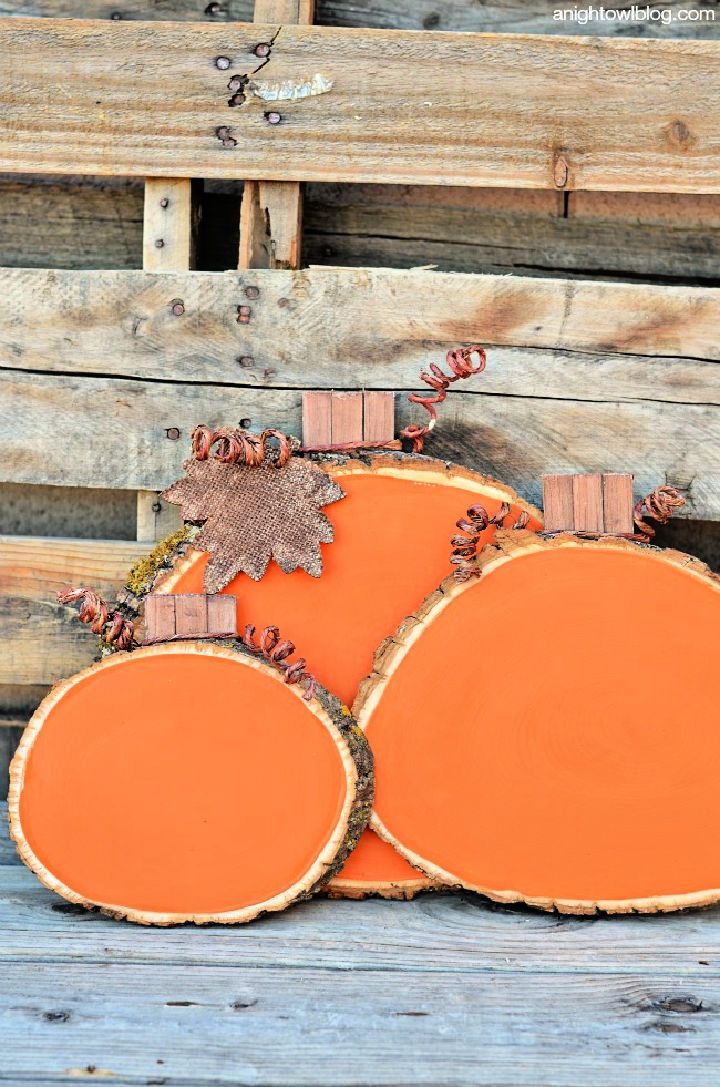
DIY projects are a perfect way to add a personal touch to your home décor. And what could be more perfect for fall than these DIY painted wood slice pumpkins? They’re beautiful, versatile, and so much fun to make! You can use them as mantel decorations and wall décor and even arrange them on your party buffet table. Plus, they make the perfect fall decorating project for kids and adults. So gather your supplies and get started on your very own wood-slice pumpkins today! anightowl
19. Customizable Chevron Arrow Wall Decor
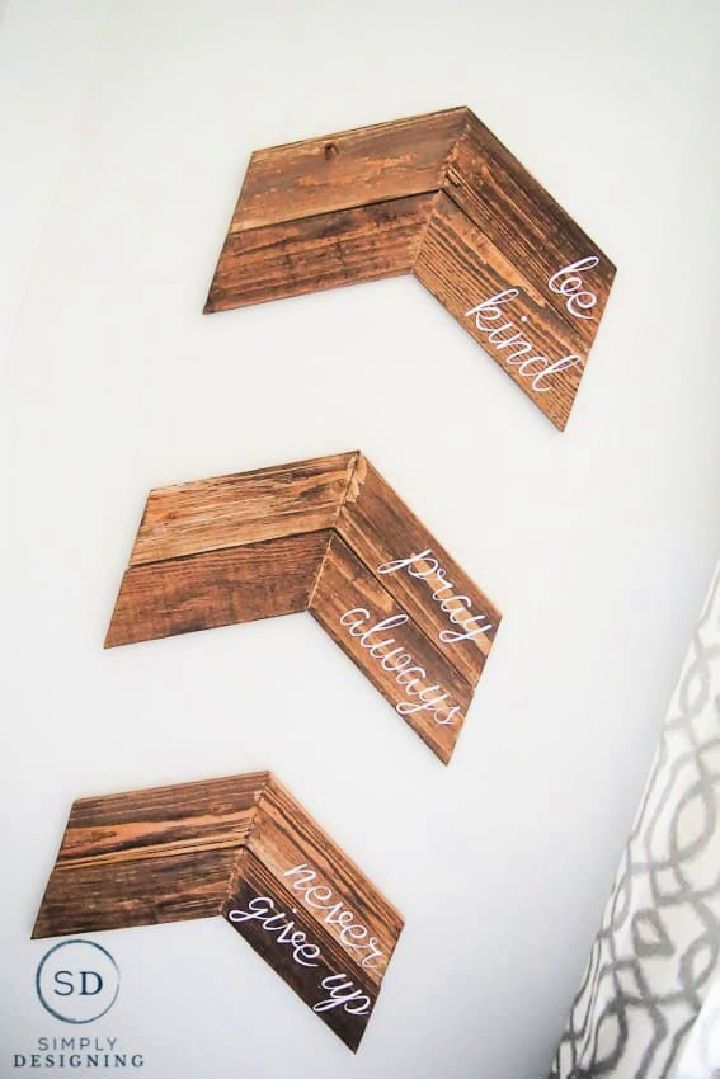
Looking for creative wood craft ideas? Check out our selection of easy-to-follow wood crafts that will help you add a unique touch to your home. DIY projects are all the rage these days and for a good reason! They allow you to personalize your home uniquely without spending much money. This DIY customizable chevron arrow wall decor is a quick and easy project that will add a touch of style to any room in your home.
The best part is that it’s completely customizable, so you can use whatever words or motto you prefer! All you need are a few supplies and a bit of time, and you’ll have a beautiful piece of wall decor you can be proud of. simplydesign
20. Wooden Hanging Table for Adults
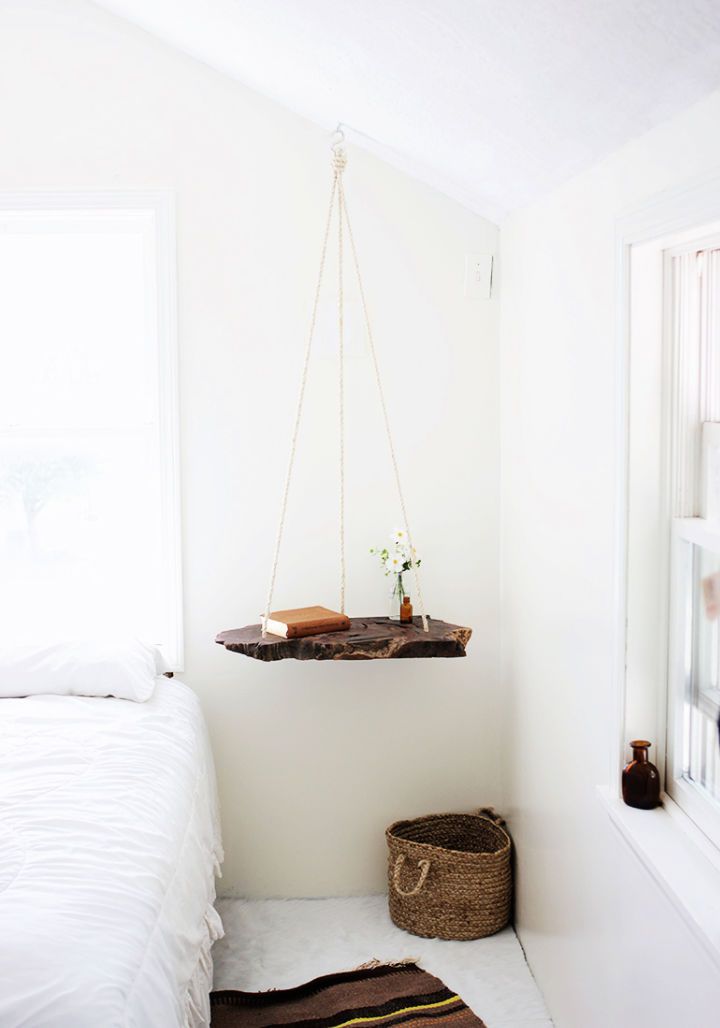
This DIY hanging table is a gorgeous cross-cut of black walnut and a worthwhile project for any home. It is beautiful, functional, and easy to make. This table is the perfect addition to any room in your home. With just a few supplies, you can have this table ready for use.
The first step is to sand the wood cross-section with an orbit sander. Then, apply a coat of spray polyurethane and let it dry. Next, drill a hole in the center of the cross-section and insert an eye screw. Screw a toggle lock onto the eye screw. To finish, glue felt to the back of the cross-section and attach a rope. Hang the table from an S-hook and enjoy! merrythought
21. Easy DIY Wood Sign Design

This easy DIY wood sign is the perfect home decor item to make! It’s easy to customize and personalized and great for rustic or farmhouse decor. The best part is that it only takes 55 minutes to make and only costs $10. Follow the basic steps below to create your own easy DIY wood sign!
- Choose your wood board. For this project, you can use wood, but we recommend using a 1 “x8″ x8” board.
- Stain or paint your wood board. This is where you can get creative! You can use any color, stain, or paint you like. We recommend using a dark stain for a rustic look or white paint for a more farmhouse feel.
- Use painter’s tape to create your design on the board. This is where you can personalize your sign! Get creative and have fun with it.
- Cut out your design using a cutting machine and vinyl. If you don’t have a cutting machine, you can also hand-cut your design out of the vinyl using a craft knife.
- Apply the vinyl to the board. Use transfer tape to help position the vinyl on the board if necessary.
Hang your sign and enjoy! Easy peasy! diycandy
22. Create Art Block Crafts With Wood
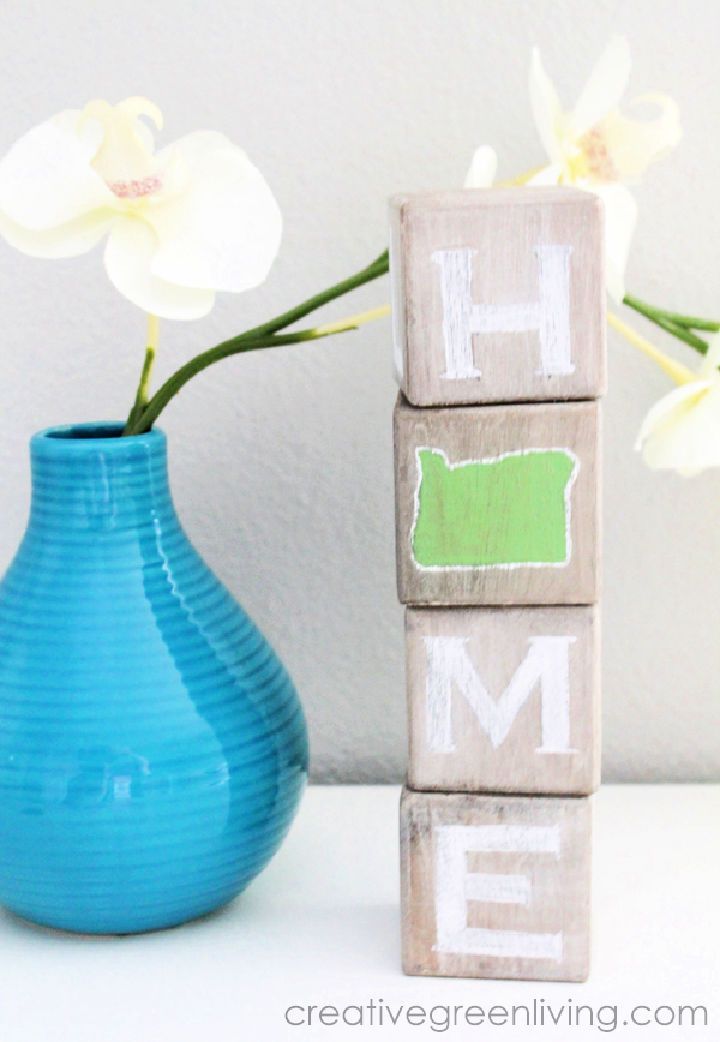
DIY rustic home state art blocks are perfect for displaying your state pride! This simple yet inspired craft is easy to make and can be customized to any state. All you need are basic materials and a little time, and you’ll have a beautiful display piece for your home.
Once you have all of your materials gathered, you’re ready to begin. First, use the barnwood finish and wax to distress the wood blocks. This will give them a rustic look that is perfect for DIY rustic home state art blocks. Next, print out your state template on freezer paper using your inkjet printer. Cut out the state shape with scissors. Apply the state shape to one of the distressed wood blocks using the large craft stick. Press down firmly to ensure good adhesion. Repeat this process for each of the four wood blocks.
Now it’s time to paint. Begin by painting the entire block with a base coat of milk paint in scottish highlands. When the base coat is dry, apply a second coat of paint in your desired state colors. We used milk paint in new england red for massachusetts, georgian yellow for georgia, and milk paint in milky white for vermont. Allow the paint to dry between coats.
Once the paint is dry, use the fine-grit sanding sponge to lightly sand around the edges of each block to give them a distressed look. Finally, use the Martha Stewart detailing brushes to add finishing details like stripes or polka dots. Allow the DIY rustic home state art blocks to dry completely before displaying them proudly in your home! creativeliving
23. Rustic Halloween Wood Craft Ideas
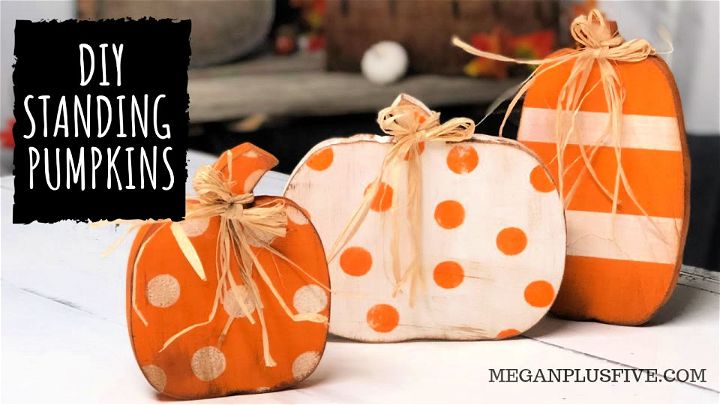
Adding a rustic touch to your home décor is easy with these DIY rustic wood pumpkins. Made from simple wood cutouts and painted with orange and white acrylic paint, these pumpkins are perfect for fall decoration. A little antiquing wax gives them an aged look, and they’re finished off with a raffia bow. These rustic wood pumpkins are a quick and easy craft that will add a beautiful touch to your home décor.
24. Build a Clock Craft From Wood
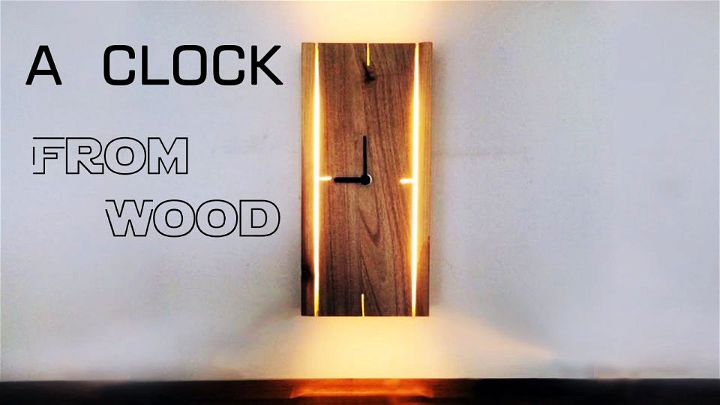
DIY clock from wood is an easy craft that anyone can do. With a few simple and easy materials, you can create a beautiful clock that will add a touch of style to any room in your home. This project is perfect for fall decoration, and it’s also a great gift idea.
To start, you need a piece of wood, some paint, and a clock movement Kit. First, paint the piece of wood in any color you like. Then, attach the clock movement Kit to the back of the wood using the included hardware. Last, hang your new clock on the wall and enjoy your handiwork! This DIY clock is an easy way to add a personal touch to your home décor. Give it a try today!
25. DIY Hand Lettered Wood Plank Keychains
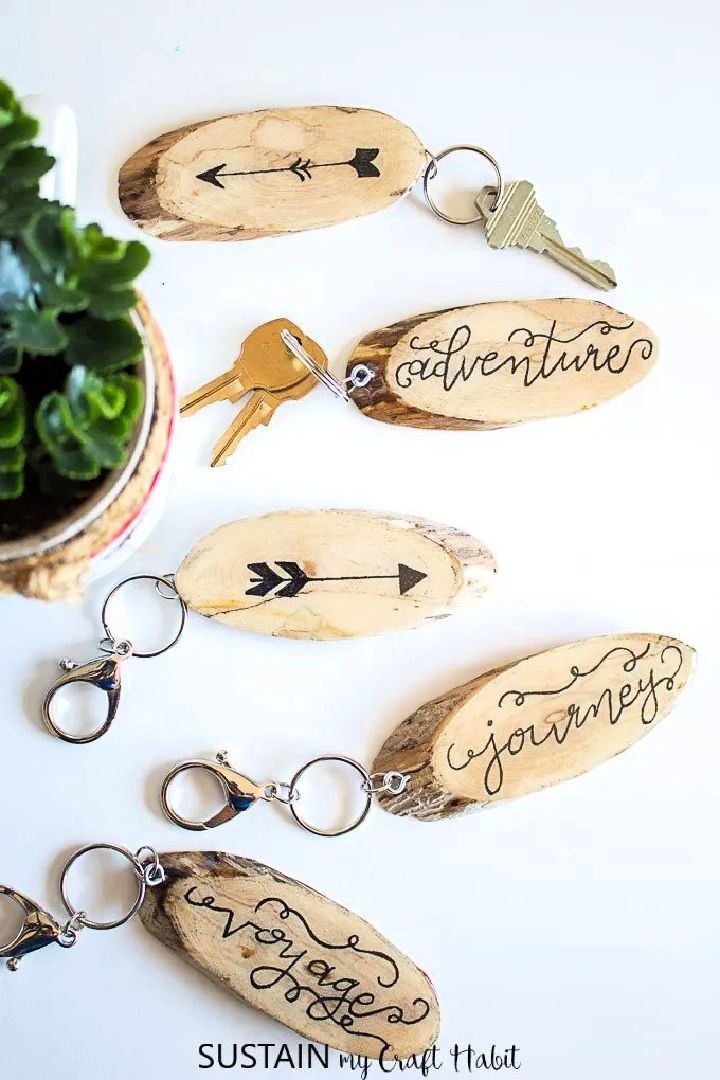
If you’re looking for a fun DIY project, look no further than these hand-lettered wood slice keychains! This project is perfect for all skill levels and can be completed in the afternoon with just a few supplies. sustainmycraft
26. Wood Burning Craft With Sharpie Markers
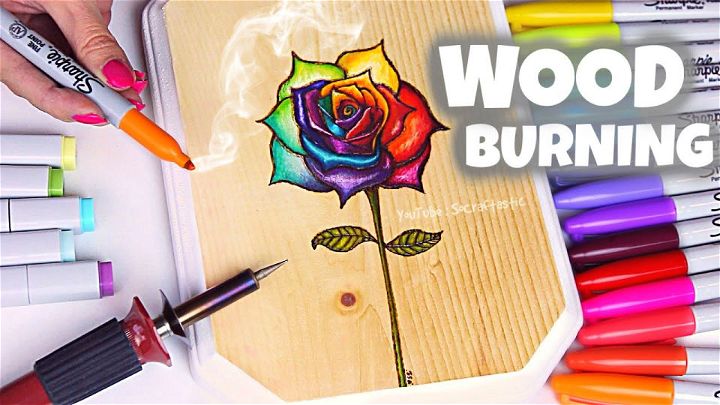
Create beautiful and unique artwork with wood burning and sharpie markers! pyrography is the art of creating designs on wood using heat, while colored ink provides stunning hues. A rainbow rose drawing is perfect as wall decor or a special gift – use your imagination to craft something truly special. With colorful detailing and easy steps, anyone can make something one-of-a-kind with this method!
27. Make a GENJI Wakizashi With Wood Sticks
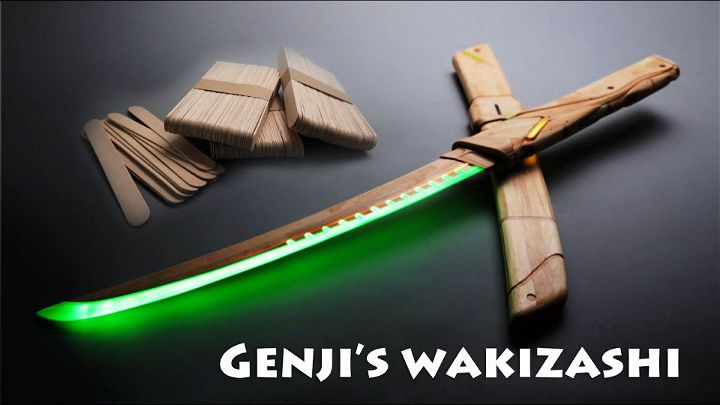
Experience the unique craft of making a genji wakizashi out of 344 popsicle sticks in just 50 days! Follow this step-by-step process with these detailed instructions to learn how to create your replica samurai sword. Watch as each stick is intricately cut and shaped, eventually combining into an authentically designed weapon inspired by ancient Japanese warriors. Learn the history behind these cherished swords and amaze friends with your very own handmade genji wakizashi. You won’t find another crafting project like it!
28. DIY Wood Heart Craft

Craft beautiful wooden hearts in no time with this simple tutorial! You can easily make unique decorations for your home or gifts with a dremel, hand saw, carpenter pencil, and a heart stencil. This easy-to-follow video will show you how to use basic tools to create a stunning wooden heart from scratch. Try it out today – the perfect handmade touch for any room!
29. Homemade Barn Wood Wall Art

Build a unique and custom black bear wall art with barnwood! This DIY rustic decor project is easy to do while measuring 24″ x 36″, perfect for any home or office. With 100% reclaimed materials, you can use basic tools and build something stunning that will fit perfectly with your existing rustic décor. Start this project today and enjoy your new masterpiece!
30. Cedar Wood Planter Box Project
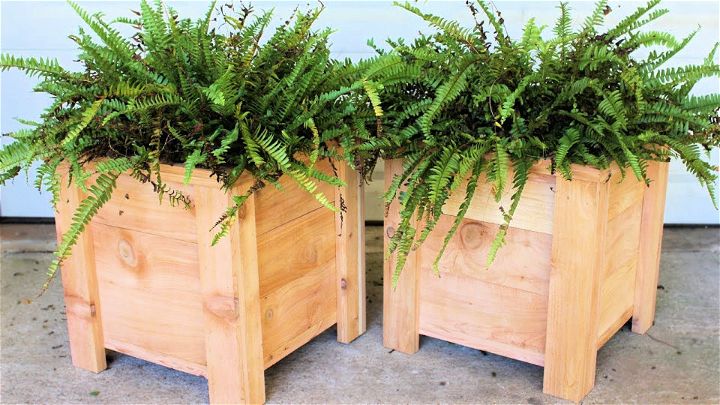
Bring your garden to life with this modern DIY cedar garden planter box! Constructed from sturdy cedar, these planters are the perfect addition to any yard or garden and can be easily created on the weekend. With an affordable price tag of less than $25 per box, you’ll also want to give one as a special anniversary gift. Plus, since they’re easy to assemble and customize, these boxes make wonderful gifts for friends and family. Get creative while putting together this unique project that’s sure to get noticed!
Related Crafts for Kids:
Introduce your kids to the world of crafting with fun and creative projects! With this list of crafts for kids, you’ll find something for all ages and interests.
- Printable Thanksgiving Crafts: This thanksgiving, get your kids crafting with these free printable thanksgiving crafts. Perfect for toddlers to teens, these craft ideas are sure to bring festive cheer!
- Fall Crafts for Kids: Get creative with kids this fall! Check out these fabulous October craft ideas perfect for all ages. From DIY decorations to nature crafts, there’s something for everyone!
- Memorial Day Crafts: Bring the family together for memorial day with these popular memorial day crafts and activities for kids. Make memories that will last a lifetime!
- Toilet Paper Roll Crafts: Explore totally awesome toilet paper roll crafts for kids – from animals to pirates and flowers to rockets. Perfect for young crafters!
- Egg Carton Crafts: Bring out your kids’ creativity with these after-school egg carton crafts and art projects. Get creative with simple materials like paint, glue, felt, buttons and more! Perfect for all ages.
- Easy Leather Crafts: Start creating beautiful leather crafts with this list of easy projects for beginners. From wallets to bags and keychains, discover all the possibilities of working with leather!
- DIY Pumpkin Crafts: Discover perfect pumpkin crafts and art projects for kids of all ages. Get inspired with these creative ideas to make jack o’lanterns, decorations, & more!
- Food Crafts for Kids: Encourage your kids to have fun and learn with these creative food crafts. From edible keychains to yummy decorations, try out these easy recipes and activities!
- Pipe Cleaner Crafts: This article provides fun and easy pipe cleaner crafts for kids. Learn how to make animals, decorations, dolls, jewelry and more with just a few simple supplies!
- DIY Wine Bottle Crafts: Create unique and stylish decorations for your home with these easy DIY wine bottle crafts and upcycling ideas. Learn how to recycle used bottles into art pieces you can be proud of!
Conclusion:
In conclusion, these creative and simple wood craft ideas are perfect for people of all ages to enjoy. From making your own birdhouses and chairs to creating wooden jewelry boxes and planters, the possibilities are endless when crafting with wood. By taking some time to browse through the various tutorials available online or in books and magazines on this topic, you can easily find a project that suits your skill level and interests. With DIY wood craft ideas and just a little effort (and perhaps some tools), you’ll be ready to start turning those raw woods into something special!

