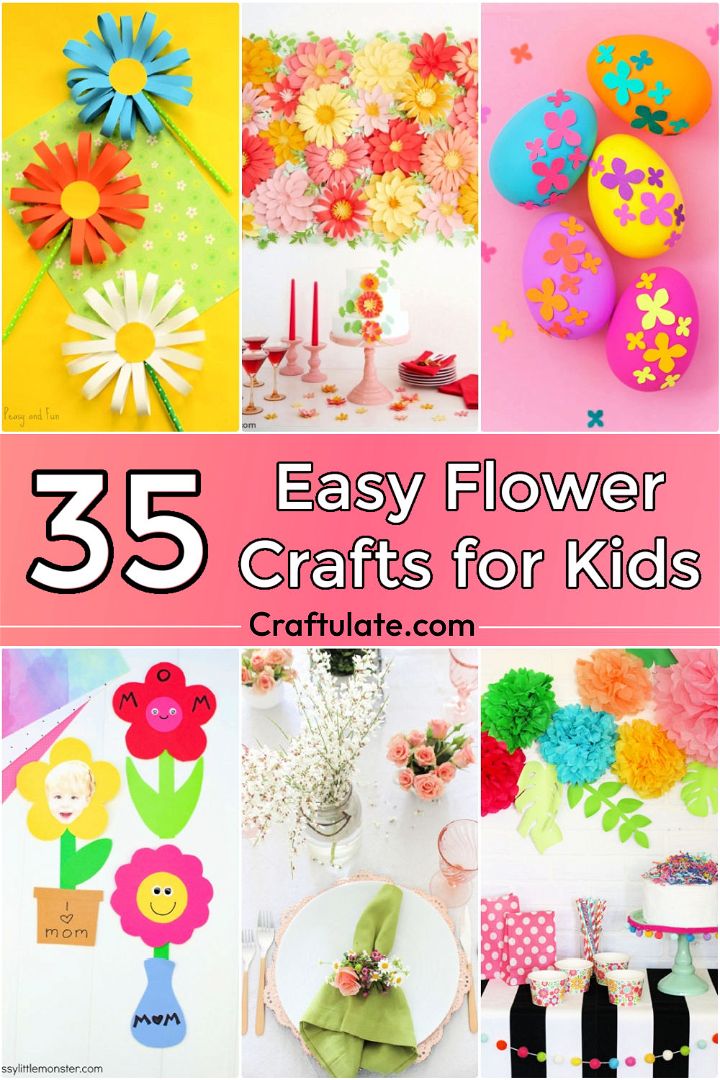
Get your kids excited about the natural world this spring with 35 fun and easy flower crafts and art projects for kids! These flower-themed activities for kids are great for toddlers, preschoolers, kindergarteners, elementary schoolers and beyond. From creative flower crafts made out of paper to fun art supplies like glue, glitter and tissue paper – we have flower art and craft ideas here that every budding artist can enjoy.
Create simple suncatchers to hang in windows or make a 3D bouquet of felt flowers! Decorate mini flowerpots with colorful paints and use construction paper to create beautiful butterflies. With so many different easy flower crafts at your fingertips, you’ll find one (or more!) that fits perfectly into your family room or classroom day this season. Invite creativity into the home or start an outdoor garden party craft session full of joyous expressions through art!
Easy Flower Crafts and Art for Kids
Encourage your preschool, kindergarten, or toddler to get creative and have some fun with easy flower crafts and activities! Our unique step-by-step flow art and craft projects help build skills while providing hours of happy crafting. These easy flower crafts include a variety of printable activities that are both simple and enjoyable for your little ones – all you need to do is grab the supplies! Start crafting today and let their imagination run wild with our easy flower crafts and art for kids.
1. Colorful Paper Flower Craft
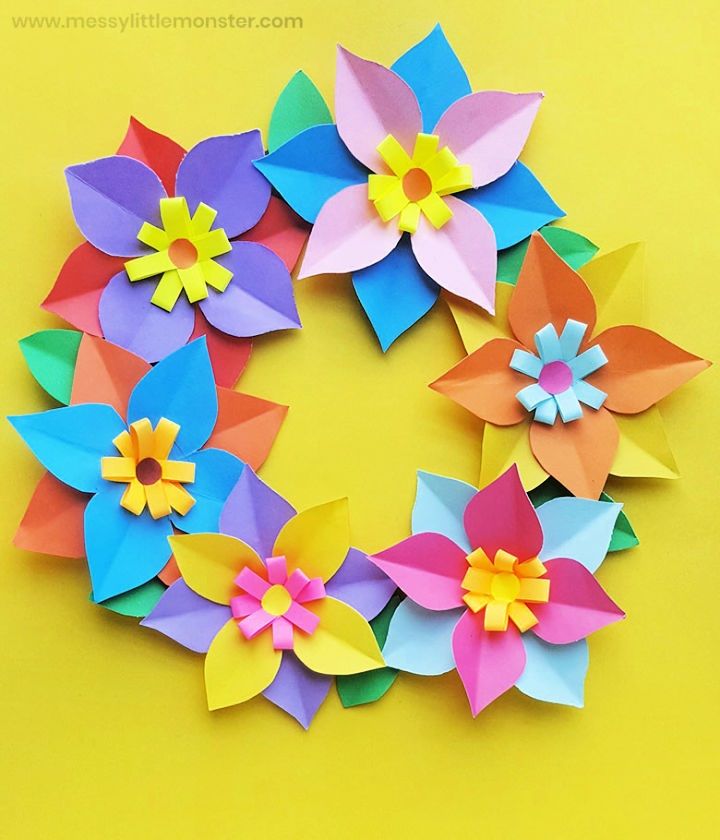
This DIY colorful paper flower craft is a beautiful and fun summer craft with kids. The materials you need for this project are colored craft paper, cardstock paper, pencils, scissors, and craft glue:
- Use the pencil to sketch a flower on the cardstock paper.
- Cut out the flower with scissors.
- Use the craft glue to attach the flower to the colored craft paper.
- Cut out a stem for the flower and attach it to the back of the flower with craft glue.
Your colorful paper flower is now complete! Enjoy your pretty floral creation! littlemonster
2. Easy DIY Paper Flowers for Eggs
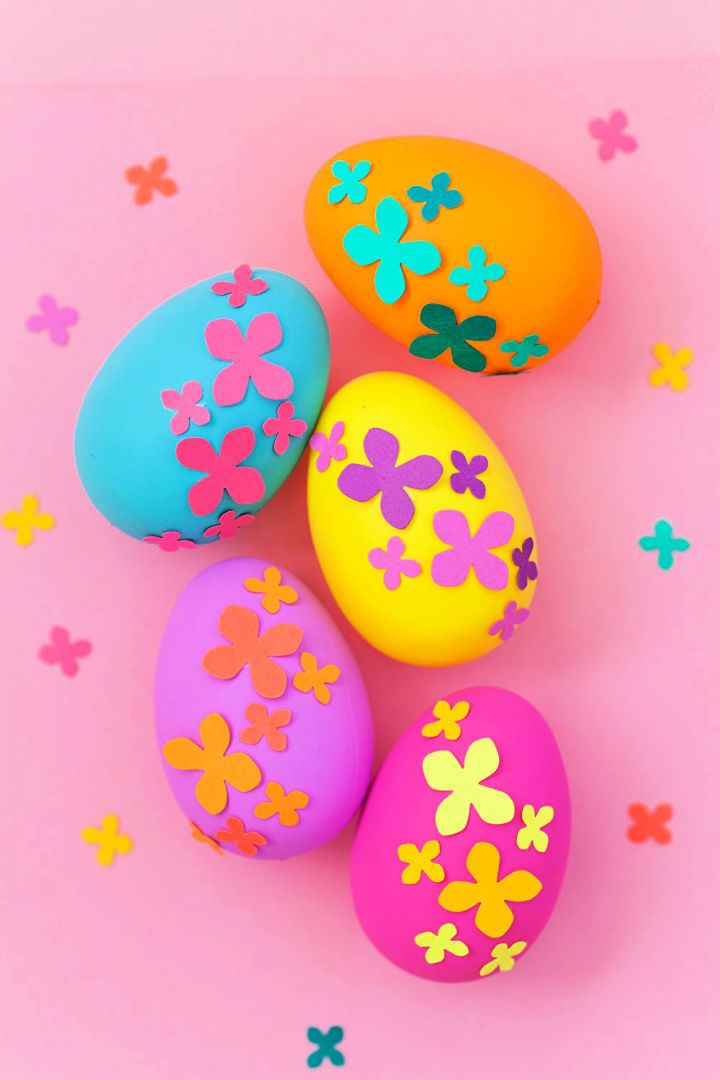
These DIY eggs from paper flowers are a fun and easy Easter craft you can make in just a few minutes! All you need is some colorful paper, a Hydrangea punch, and a hot glue gun. Simply punch out the flowers, glue them onto the eggs, and you’re done! These paper flower eggs are sure to brighten up your Easter celebration! loveandparty
3. Paper Flower Crafts for Kids
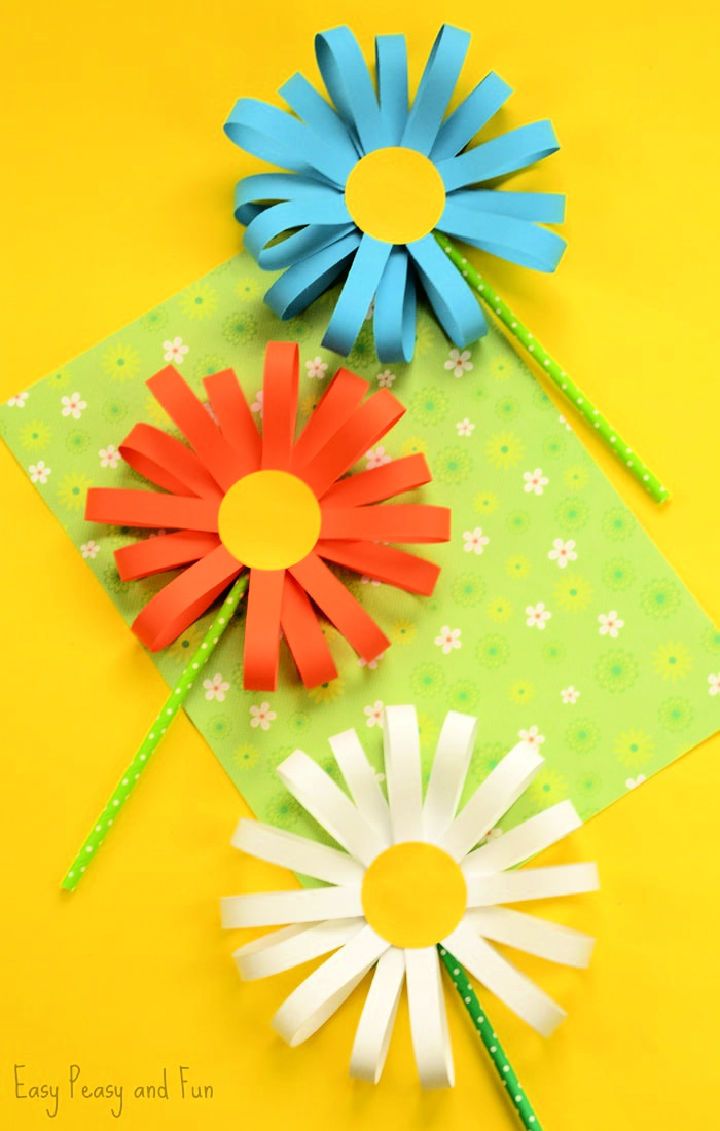
This DIY paper flower craft is perfect for a springtime or a Mother’s Day classroom craft! It’s also a great DIY gift idea. These flowers are so easy and quick to make and look adorable. This project is perfect for beginners.
All you need is a circle paper punch, yellow paper, and paper in various colors. You also need a paper cutter or scissors, stick glue, green paper drinking straws, and clear tape or patterned. Follow this step-by-step tutorial to make your own DIY paper flowers! easypeasy
4. Simple Button Flowers Canvas
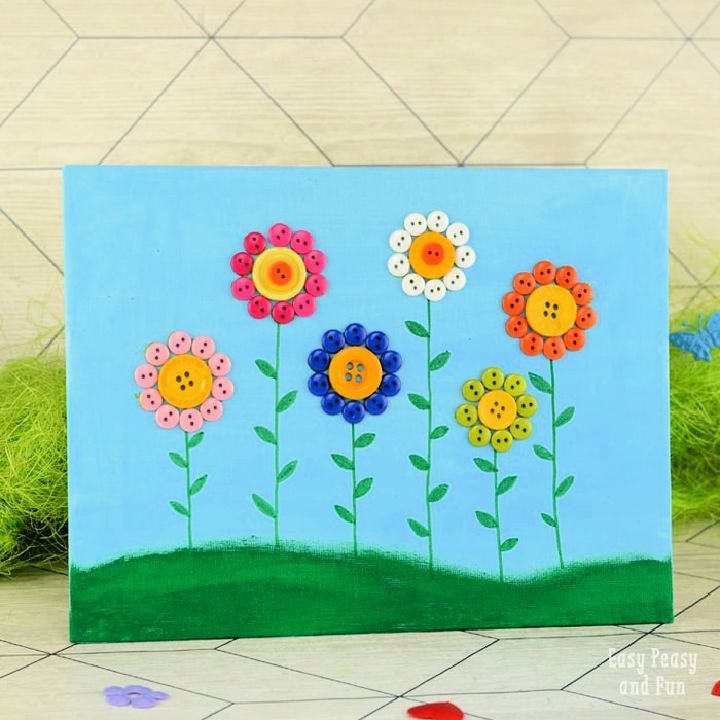
This handmade button flower canvas is a simple and fun craft to do with kids. It is also a fantastic way to use up those buttons! To make your own canvas, you will need a canvas, buttons in different sizes and colors, blue and green paint, a brush, glue, and a green Sharpie marker.
First, paint your canvas blue or green. Then, start gluing your buttons onto the canvas in the shape of flowers. Once you have finished making your flowers, use the Sharpie marker to add stems. And that’s it! You now have your very own DIY button flowers canvas. easypeasy
5. Curled Paper Spring Flower Crafts
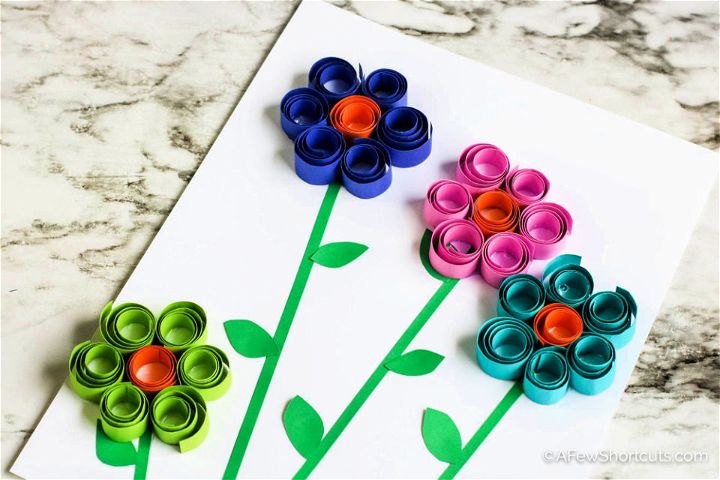
These DIY curled paper spring flowers are a beautiful and fun craft to make with your kids. This introduction craft is perfect for kids of all ages and can be completed in just a few simple steps. All you need is some paper, scissors, and glue.
First, cut your paper into strips using a guillotine cutting board or ruler. Next, use an unsharpened pencil to curl the strips of paper. Finally, glue the strips together to form your spring flowers.
These paper spring flowers are the perfect addition to any springtime decoration and are sure to put a grin on your child’s face. afewshortcuts
6. DIY Felt Flowers for Mother’s Day Gift
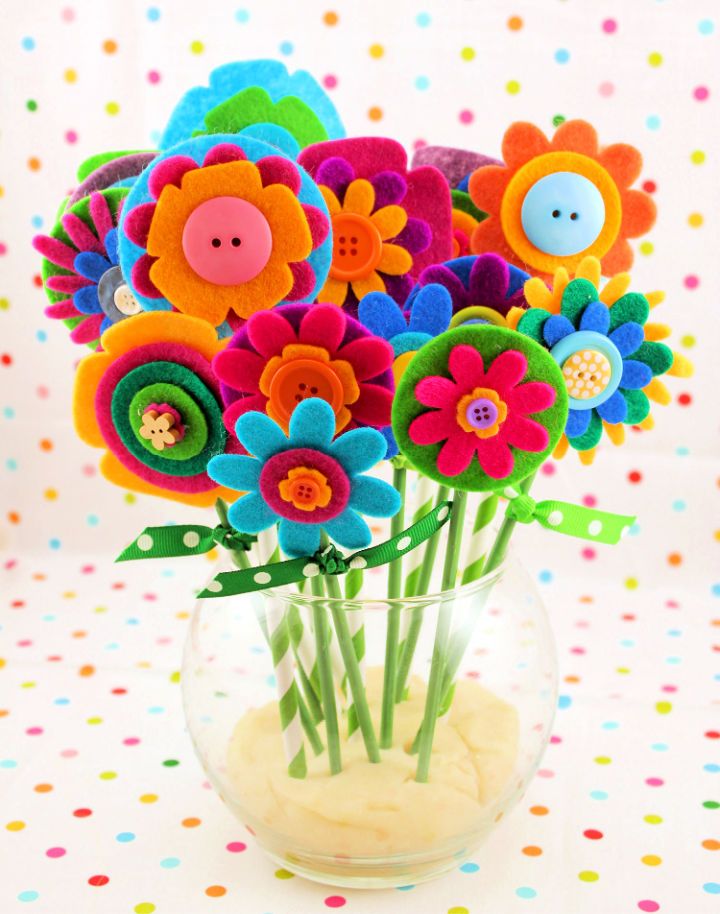
DIY gifts are always a hit, but they can sometimes be time-consuming or require special skills. These DIY felt flowers are neither of those things! Quick and easy to make, they’re perfect for kids (with a little help from an adult) and make a beautiful homemade Mother’s Day gift.
All you need is some felt, buttons, and a few other supplies. Follow the step-by-step instructions below to put together your own DIY felt flowers. happinessishome
7. Fun Mix & Match Flower Art and Craft
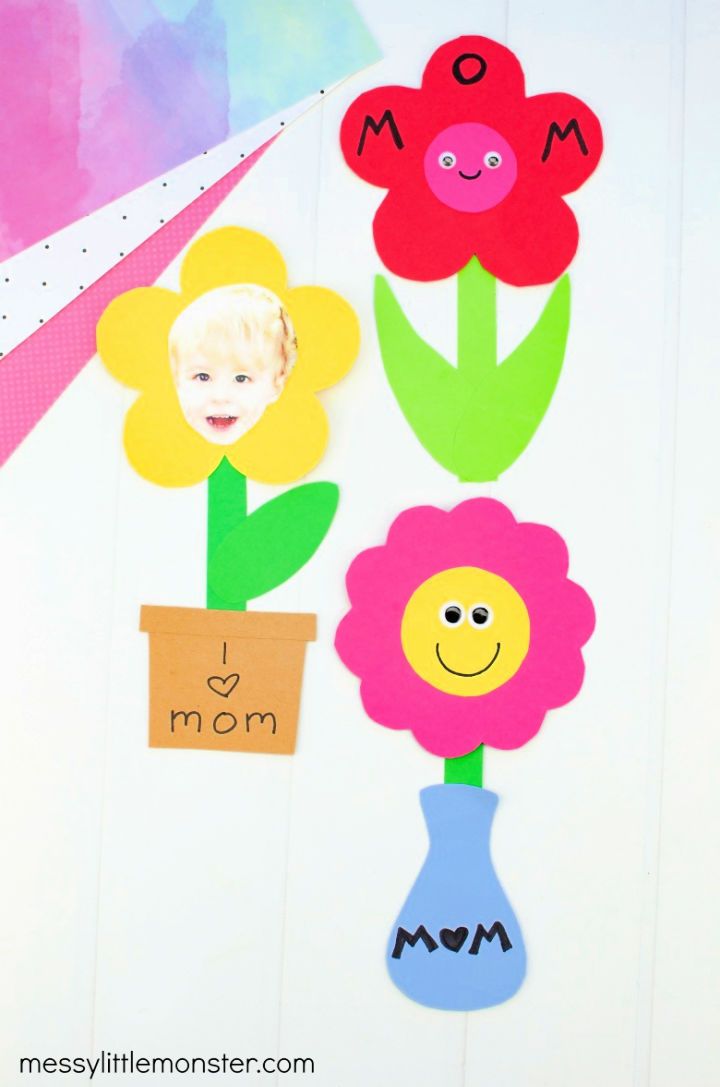
This DIY mix & match flower craft is an innovative idea that is simple to make. Mixing and matching different flower heads, stems and vases with the free template is fun. The materials needed for this craft are colored cardstock, a flower template, a black marker, googly eyes, a glue stick and scissors. Optional materials include a photograph.
The step-by-step instructions are as follows:
1) Print the flower templates on colored cardstock and cut out the flowers.
2) Draw a stamen in the center of each flower using a black marker.
3) Add googly eyes to the stamen.
4) Cut out stem shapes from green cardstock and glue them to the back of the flowers.
5) Arrange the flowers in a vase or pot and enjoy! littlemonster
8. Beautiful Spring Flower Wreath Craft
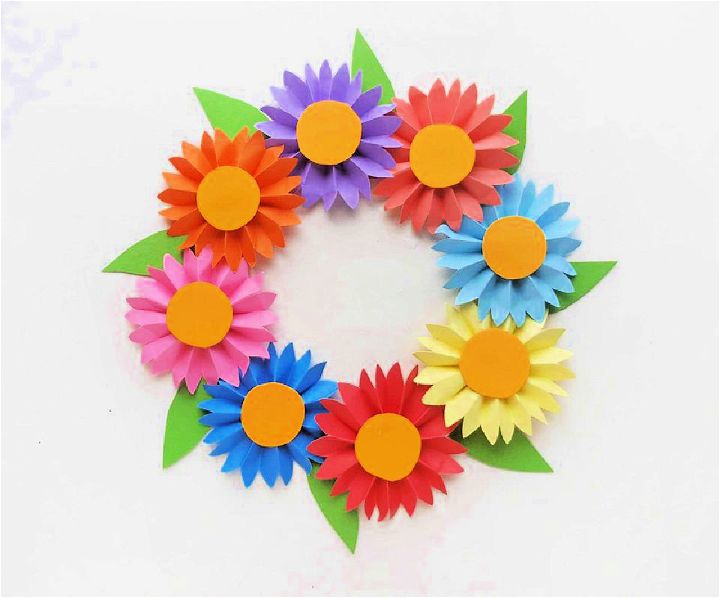
A DIY spring flower wreath is a beautiful and easy way to add a whiff of spring to your decor. This project is superb for kids and adults alike. You can use accordion folds or any other method to DIY this cute gift on Mother’s Day. This craft is also simple enough to make, with just a few materials needed. You will need craft paper in various colors (including green), cardstock paper, a pencil or pen, scissors, and glue. Once you have gathered your materials, follow the step-by-step instructions below to create your own flower wreath.
- Begin by tracing a template of a small circle onto the center of your cardstock paper. This will be the base of your wreath.
- Cut out the traced circle from the center of the cardstock paper.
- Next, take your craft paper and begin accordion folding it into small strips. You will need around 5-6 strips total, depending on how full you want your wreath to be.
- Once you have all of your strips accordion folded, begin gluing them onto the cardstock base, starting from the outside and working your way in. Make sure to overlap each strip so that no cardstock base is showing through.
- Continue until the entire wreath is covered with craft paper flowers. Let the glue to dry completely before displaying or gifting your handmade spring flower wreath! inspirationedit
9. How to Make Dried Flower Candles
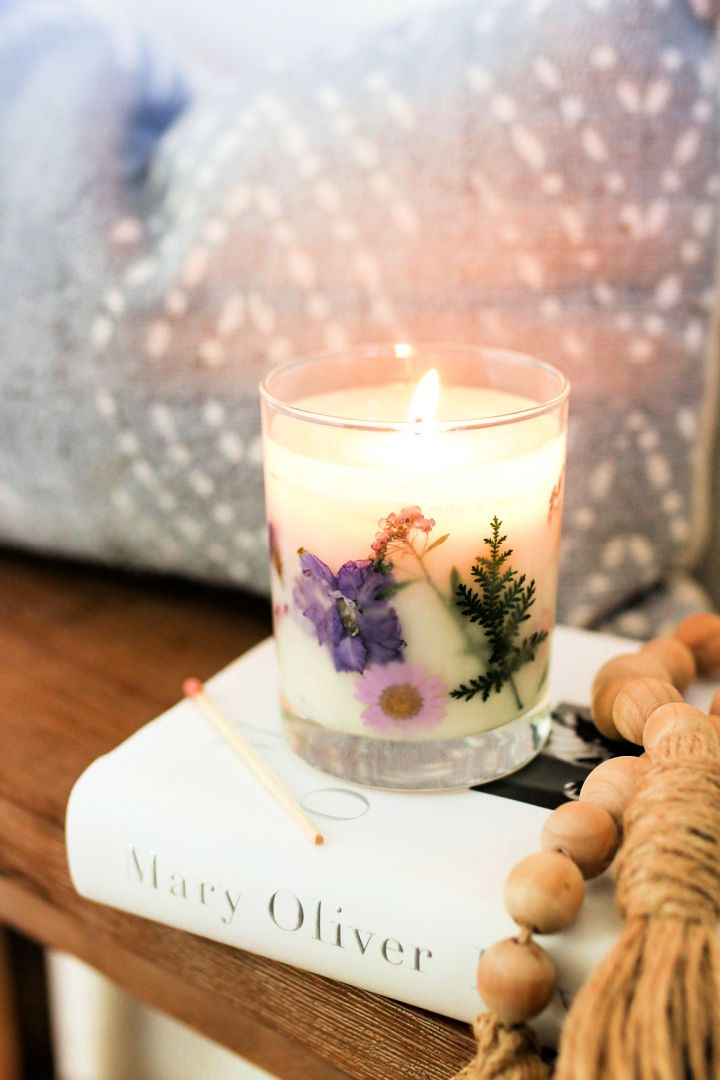
These DIY dried flower candles are a beautiful, easy-to-make decor item that can also be given as a thoughtful and thrifty gift. This project only takes about three hours to complete, and the materials are easily accessible.
All you need is some dried pressed flowers, paraffin or soy wax, cotton wicks, clothespins or chopsticks, essential oils, and two glass containers of different sizes – one that is slightly narrower with straight sides. You will also need a Pyrex measuring cup and a small saucepan or double boiler.
First, melt the wax in a saucepan or double boiler over low heat. Once the wax is melted, remove it from the heat and add 30-40 drops of essential oil; stir well. Next, take your wider container and place the smaller container inside. Tape the edges of the smaller container to the larger one to secure it in place.
Then, use clothespins or chopsticks to hold the wicks around the perimeter of the smaller container. Leave enough slack to lower the wicks into the melted wax later. Once the wicks are secured, slowly pour the wax mixture into the larger container until it reaches just below the rim of the smaller container inside. Gently lower the wicks into the wax, being careful not to disturb their placement too much.
Allow the candles to cool undisturbed for several hours until they are hardened. Once they are cooled and hardened, trim the wicks to about half an inch, and your dried flower candles are ready to enjoy! hellonest
10. DIY Bookmarks With Pressed Flowers
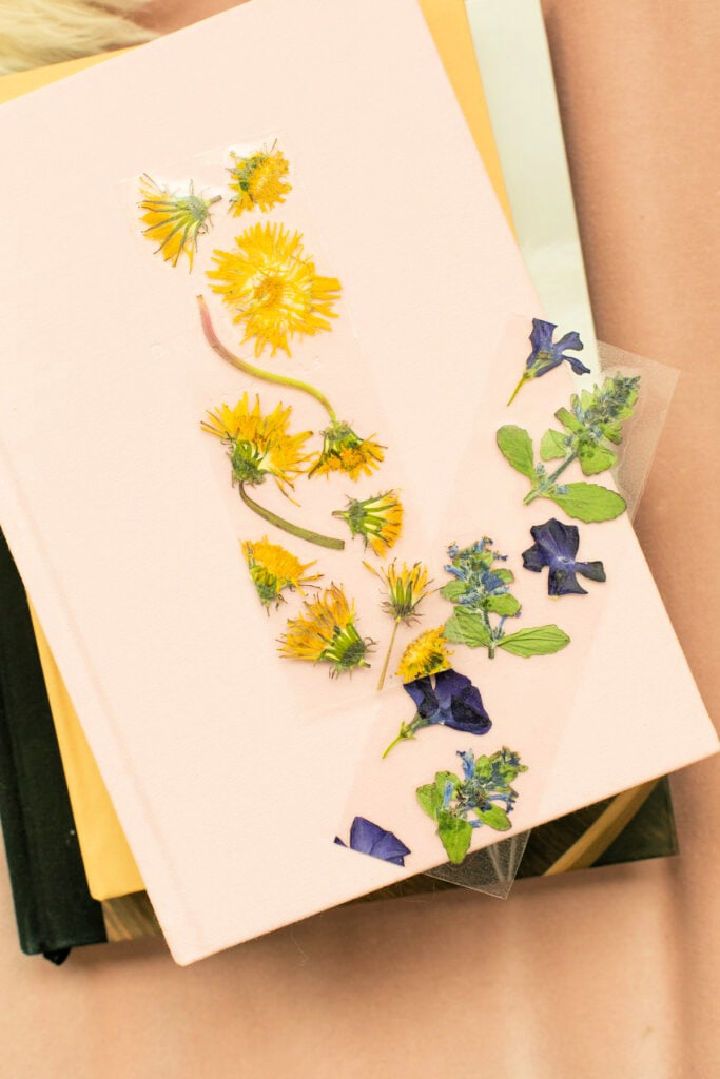
These handmade pressed flower bookmarks are a fun and easy craft to make with kids. All you need are some fresh flowers or leaves, heavy books, scissors and clear contact paper.
To make your own bookmarks, place the flowers or leaves between two sheets of contact paper and sandwich them between the pages of a heavy book. Place a bulky weight on top of the book and let it sit for several days.
Once the flowers are dried, carefully cut around them with scissors and enjoy your beautiful DIY bookmarks! lovelyindeed
11. Japanese Herbarium Bottles for Adults
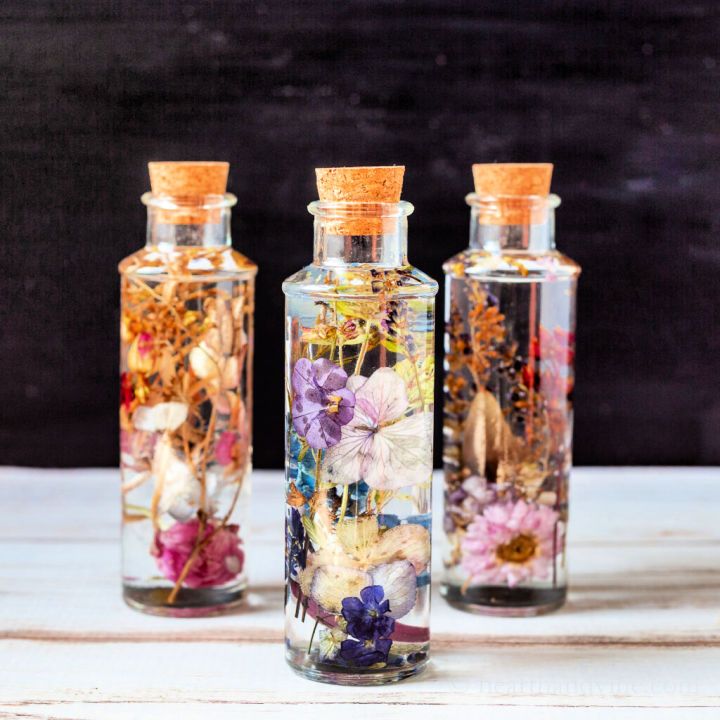
These DIY Japanese herbarium bottles are an excellent way to display your dried flower collection. They also make for beautiful, unique decor pieces that are handmade and easy to make.
Simply gather your materials, which include dried flowers, glass bottles, baby oil or mineral oil, a long wooden skewer, and a candle (optional), then follow the step-by-step instructions below. These herbarium bottles make an excellent gift and are also great for adding a personal touch to any room in your home. So get creative and have fun! hearthandvine
12. How to DIY Dried Flowers in Resin
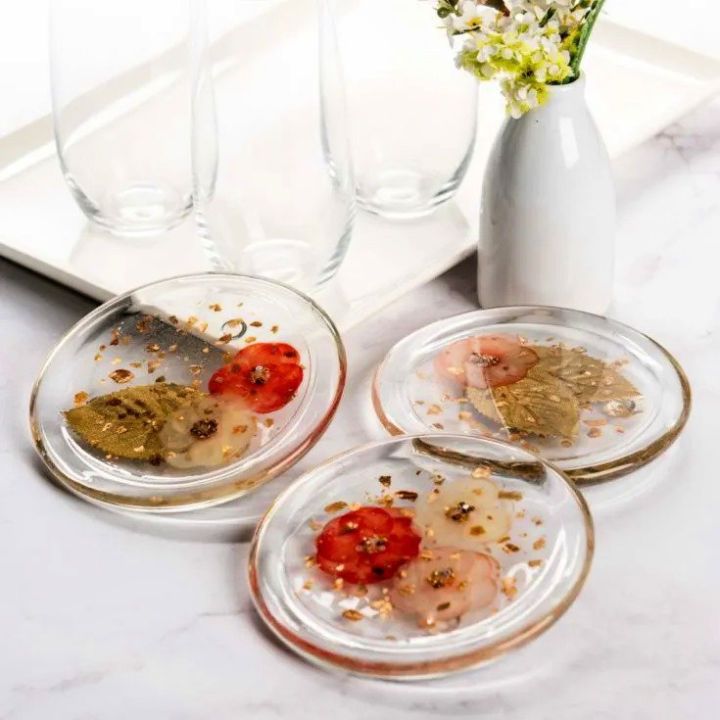
DIY crafts are a great way to personalize your home and express creativity. One of the most popular DIY projects is creating dried flowers in resin. This project is easy to make, and it looks beautiful when it’s finished. You can use any flower you like and add other embellishments to personalize your piece.
To start, you’ll need epoxy resin, a surface or silicone mold, personal protective equipment, mixing cups and craft sticks, tweezers, additives, a timer, and a butane torch.
Once you have all of your materials gathered, follow the step-by-step instructions below to create your own dried flowers in resin.
- Begin by putting on your protective equipment. This includes gloves, goggles, and a respirator mask.
- Mix the epoxy resin according to the manufacturer’s instructions.
- Once the resin is mixed, add your dried flowers and other embellishments to the surface or mold.
- Use tweezers to place the flowers where you want them.
- Allow the resin to cure overnight.
- Remove the cured resin from the mold or surface the next day.
- Use a butane torch to smooth any rough edges on the piece.
- Your dried flowers in resin are now ready! modpodgerocks
13. DIY Fake Flower Letters
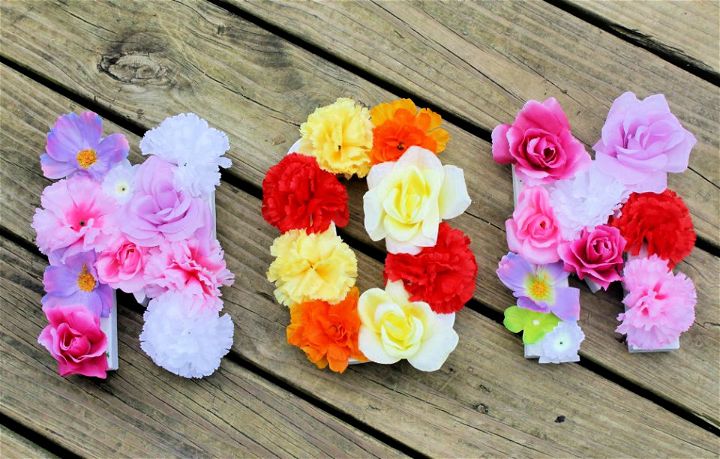
These homemade flower letters are a simple, beautiful decor that can be made for less than $2. They’re perfect for a girl’s room, as these letters can be given as a personalized gift and lovely decoration. They’re also easy to make for kids and adults! Making DIY flower letters is easy, gather your materials, follow the step-by-step instructions below, and enjoy your lovely new DIY decoration. everydaysavvy
14. Making 3D Flower Bookmarks
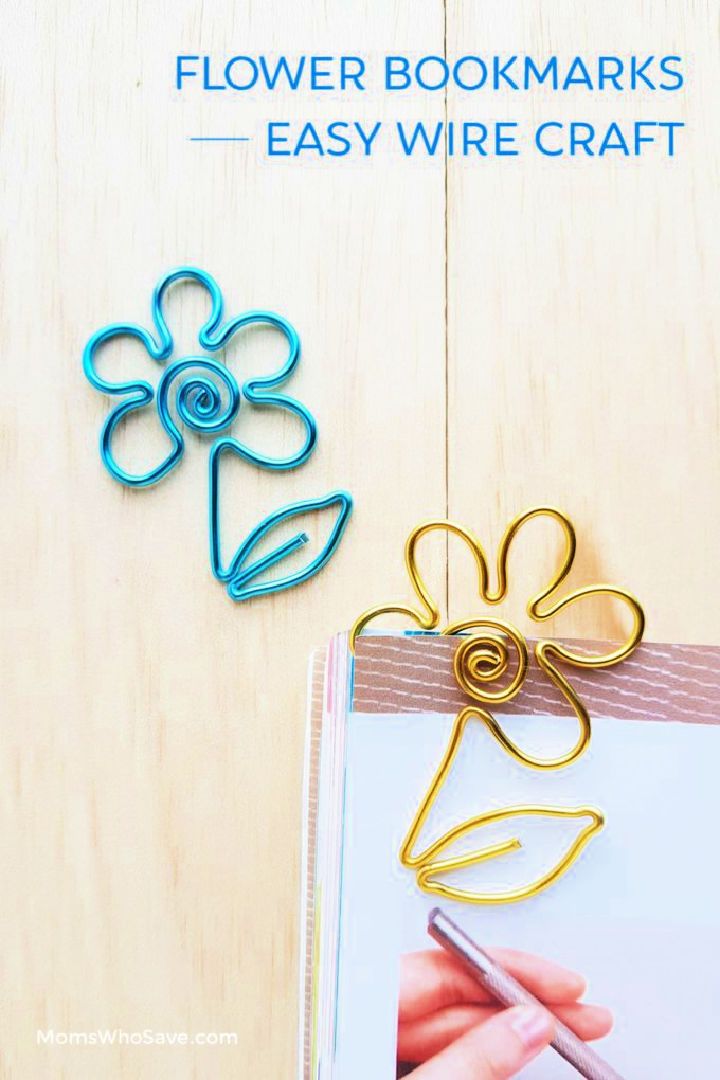
These DIY aluminum flower bookmarks are a great way to add a personal touch to your gifts or decorate your own books. These flowers are easy and quick to make, and they look adorable. You can use any color of aluminum craft wire, and 16 or 18-gauge wire works best. You will also need a template and craft pliers (looping, cutting and flat nose pliers). The template can be found in the tutorial.
To make the bookmark, first cut a length of wire. Then, use the pliers to make a loop at one end of the wire. Next, thread the other end of the wire through the loop to create a petal shape. Repeat this process until you have six petals.
Finally, the flat nose pliers gently bend the petals up and out, forming a 3D flower shape. These aluminum flower bookmarks make great gifts and will surely bring a smile to any recipient’s face. momswhosave
15. Modern Spring Floral Wreath
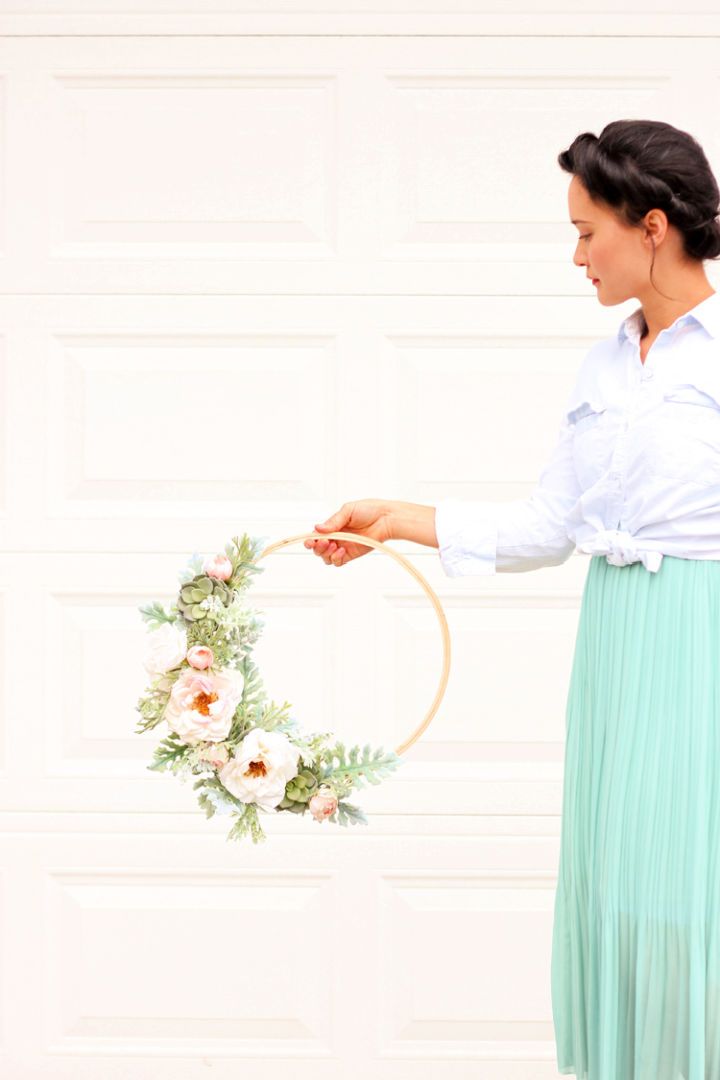
This DIY spring floral wreath is a beautiful spring decor. This trendy-looking wreath is easy to make and cheaper. You can use large blooms, coordinating greenery, smaller accent blooms, and sprigs of succulents. You will also need a 14-inch embroidery hoop, floral wire, hot glue, a glue gun, wire snips, and pliers.
Follow the step-by-step instructions below to DIY your own modern spring floral wreath.
First, gather your supplies. Next, take the embroidery hoop, wrap the floral wire around the top portion a few times, and then twist it to secure it. This will serve as the base of your wreath.
Now it’s time to start adding in your flowers and greenery! Begin by attaching your larger blooms to the hoop using the wire. Once you have added in all of your large blooms, move on to adding in the greenery. Start by wrapping a piece around the hoop and then continue adding more pieces until you are happy with the fullness of the wreath.
To finish up, add your smaller accent blooms and succulents. Once you are happy with the overall look of your wreath, cut off any excess stems and leaves. Your lovely modern spring floral wreath is now complete! Enjoy! deliacreates
16. Valentine’s Day Paper Flowers Craft
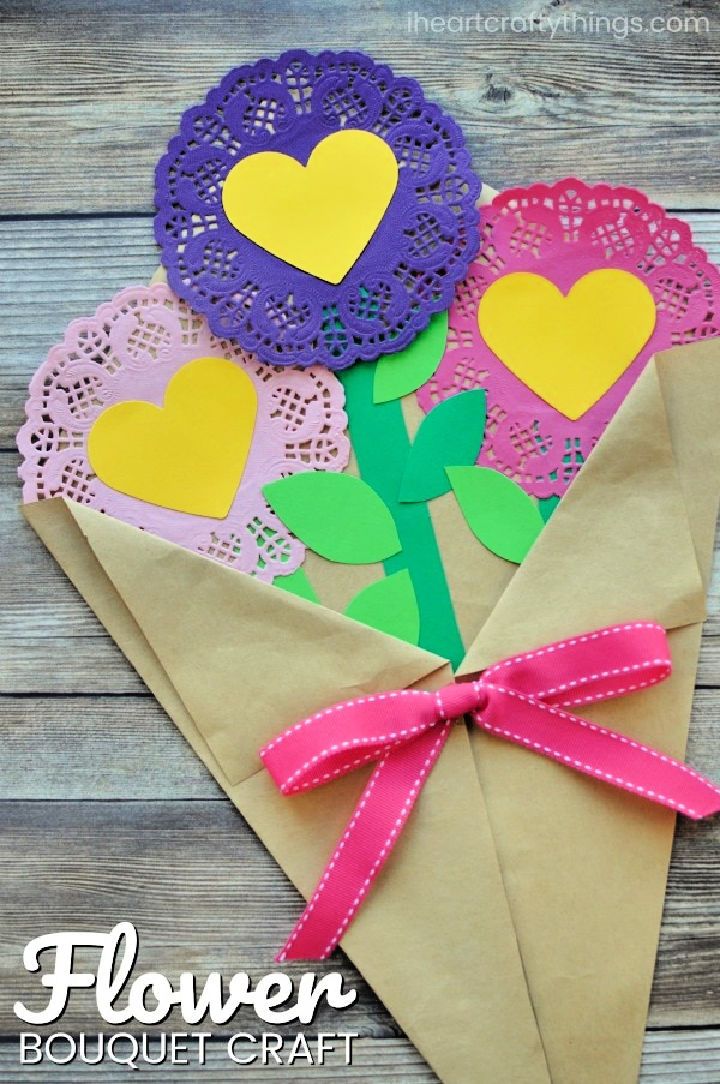
These DIY paper flowers will be stunning, lovable, and meaningful gifts for our special or loved ones this valentine’s day. They are easy to make with simple materials that you may already have at home.
With some brown craft paper, colorful doilies, green and yellow cardstock or construction paper, a heart punch (optional), ribbon, scissors, and glue, you can make these beautiful valentine’s day paper flowers.
For step-by-step instructions on how to make these paper flowers, follow the simple instructions in the tutorial. These DIY valentine’s day craft is the perfect way to show your loved ones how much you care! craftythings
17. DIY Paper Flowers Backdrop
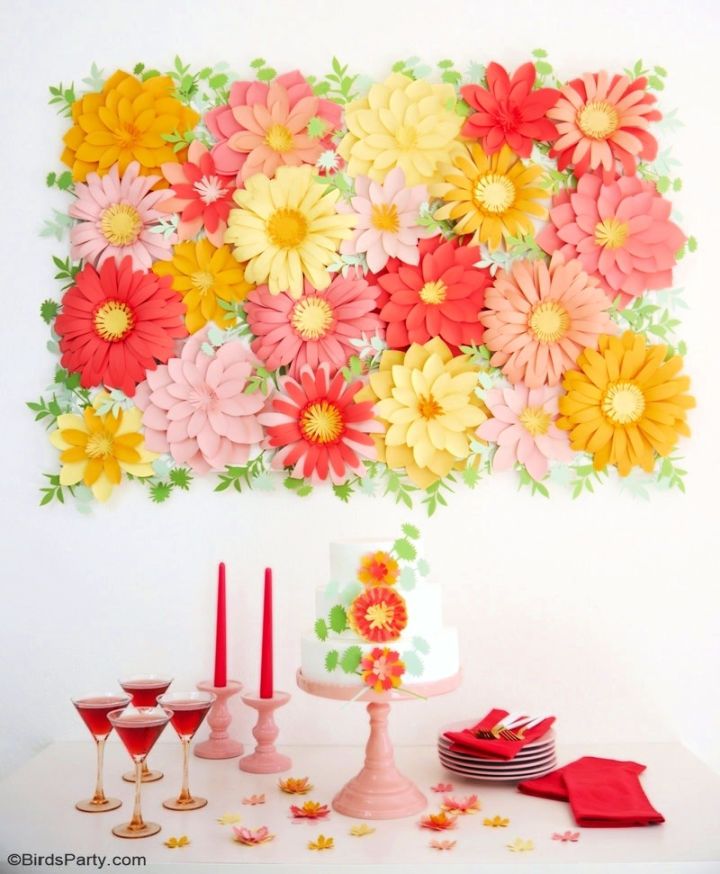
These DIY paper flowers backdrop is a beautiful and easy way to add color and life to any event or space. Using just a few simple materials, you can create a stunning floral backdrop perfect for decorating parties, photo booths, weddings, and events. Plus, these paper flowers make an excellent piece of art for home decor. Best of all, they are super easy to make!
To create your own floral backdrop, you will need cardstock in your desired colors, hot glue, a large canvas and a few other supplies. Once you have gathered your supplies, follow these easy steps:
- Cut your cardstock into a few inches of strips.
- Fold the strips in half, and accordion fold them.
- Cut the end of each strip into a point.
- Unfold the strip and curl the edges inward.
- Hot glue the center of the strip to the canvas. Repeat with the remaining strips until the entire canvas is covered in flowers! sizzix
18. Crepe Paper Calla Lily Flower Craft
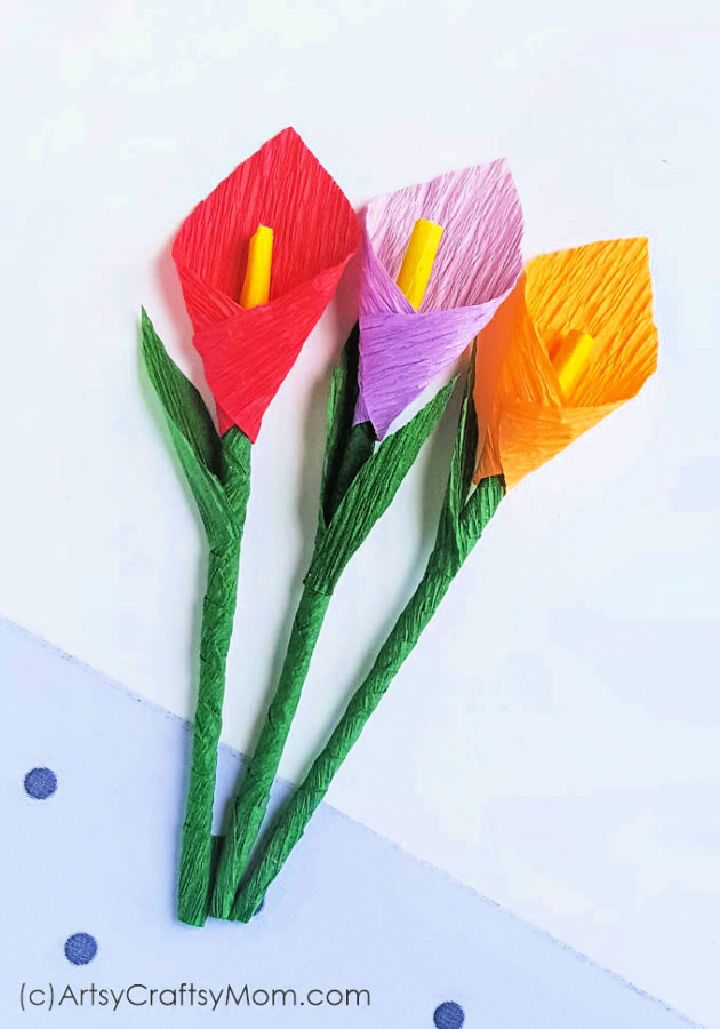
This DIY crepe paper calla flower craft is easy and fun to make. You can use them to decorate your home or office. They are also great gifts for friends and family. Making these calla lily flowers is a great way to show your creative side.
With just a few handy supplies, you can create stunning blooms that will brighten up any space. To make crepe paper flowers, you will need crepe papers in assorted colors, glue, white construction paper and scissors. So grab your supplies and get started today on this project! craftsymom
19. Easy DIY Spiral Paper Flower Heart
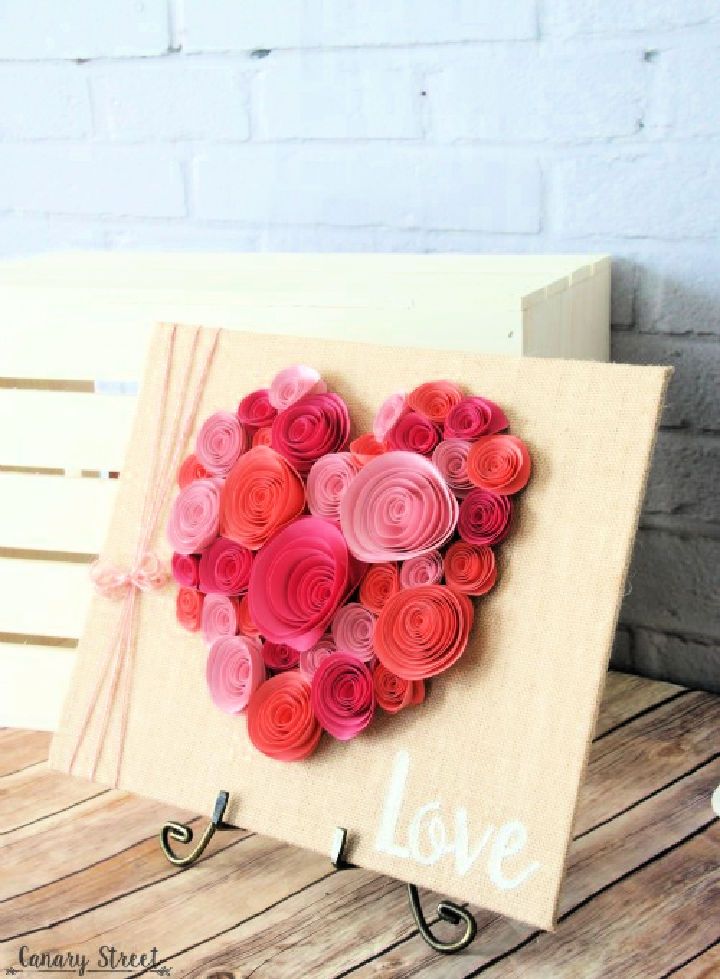
DIY projects are a fabulous way to add a unique touch to your home décor. If you’re looking for a stylish and elegant way to show your loved ones how much you care, consider making DIY spiral paper flower hearts.
These beautiful flower crafts are easy to make and can be customized to match any décor. Plus, they make stunning decor for Valentine’s Day or any other special occasion. Best of all, they’re so easy to make that even the most crafting-challenged individual can create a work of art. So, give it a go! streetcrafts
20. Fresh Floral Napkin Rings Ideas
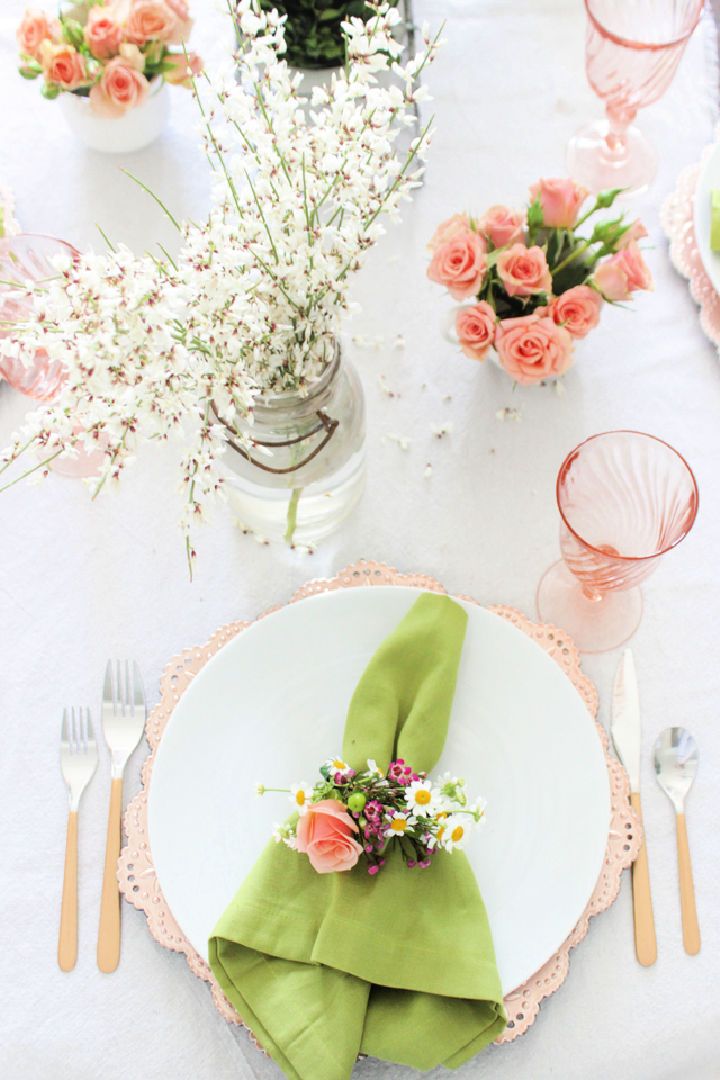
These homemade floral napkin rings are a beautiful and inexpensive way to add a touch of spring to any tablescape. They are perfect for Easter brunch, a garden party, a baby shower, or even a wedding. You can create these lovely napkin rings from scratch with just a few supplies and some simple steps. All you need is a plain napkin, fresh flowers and greenery, and some ribbons or twine.
Simply fold the napkin into a ring and slip it over the ribbon or twine to get started. Then, begin attaching your flowers and greenery to the ring, working in small sections until the entire ring is covered. These lovely floral napkin rings are a beautiful way to add a touch of spring to any tablescape! shadesofblue
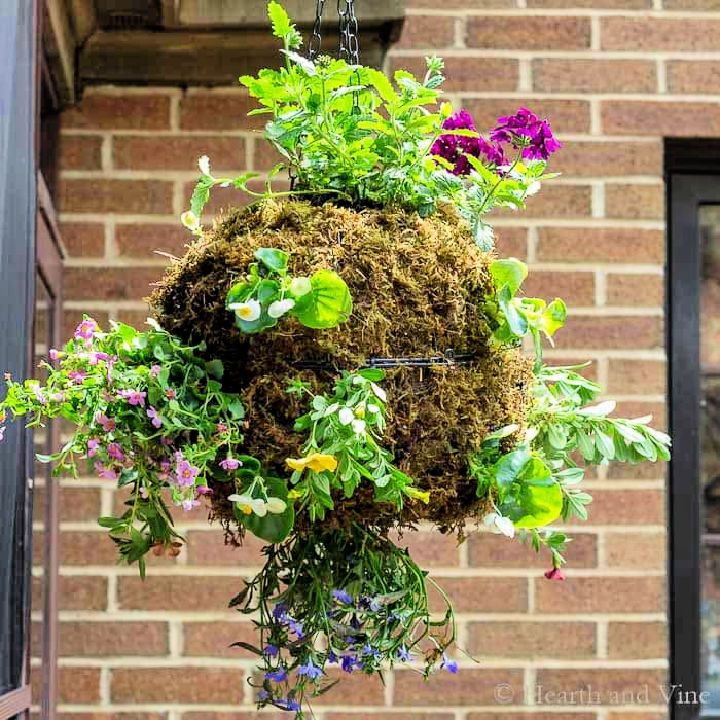
21. A Hanging Moss Globe Planter for Flowers
22. Tissue Paper Flower Bracelet Crafts for Kindergarten
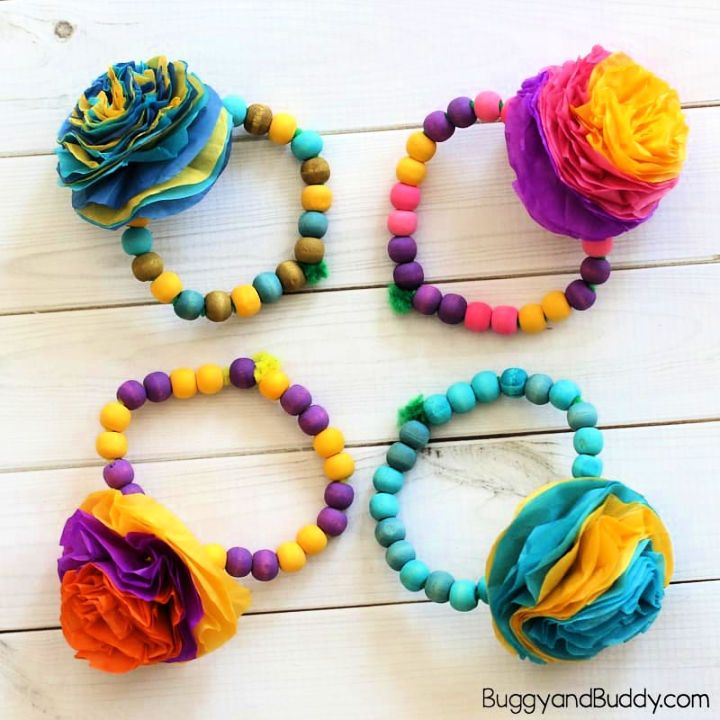
This DIY tissue paper flower bracelet is a fun craft for kids. It is also a wonderful gift for Mother’s Day, Teacher’s Day, or to give to friends. The supplies you need are tissue paper in various colors, a single-hole punch, scissors, a pipe cleaner, and beads. The step-by-step instructions are easy to follow:
First, cut the tissue paper into circles. Next, layer all the pieces together evenly and punch a hole in the center. Then, line the pipe cleaner through the holes and tie a knot. Finally, add beads to the pipe cleaner’s ends and tie a knot to secure the beads. Your handmade paper flower bracelet is now complete! buggyandbuddy
23. DIY Flowering Branches
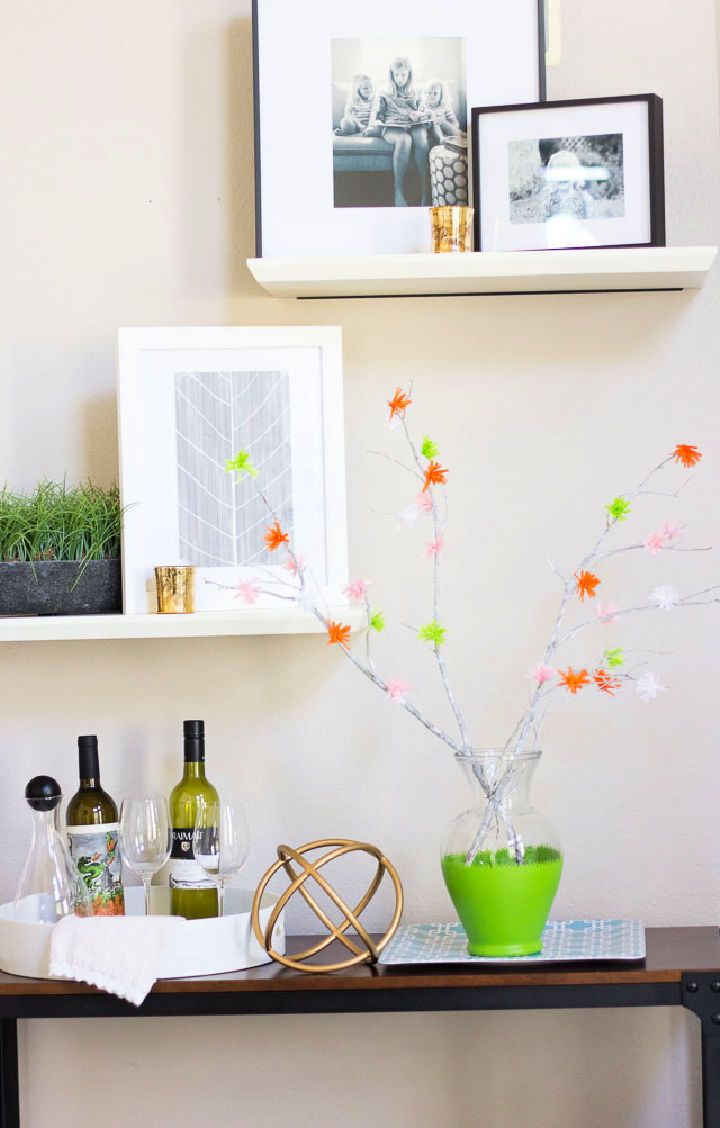
These DIY flowering branches are a charming way to decorate your home for spring. You can transform ordinary branches into beautiful blooms with just a few supplies. First, use fringe scissors to cut streamers into thin strips. Next, thread the strips onto a darning needle or toothpick, and poke the needle into the branch to attach the crepe paper streamers.
Once all of the streamers are in place, cut them to varying lengths to create a fuller flower effect. Finally, use adhesive stencils and green paint to add leaves to the branches. Once the paint is dried, arrange the branches in a glass vase and enjoy your DIY springtime bloom! designimprovised
24. DIY Pom Pom Flower Bookmark
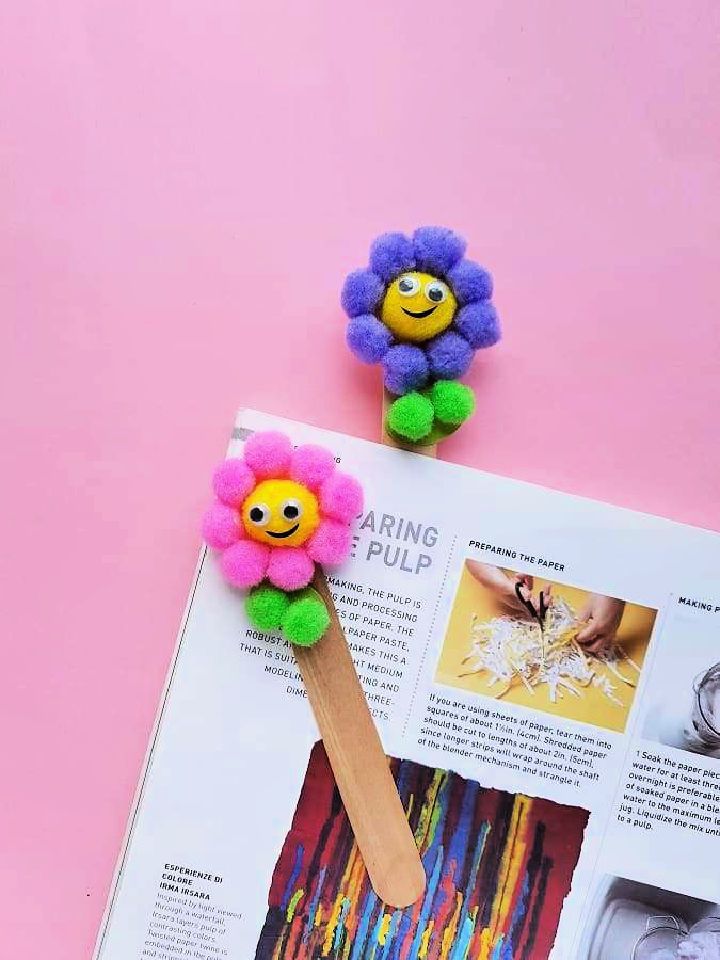
This DIY pompom flower bookmark is so adorable, and they’re fun to make, too! It is a great kid-friendly craft that’s perfect for spring. And it also makes a super cute gift for kids, too! All you need are some colorful pompoms, popsicle sticks, craft glue, scissors, googly eyes, and craft paper. Follow the step-by-step instructions below to make your own pompom flower bookmark and let your kids enjoy a cute new addition to their books. twokids
25. Flower Painted Rocks Craft Ideas
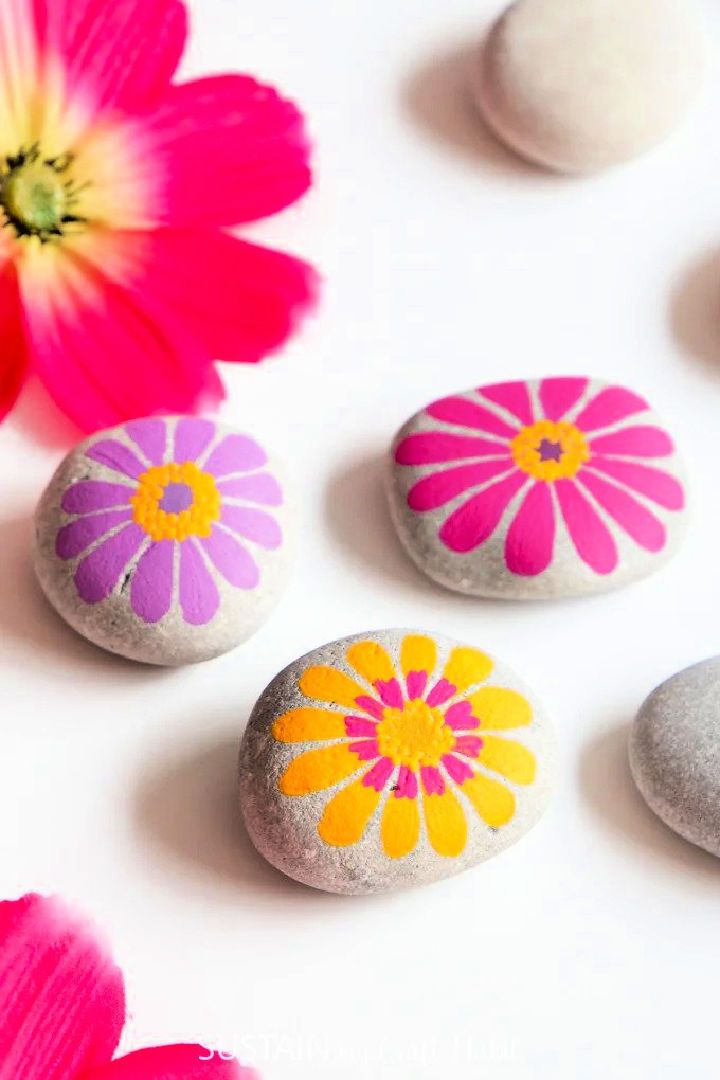
These DIY flower-painted rocks are a fun and easy way to add a speck of color to your home or garden. With just a few supplies and a quick afternoon, you can make these cheerful flowers that will brighten up any space. This is also a thrifty project – rocks are free, and you can use recycled paint. So gather up your supplies, and let’s get started!
First, gather your rocks and sort them by size. You’ll want to use smaller rocks for this project so that they are easy to handle and paint. Next, select your paint colors. Use Decoart Americana Acrylics in Magenta, Lilac Meadow, Summer Squash, Lamp (Ebony), and Black. Start by painting, for this, dip your brush in the paint and then tap off any excess onto a paper plate.
Starting with the lightest color, begin painting the rocks. Use a light touch for the first color so that the other colors will show through. Once the first color is dried, add the next color and so on. You can be as creative as you like with your color choices – try different combinations to see what you like best.
Let the paint dry completely before moving on to the next step. Once the paint is dried, use a black marker to add stamen details in the center of each flower. To finish, spray a light coat of sealer over the rocks to protect the paint and voila – you’re done! Your beautiful flower-painted rocks are ready to add lively home or garden decor, and you can also give them as a lovely gift. So have fun crafting! crafthabit
26. Artificial Flower Wall Backdrop
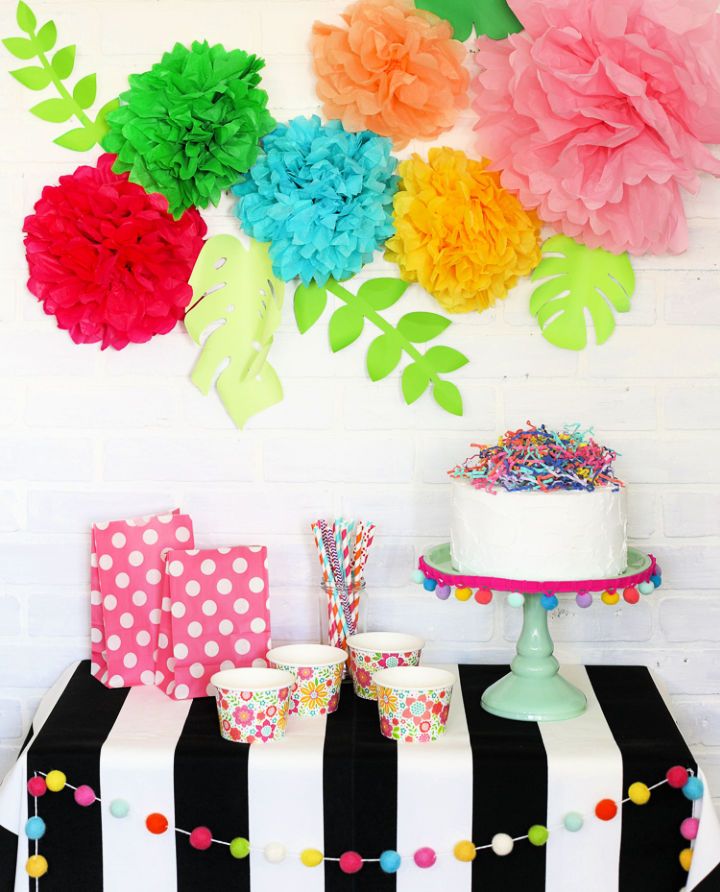
These homemade tissue paper flowers are a fun and cheap craft that can add a touch of beauty to any home. They are also incredibly easy to make! All you need is a stack of tissue papers in assorted colors, a stapler, and scissors.
To create your flowers, stack the tissue papers on top of each other and cut them into strips. Then, fold the strips in half and staple them together in the middle. Once all of your strips are stapled together, begin folding them up from the bottom to create the flower shape.
Finally, fluff out the tissue paper to give your flower some volume and voila! You have now made your very own pretty tissue paper flower. Happy Crafting! thecraftpatch
27. Easy Crepe Paper Flower Wreath
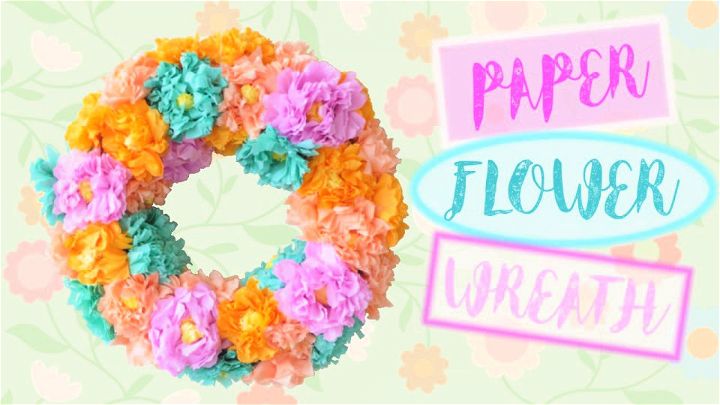
Dress up your front door for spring with this DIY crepe paper flower wreath. This inexpensive wreath is easy and quick to make, and it’s absolutely beautiful. You’ll need a straw wreath, crepe paper, yarn, scissors, and a ruler.
First, cut the crepe paper into strips. For each flower, you’ll need two strips. Accordion-fold each strip, and then twist the center to create a spiral. Next, overlap the two larger spirals to form the base of the flower and secure it with yarn. For the petals, take three of the smaller spirals and arrange them around the base of the flower, overlapping in the center. Secure with yarn, and repeat with the remaining petals.
Once your flowers are made, attach them to the wreath with yarn. Hang your gorgeous wreath on your front door or anywhere else in your home that could use a little bit of springtime cheer.
28. Paper Flower in a Pot Craft
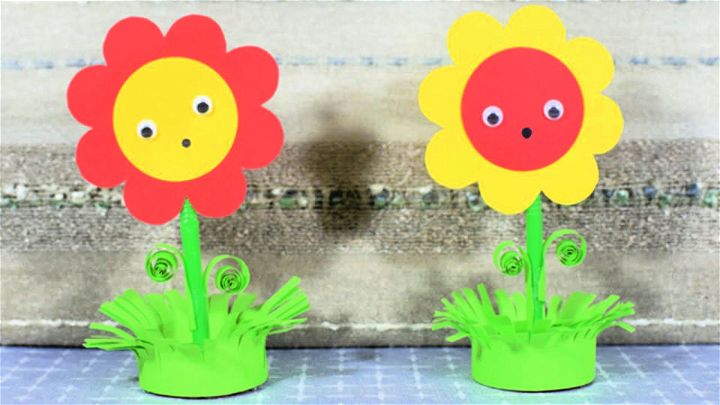
This DIY paper flower in a pot craft is beyond adorable and super easy and fun to make! It’s the perfect craft that you can whip up in minutes with your kiddos. They will love adding their own touch by decorating their flower pots with googly eyes.
The best part is this paper flower craft makes the perfect addition to any room, as it is super cute and compact. Plus, it is inexpensive to make! So, what are you waiting for? Gather your supplies and follow the step-by-step instructions in the tutorial to make your own handmade flower pot.
29. Flower Art Project for Summer
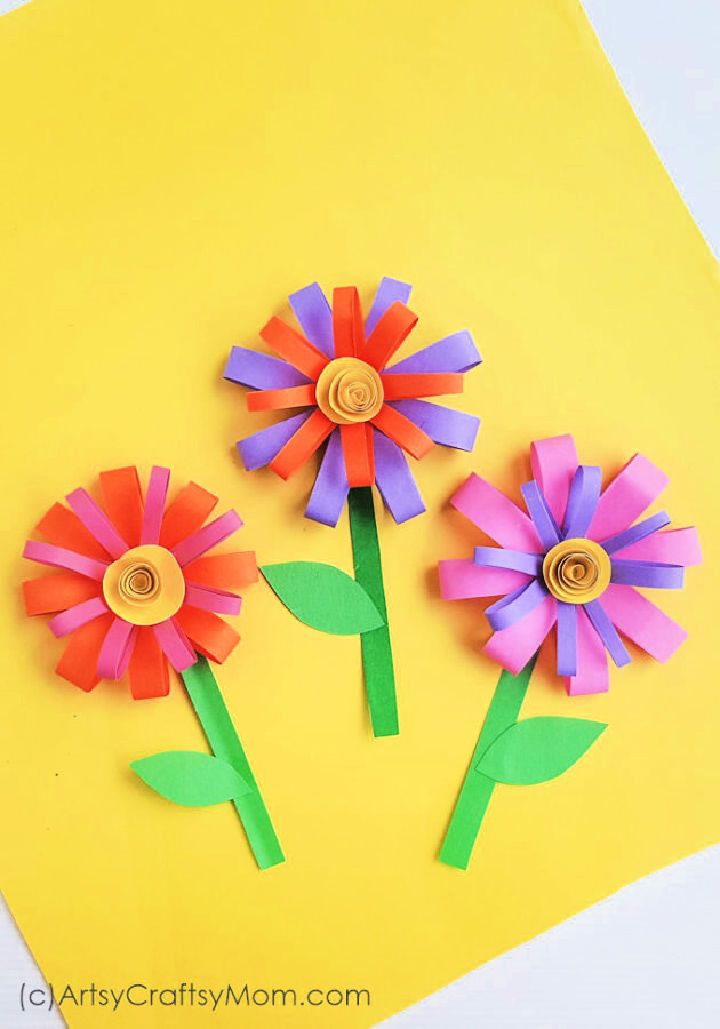
This DIY paper flower craft is a colorful and cheerful décor for summer that will always brighten your home’s look. It is a cool craft that is simple to make in a snap. The supplies you will need for this craft are craft paper in purple, orange, green and yellow, glue and scissors.
The step-by-step instructions are as follows:
1) Cut a strip of paper as guided in the tutorial.
2) Fold the strip of paper in half lengthwise and then in half again.
3) Cut along the folded edge to create fringe.
4) Open up the strip of paper and apply glue to one end.
5) Roll up the strip of paper to form a flower shape.
6) Once you have reached the end of the strip, apply glue to secure it.
7) Repeat steps 1-6 with the remaining strips of paper.
This paper flower craft for summer is a beautiful decor that is easy to make. It will add a splash of color to any room. So give this craft a try this summer! craftsymom
30. Paper Plate Flower Craft
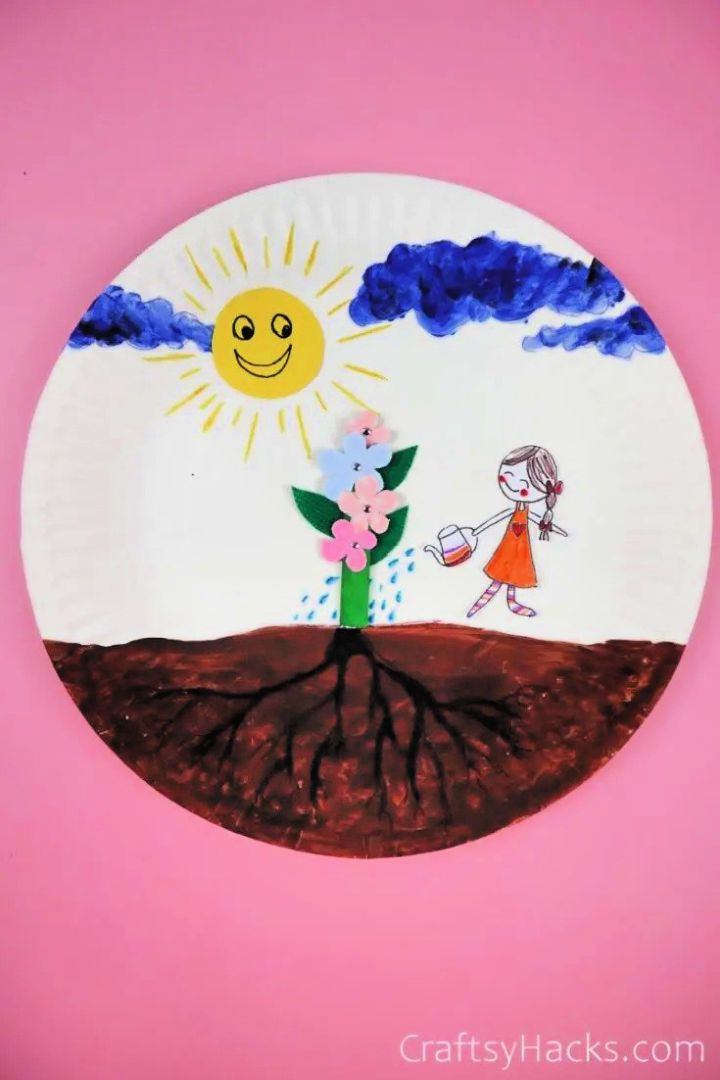
This DIY paper plate flower craft is a fun and easy weekend activity for the whole family. It’s a beautiful combination of a 2D summertime scene with 3D flowers and makes a lovely wall decoration for kids’ rooms. To make this craft, you will need a paper plate, a green craft stick or dyed lolly stick, glue, construction paper, acrylic paint, markers, a pencil, a pen, scissors, a brush, and a safety cutter.
Begin by tracing the outline of the paper plate onto the construction paper. Then, use the scissors to cut out the shape. Next, use the pencil to outline the flowers on the paper. Once you have the outline of the flowers drawn, use the scissors to cut them out.
Now it’s time to start painting! Begin by painting the sky blue and adding some white clouds. Then, paint the grass green. Once you have finished painting, it’s time to assemble the flower. Start by hot gluing the green craft stick to the back of the paper plate.
Then attach the construction paper flower to the front of the plate using hot glue or tape. Finally, add some details to your flower using markers or a pen. Your handcrafted paper plate flower is now complete! craftsyhacks
31. Flower Activity for Preschoolers
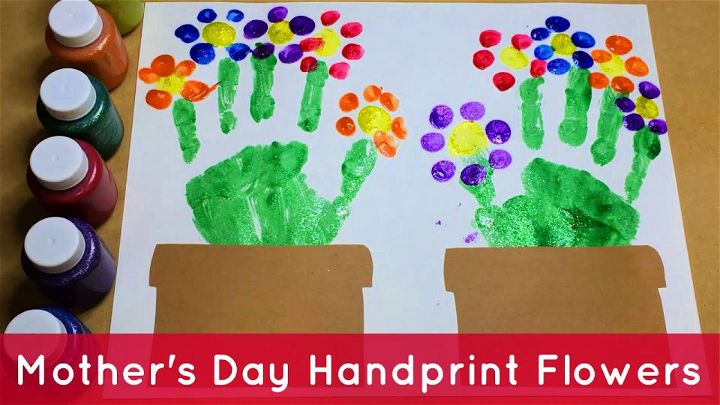
Celebrate spring with this fun and easy preschool craft! Handprint Flowers are perfect for a Mother’s Day gift or to bring life to any garden, flower, or spring theme. This craft activity is great for childcare centers, kindergartens, homeschools, and other educational environments. Get creative with your kids as they make these beautiful flowers using their own tiny hands! For more preschool activities and resources check out our site today!
32. Flower Art Activities for Toddlers
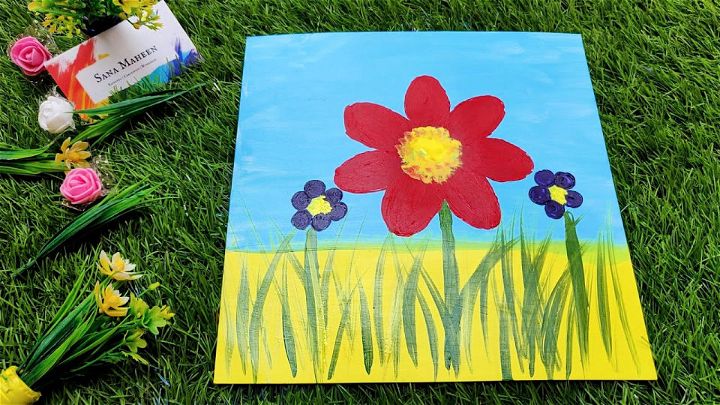
Bring the beauty of nature into your home with this fun painting activity for toddlers and kids! Follow these step-by-step instructions to create a beautiful flower painting without having to draw. Easily accessible for kindergarten age children, this art project is sure to be full of creativity and will bring smiles all around. Watch as your little ones develop their fine motor skills while learning about the wonders of nature – there’s no better way to spend an afternoon! Don’t forget to share the finished product so we can see how talented you are!
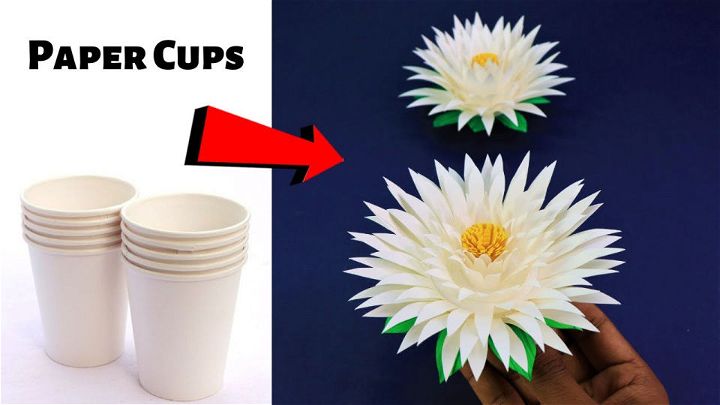
33. Paper Cup Flowers Craft
34. Cupcake Liner Flower Crafts
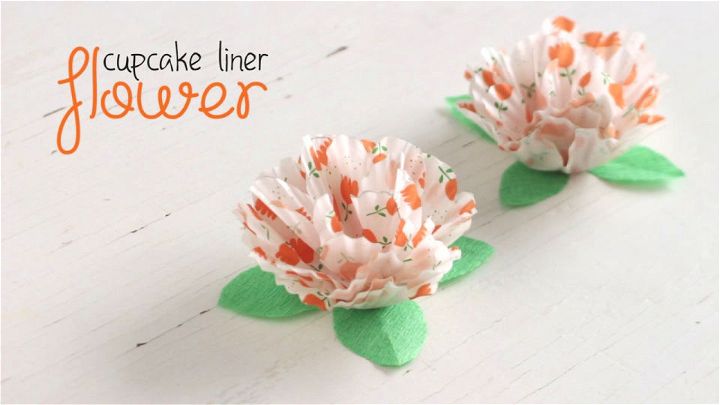
Do you want to make something special and unique for your home? Try making these beautiful Paper Cup Flowers! This easy-to-follow craft is perfect for any skill level and requires only a few materials. With these paper cup flower ideas, you can create stunning decorations or thoughtful gifts with minimal effort. Learn how to make flowers from paper cups and find out how versatile this DIY project really is! Start crafting today, and you’ll be amazed by the results!
35. How to Make Round Tissue Paper Flower
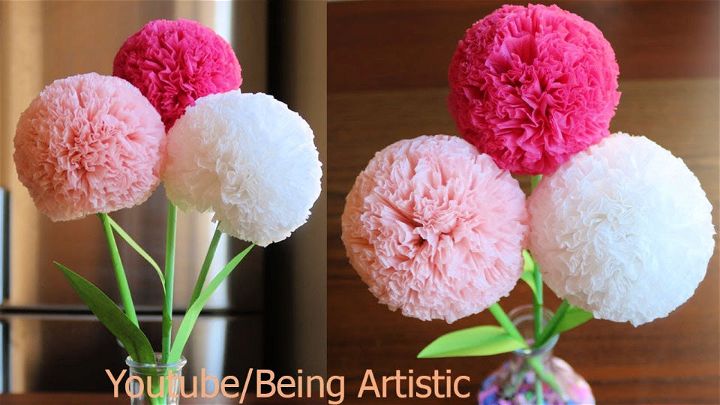
Transform your home decor with this simple and easy DIY tissue paper flower craft. Make beautiful flowers using 10x32cm tissue paper in just a few steps! No matter the occasion, you can make these gorgeous blooms to add a burst of color to any room. With detailed instructions, anyone can make round tissue paper flowers quickly and easily for any special event or everyday enjoyment. Bring some life into your space by crafting these vibrant decorations from the comfort of your own home!
Related Crafts for Kids:
Explore creative and fun crafts for kids! Keep your little ones entertained with unique projects like homemade cards, paper airplanes, painting, origami, and more.
- Earth Day Crafts: Discover fun, creative earth day crafts, and projects for kids that teach them about sustainability and the environment. Celebrate our planet!
- Clothespin Crafts: Bring out your child’s creativity with these creative clothespin crafts and ideas made just for kids! Fun and easy projects to keep them entertained.
- Ocean Crafts: Let kids explore the depths of their imagination with fun ocean-themed crafts and art projects! Perfect for children of all ages, these activities are sure to bring hours of creative entertainment.
- DIY Felt Crafts: Create fun, cute felt crafts with easy DIY projects and free patterns! Get creative with these simple yet stylish ideas for decorations, accessories, and more.
- Bee Crafts for Kids: Make adorable bee-themed crafts with your kids! From paper plate bees to buzzing bee puppets, find creative ideas for any age and skill level. Try these easy and educational craft projects today!
- Crafts for Teens: Check out easy crafts for teens! From fun DIY projects to quick and simple craft ideas, find something new to try. Perfect for any skill level!
- Yarn Crafts: Craft something unique with these easy yarn crafts! Get creative and make one-of-a-kind items from furniture to artwork with simple steps and materials.
- Button Crafts: Explore the creative side of crafting with these simple button art and craft projects. Make something unique for your home or as a thoughtful gift!
- Dinosaur Crafts: Bring the prehistoric world to life with these easy and fun dinosaur crafts and activities for kids. Perfect for at-home learning, parties or just having fun!
- Popsicle Stick Crafts: Make crafting fun with these easy popsicle stick crafts for kids! Create unique toys and decorations that are sure to spark your child’s creativity.
- Handprint Crafts: Make fun and easy crafts with your kids! These simple handprint crafts and art projects are perfect for little ones to create a lasting memory. Get creative and have fun!
Conclusion:
In conclusion, flower crafts and art projects are great ways to involve children in creative activities. As many different craft materials are available, making easy and fun flower crafts with just a few items is possible. These flower crafts not only allow kids to express themselves through art but also help them become more confident in their own abilities.

