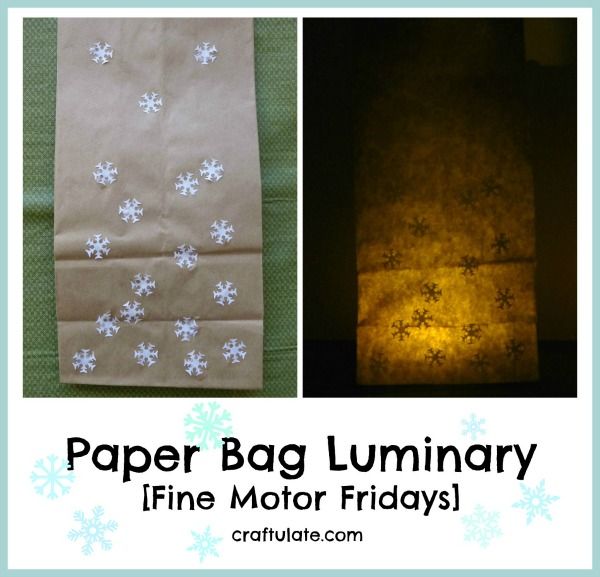
This paper bag luminary is a really fun way to get some fine motor practice – that results in lovely winter decoration!
The following post contains affiliate links, which means that at no extra cost to you I can make a tiny bit of money to help support this blog. Thank you!
Materials used:
- White paper
- Brown paper bag*
- Glue
- Snowflake Paper Punch
- Battery votive (tea light) candle*
* Both of these items were from the dollar store – they don’t have to be anything fancy!
![Craftulate: Paper Bag Luminary [Fine Motor Fridays]](https://media.craftulate.com/wp-content/uploads/2013/11/P1060290e.jpg)
Our first task was to get punching! I actually bought two paper punches as I wasn’t sure how hard they would be for F to use. Slipping the paper into the punch took a little practice, and then quite a bit of force was needed to push the punch down through the paper. F needed some help with pushing down the punch, but tried very hard to do it himself.
An unplanned part of this activity was that F loved matching up the punched snowflakes with the holes!
When we had punched out enough snowflakes, I got out the paper bag (placing it seam-side down if it has a middle seam on one side). To F’s delight I handed over the glue (his favourite craft material right now) and showed him how to stick the snowflakes onto the bag. I made one at the same time so that he could see how to do it, but without me interfering in HIS project.
Those little bits of paper got quite tricky to manipulate once everything got sticky!
![Craftulate: Paper Bag Luminary [Fine Motor Fridays]](https://media.craftulate.com/wp-content/uploads/2013/11/P1060482e.jpg)
![Craftulate: Paper Bag Luminary [Fine Motor Fridays]](https://media.craftulate.com/wp-content/uploads/2013/11/P1060483e.jpg)
Once the glue had dried I opened up the bag, put the battery candle inside, and switched off the overhead lights. They looked pretty effective! In daylight they don’t look like much, but with the candle inside F’s version looked *almost* as good as mine… 😉
F’s:
![Craftulate: Paper Bag Luminary [Fine Motor Fridays]](https://media.craftulate.com/wp-content/uploads/2013/11/Bag1e.jpg)
Mine:
![Craftulate: Paper Bag Luminary [Fine Motor Fridays]](https://media.craftulate.com/wp-content/uploads/2013/11/Bag2e.jpg)
Of course you don’t have to use snowflakes if you have a different type of paper punch. Or maybe skip the paper punch and glue on shaped sequins instead. Even random pieces of cut-up paper would look pretty good!


