These shrinky dink zipper pulls are easy and fun to make – and are completely customisable for each child!

I baked the test images in a preheated 300F oven. If you haven’t used shrinky dinks before then it is a great idea to run some tests first so that you get used to how they work. After a minute or two in the oven the shrinky dinks dramatically curl up, then slightly uncurl, making you panic that you’ll never get them flat. BUT – wait a little longer. If you’re patient then they will flatten out by themselves. If a shrinky dink curls up so much that it sticks to itself, you’ll need to use tongs or tweezers to carefully unstick it, before returning it to the oven.
Here are the before and after images and sizes for my test pictures:
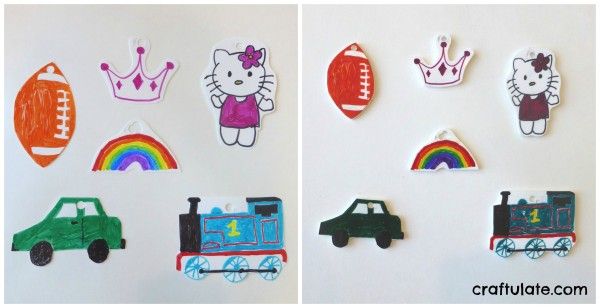
Princess Crown 2.5 x 1.75″ shrunk down to 1 x .75″ Kitty 3.5 x 2.25″ shrunk down to 1.5 x 1″ Car 3.5 x 2″ shrunk down to 1.25 x .75″ Train 3.5 x 2.75″ shrunk down to 1.25 x 1″ Rainbow 2.75 x 1.25″ shrunk down to 1 x .5″ Football 2 x 3.5″ shrunk down to 1.25 x .75″
Based on my tests, here are some tips for preparing the images:
- Some images work better on white film (eg the football), and other images would have worked better on clear film (like the car and train)
- The colors get darker after baking; use lighter colors where possible
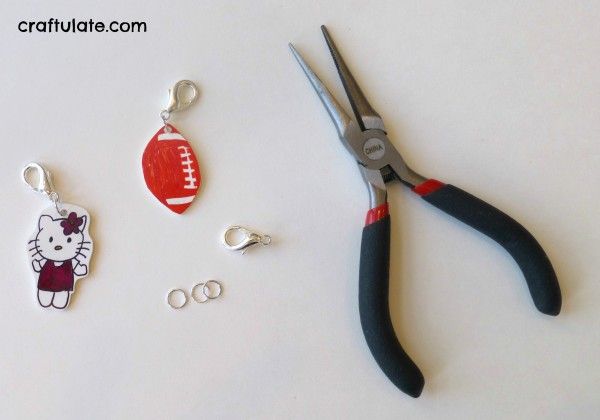
- If using jump rings to attach to the clip, only one hole punch is necessary
- Your zipper pull will look better if the hole is centred!
- Gaps in “colouring-in” WILL show after baking, especially when using white film
Here are some of my final designs!
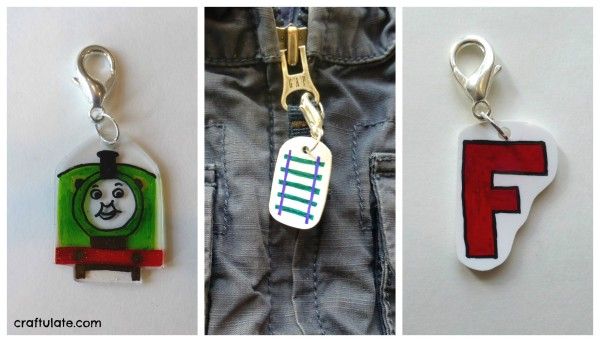
They can be used on coats or bags – and would make perfect gifts, especially for mailing!