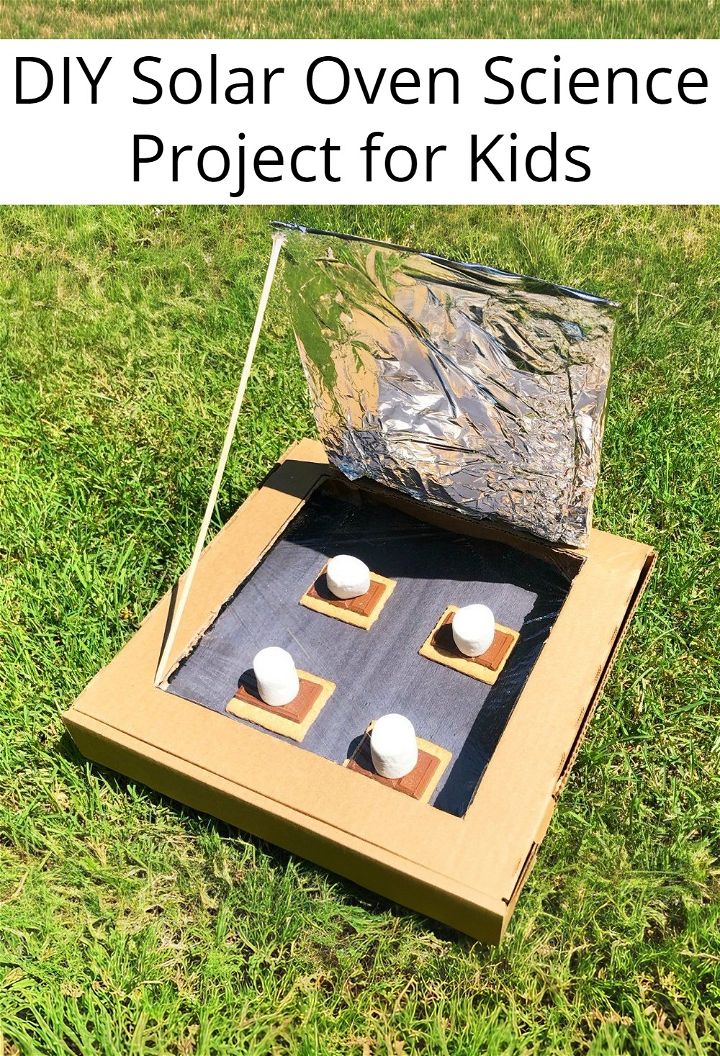
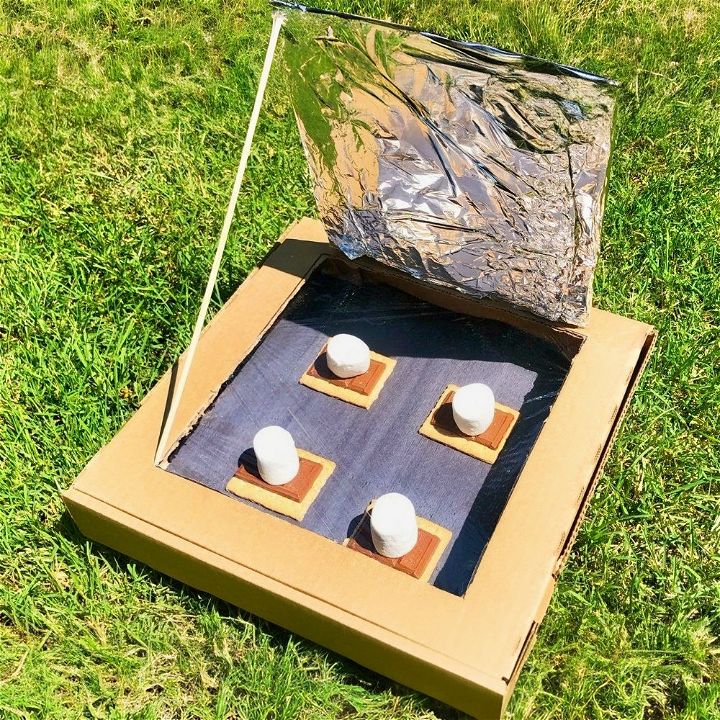
Here is a simple way to understand the power of renewable energy by making a DIY solar oven. It was a sunny day when I decided to try out this science project with my kids. The idea was to use the sun’s heat to bake cookies. I gathered my materials: a pizza box, aluminum foil, plastic wrap, and tape. It sounded easy, but making it work was a fun challenge.
This solar oven science project showed me renewable energy is simple and powerful, great for kids to learn about. I encourage you to try this solar oven science project activity for your kids and learn how a DIY solar oven works. It’s a great way to explore science, especially for kids or anyone interested in renewable energy. Let’s build now!

Materials Needed and Their Purpose
- Pizza Box: The foundation of our solar oven. Its compact size and ease of modification make it perfect.
- Utility Knife and Scissors: For cutting the pizza box and trimming materials to the right size.
- Black Construction Paper: It absorbs sunlight, converting it into heat within the oven.
- Aluminum Foil: Reflects and concentrates sunlight into the box.
- Clear Plastic Wrap: Seals the heat in while allowing sunlight to enter.
- Tape (Masking, Black Duct, and Aluminum Foil Tape): To secure everything in place.
- Glue (Optional): For attaching the black construction paper if tape isn’t available.
- Reflective Insulation: Enhances the oven’s ability to trap and reflect sunlight, though this is optional and can be substituted with more aluminum foil.
- Marshmallows and Other Ingredients: The treats you’ll cook in your solar oven.
Step 1: Prepare the Pizza Box
Start by drawing a flap on the top of your pizza box, leaving about an inch border around three of its sides. Carefully cut along these lines with a utility knife, creating a flap that you can lift to allow sunlight into the box. This step is where patience pays off; take care to make clean cuts.
Step 2: Line the Bottom with Black Construction Paper
Line the inside bottom of the pizza box with black construction paper. Secure it with glue or black duct tape. Remember, the black surface is key to absorbing the sun’s rays and heating up your oven.
Step 3: Add Insulation If Available
If you have reflective insulation, cut it to size and attach it to the underside of the flap you’ve created. This step is about maximizing sunlight reflection inside the box.
Step 4: Cover the Flap and Bottom with Aluminum Foil
Cover the flap’s exterior (now with reflective insulation if you’ve used it) and the interior sides of the box with aluminum foil, shiny side out. Use your tape to secure it. Make sure the foil is as smooth as possible to effectively reflect sunlight into the box.
Step 5: Seal with Clear Plastic Wrap
Cut two pieces of clear plastic wrap, each larger than the flap hole in the pizza box. Tape one piece on the interior and one on the exterior, creating a double-glazed window. This seals in heat while letting light pass through.
Step 6: Preheat Your Solar Oven
Place your solar oven outside in a sunny spot. Angle the flap so that it directs sunlight into the box. You might need to prop it with a stick or a straw. Give it about 30 minutes to warm up. The inside should get noticeably warmer, especially if it’s a sunny day.
Step 7: Cook Your Treats
Once preheated, it’s time to cook. Place your marshmallows or other ingredients inside, close the lid (without sealing it completely, to allow some air in), and adjust the flap to catch the sun. Depending on the sun’s intensity and your insulation, cooking can take anywhere from 30 minutes to an hour.
Understanding the Science Behind Solar Ovens
Solar ovens are a fascinating way to cook using the power of the sun. Here’s a simple explanation of the science that makes it possible:
- The Greenhouse Effect: Just like a greenhouse for plants, a solar oven uses clear plastic or glass to let sunlight in and trap heat. The sunlight passes through the transparent cover and is absorbed by the dark surfaces inside, which heats up the air and cooks the food.
- Reflection: The shiny aluminum foil or mirrors on a solar oven reflect more sunlight into the cooking area, increasing the heat.
- Insulation: To keep the heat from escaping, solar ovens are insulated. This means they have materials like newspaper, wool, or even air pockets that slow down the transfer of heat to the outside.
- Absorption: The inside of a solar oven is usually painted black because dark colors are good at absorbing heat. This helps to raise the temperature inside the oven to cook the food.
By combining these principles, a solar oven can reach temperatures high enough to bake, roast, or steam a variety of foods.
Tips for Best Results with Your Solar Oven
To get the most out of your solar oven, follow these tips:
1. Cook on Sunny Days: Solar ovens rely on sunlight, so pick a bright, sunny day for your cooking.
2. Preheat Your Oven: Just like a regular oven, let your solar oven warm up before adding your food.
3. Use the Right Cookware: Dark-colored pots and pans work best because they absorb heat more efficiently.
4. Adjust the Position: Every now and then, reposition your solar oven to face the sun directly, maximizing the heat.
5. Be Patient: Cooking with a solar oven takes longer, so give it time and start early if you’re planning a meal.
With these simple science concepts and tips, you can enjoy cooking with a solar oven while also being kind to the environment.
Educational Activities for Kids with Solar Ovens
Engaging children in building and using a solar oven can be a delightful educational activity. It’s a hands-on project that teaches about renewable energy, science, and cooking. Here are some ideas to make the experience both fun and educational:
1. Solar Oven Design Challenge: Encourage kids to design their own solar ovens using different materials. Compare which designs are most effective at cooking food or heating water.
2. Temperature Tracking: Have kids measure and record the temperature inside the solar oven at regular intervals. This can teach them about how the sun’s position affects the oven’s temperature.
3. Cooking Experiments: Test different foods to see which ones cook best in a solar oven. Kids can learn about heat transfer and cooking times.
4. Science Fair Project: Use the solar oven as a science fair project. Kids can explore questions like “Does the size of the solar oven affect its cooking power?” or “How does the type of insulation affect the oven’s efficiency?”
5. Solar S’mores: Making s’mores is a classic solar oven activity. It’s a simple and delicious way to show how the oven can melt chocolate and marshmallows.
6. Reflective Material Testing: Experiment with different reflective materials to see which one makes the oven hotter. This can include aluminum foil, mirrors, or reflective gift wrap.
7. Environmental Discussion: Talk about how using solar energy can reduce our carbon footprint. Discuss the benefits of solar power compared to traditional cooking methods.
8. Storytelling with Solar Cooking: Create a story around a dish that’s being cooked in the solar oven. For example, kids can pretend they’re chefs at a solar-powered restaurant or scientists on a space mission using only solar energy to cook.
By incorporating these activities, kids will not only learn about solar energy and sustainability but also develop their creativity and problem-solving skills.
Remember to supervise the children, especially when handling the solar oven, as it can get quite hot. Have fun and enjoy the power of the sun!
Afterthoughts and Tweaks
Reflecting on my solar oven, I’d consider a few adjustments for next time. A tighter seal around the box’s edges might retain more heat. Also, finding a way to adjust the reflective flap more easily as the sun moves across the sky could maintain optimal cooking temperatures.
Making this solar oven was a delightful project that blended environmental science, crafting, and outdoor fun. Whether you’re a parent looking for a hands-on educational science project for kids or a DIY enthusiast eager to explore renewable energy, making a solar oven is rewarding. With simple materials and easy steps, this project can teach children about renewable energy and the power of the sun. Let’s get building!

Frequently Asked Questions About DIY Solar Ovens
When embarking on the project of building a DIY solar oven, it’s natural to have questions. Here are some of the most common inquiries people have, answered in a straightforward and easy-to-understand manner.
Q1: What materials do I need to build a DIY solar oven? To build a DIY solar oven, you’ll need cardboard boxes, aluminum foil, clear plastic wrap or a glass pane, black paint, and insulation materials like newspaper or wool. These items help trap and concentrate the sun’s rays to cook food.
Q2: How does a solar oven work? A solar oven works by converting sunlight into heat energy. The interior of the oven is painted black to absorb the sun’s rays, while the reflective surfaces like aluminum foil direct more sunlight into the box. The clear cover allows sunlight to enter while trapping the heat inside, cooking the food.
Q3: Can I use a solar oven even if it’s not very sunny? Yes, solar ovens can still function on partly cloudy days, but the cooking time will be longer. For best results, use your solar oven when the sun is strong, typically between 10 AM and 4 PM.
Q4: What can I cook in a solar oven? You can cook a variety of foods in a solar oven, including bread, cookies, pizza, vegetables, and meats. It’s great for slow-cooked dishes like stews and soups. Just remember that cooking times are longer than conventional ovens.
Q5: Is it safe to cook with a solar oven? Yes, cooking with a solar oven is safe as long as you follow basic safety guidelines. Use oven mitts to handle hot cookware, and ensure the oven is stable to prevent accidents. Keep in mind that while the oven exterior is safe to touch, the interior and cookware will be hot.
Remember, building and using a solar oven is not only a fun and educational experience but also a step towards sustainable living. Enjoy your solar cooking adventures!
